Managing Subnets
This page describes how to create a network and add a subnet in Pathfinder.
You can create your subnet and scan for IP addresses in your network to automatically get the host name and other information.
You can then assign these IP addresses from your subnet to components in Pathfinder.
New Network
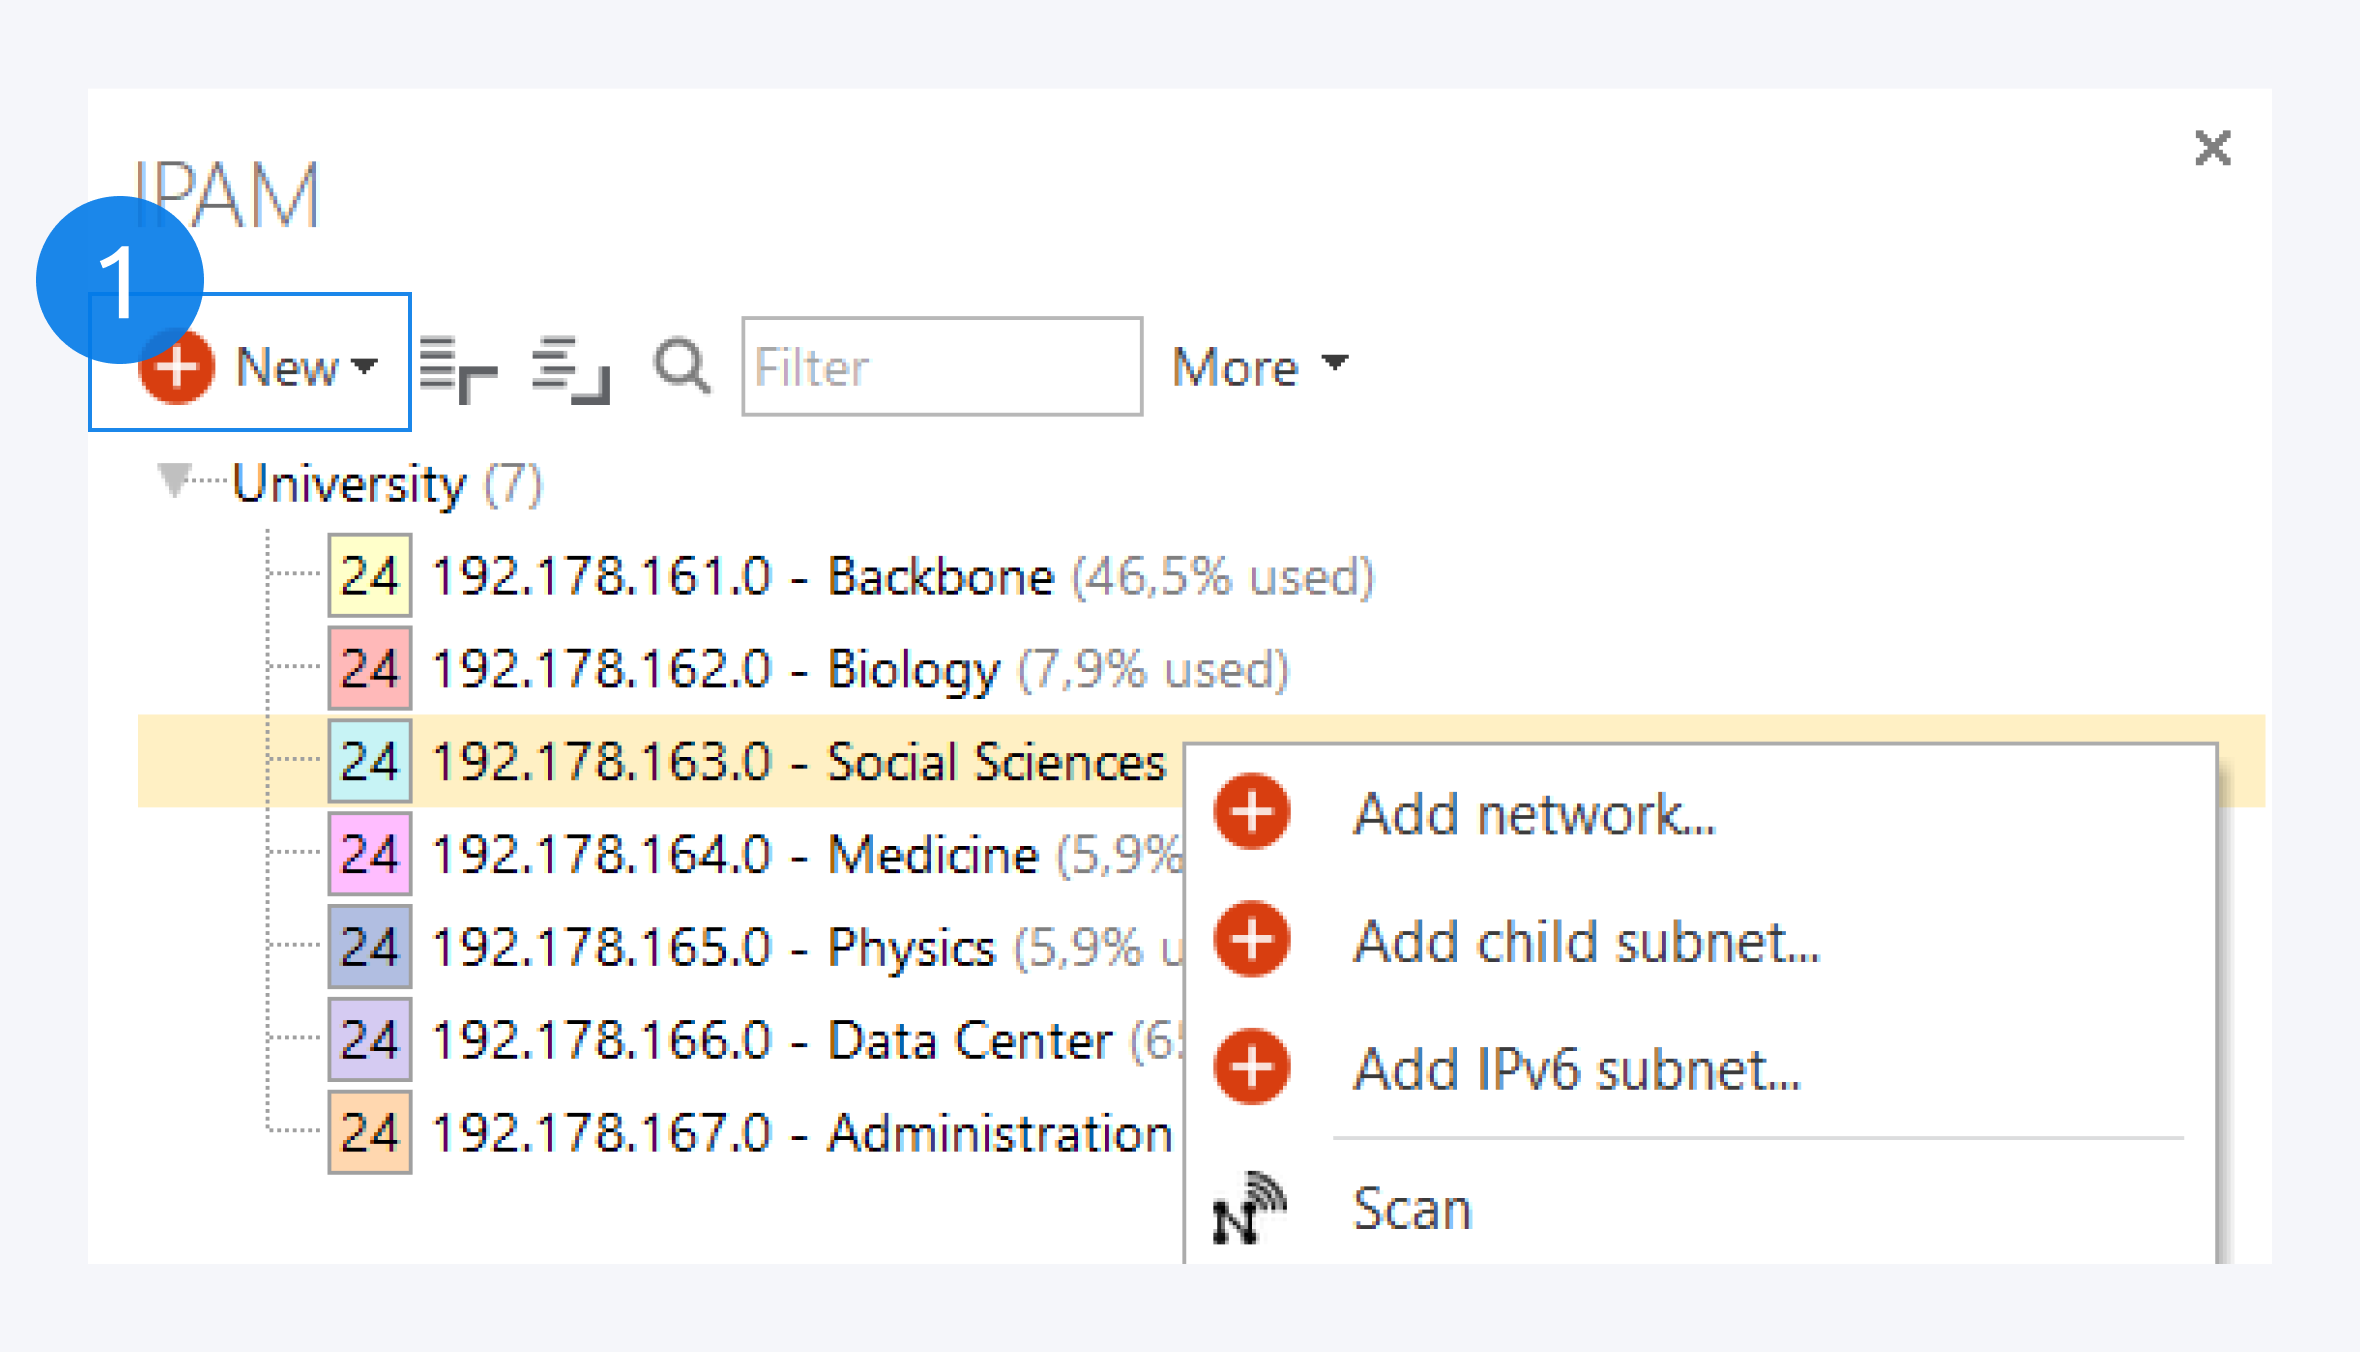
Click on New (1) to add a new group or network or open the context menu and click on add network. Assign a name, description and comment to your network and click on OK to finish.
Right click on your network and select Add IPv4 subnet.
Add Subnet
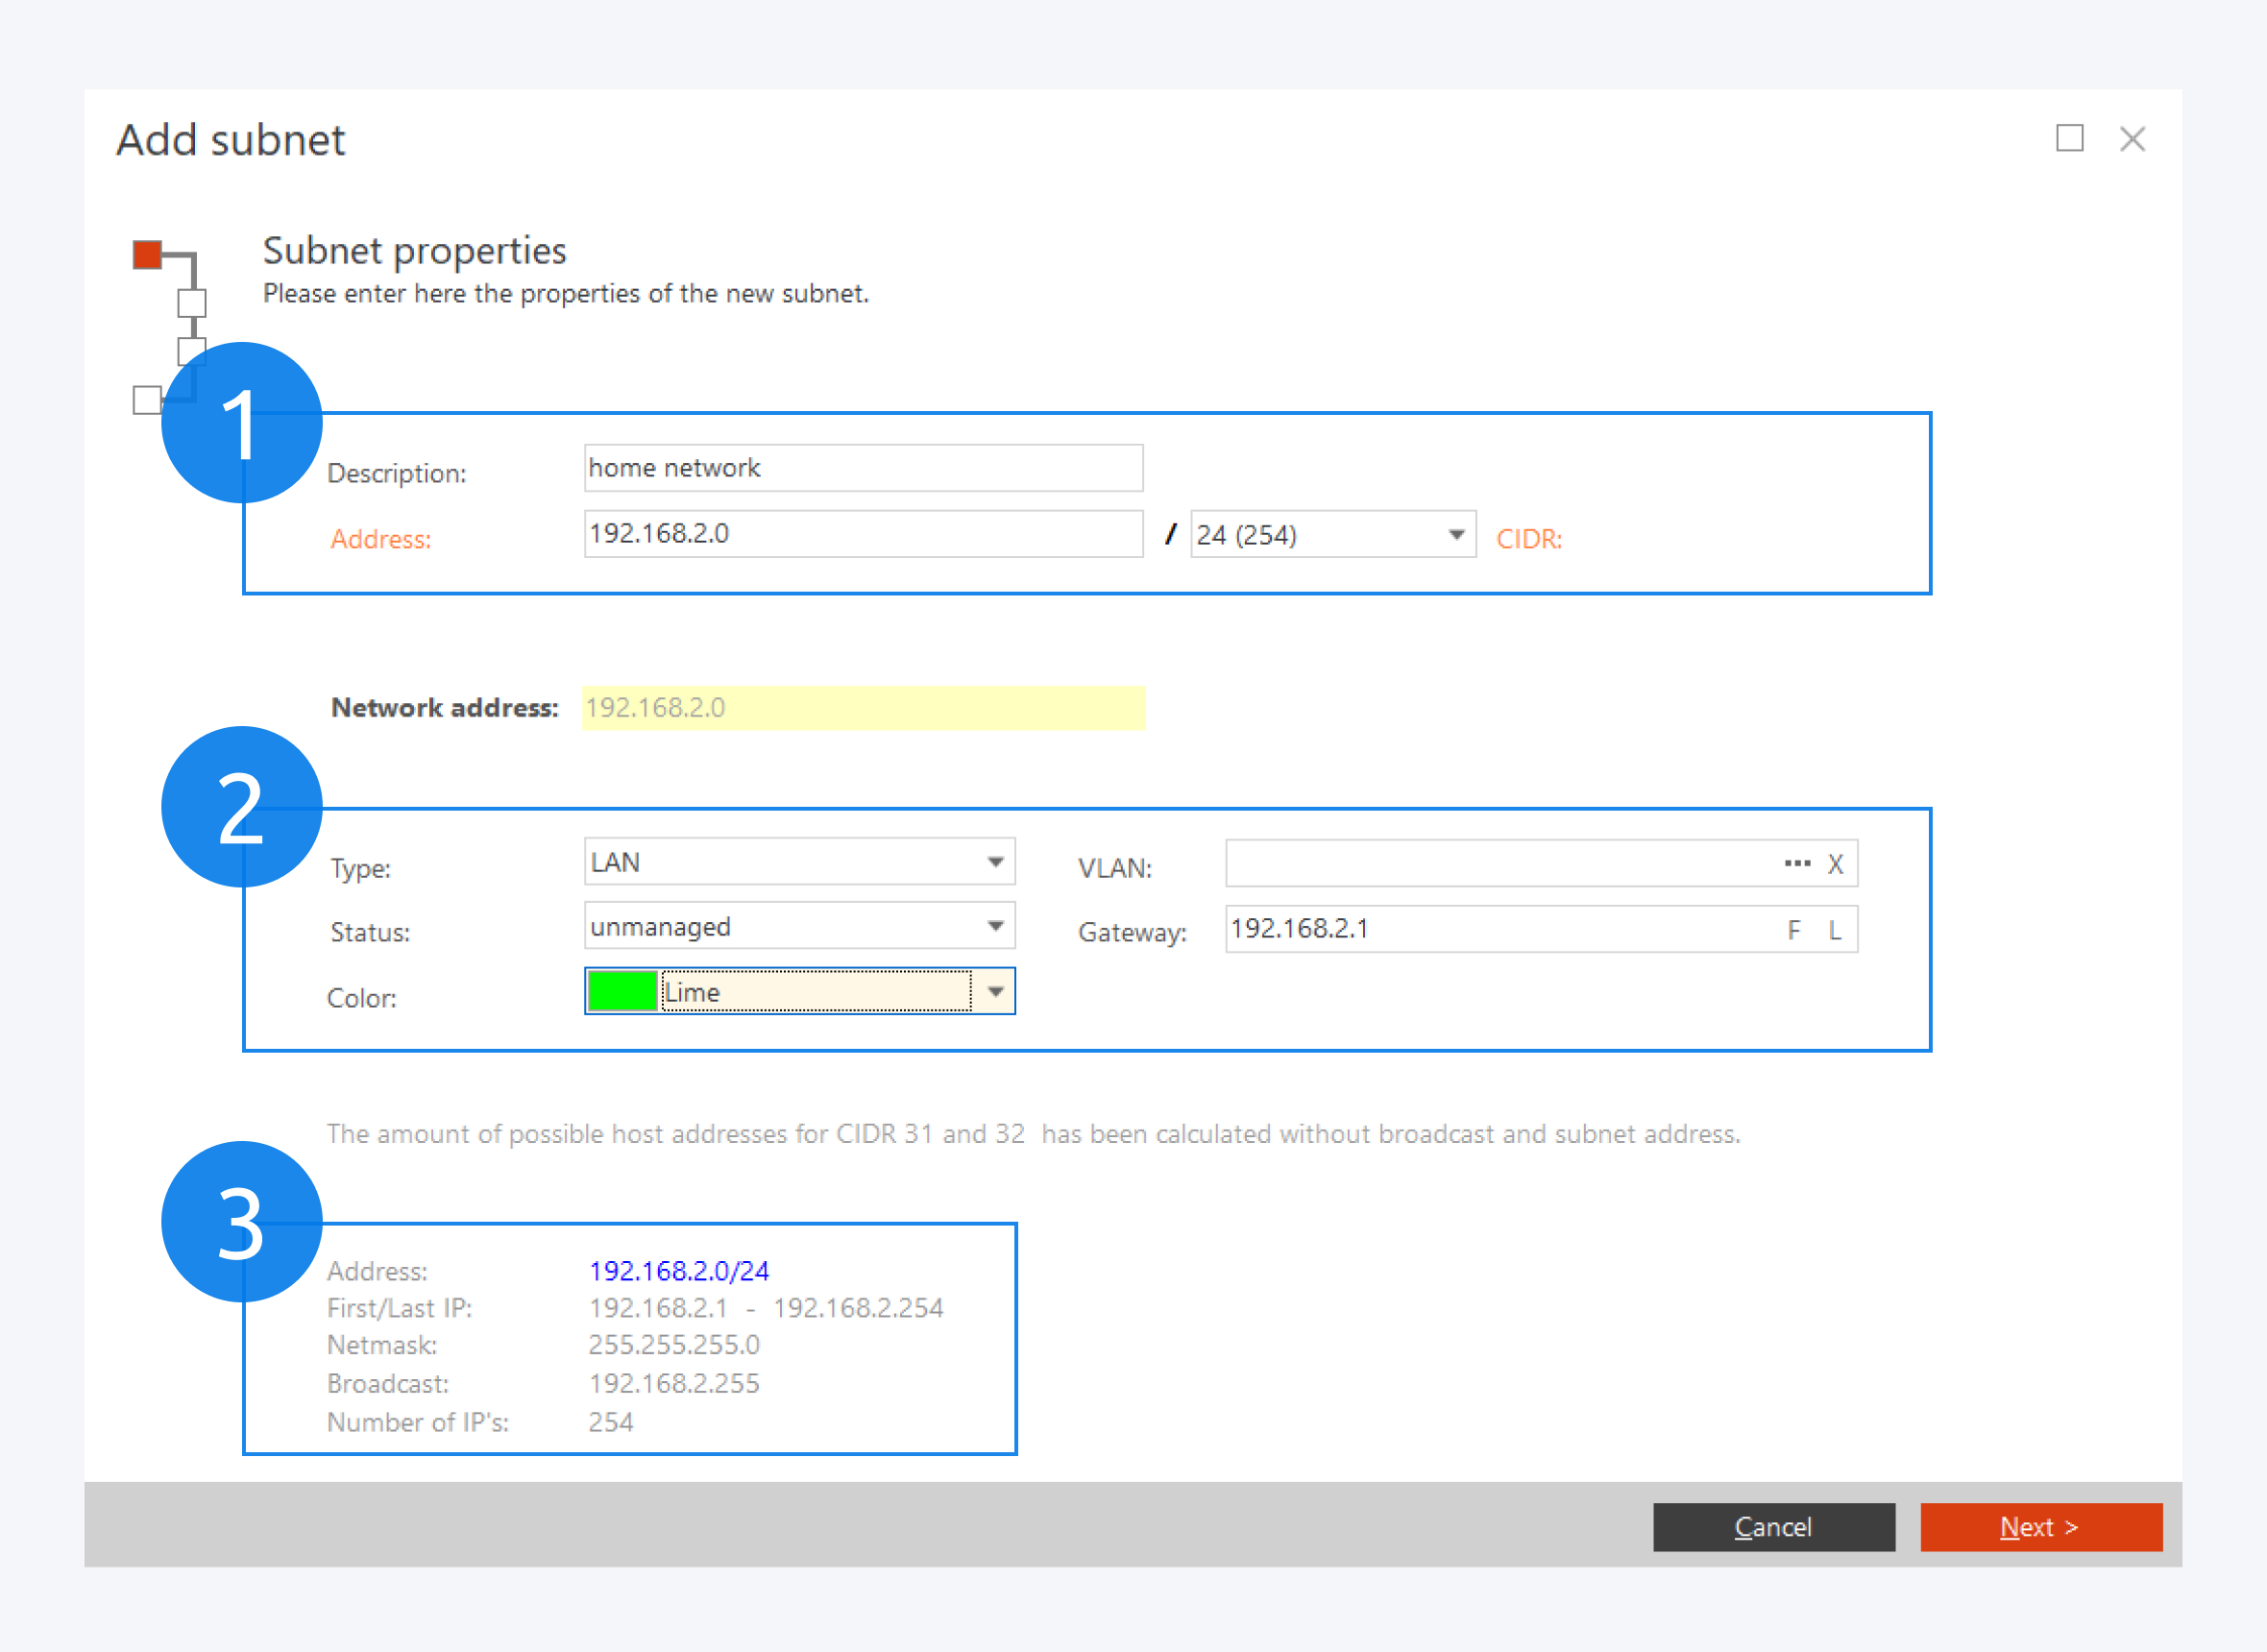
In the Add subnet dialog window, first assign the subnet description, network address and the subnet mask (1).
In this section (2) you can assign the subnet type, status of the IP addresses, subnet color, VLAN tags and the gateway IP address.
An overview of your subnet will be shown here (3).
Click on Next to confirm and move to the next dialog window.
Add IP addresses
Defining the subnet
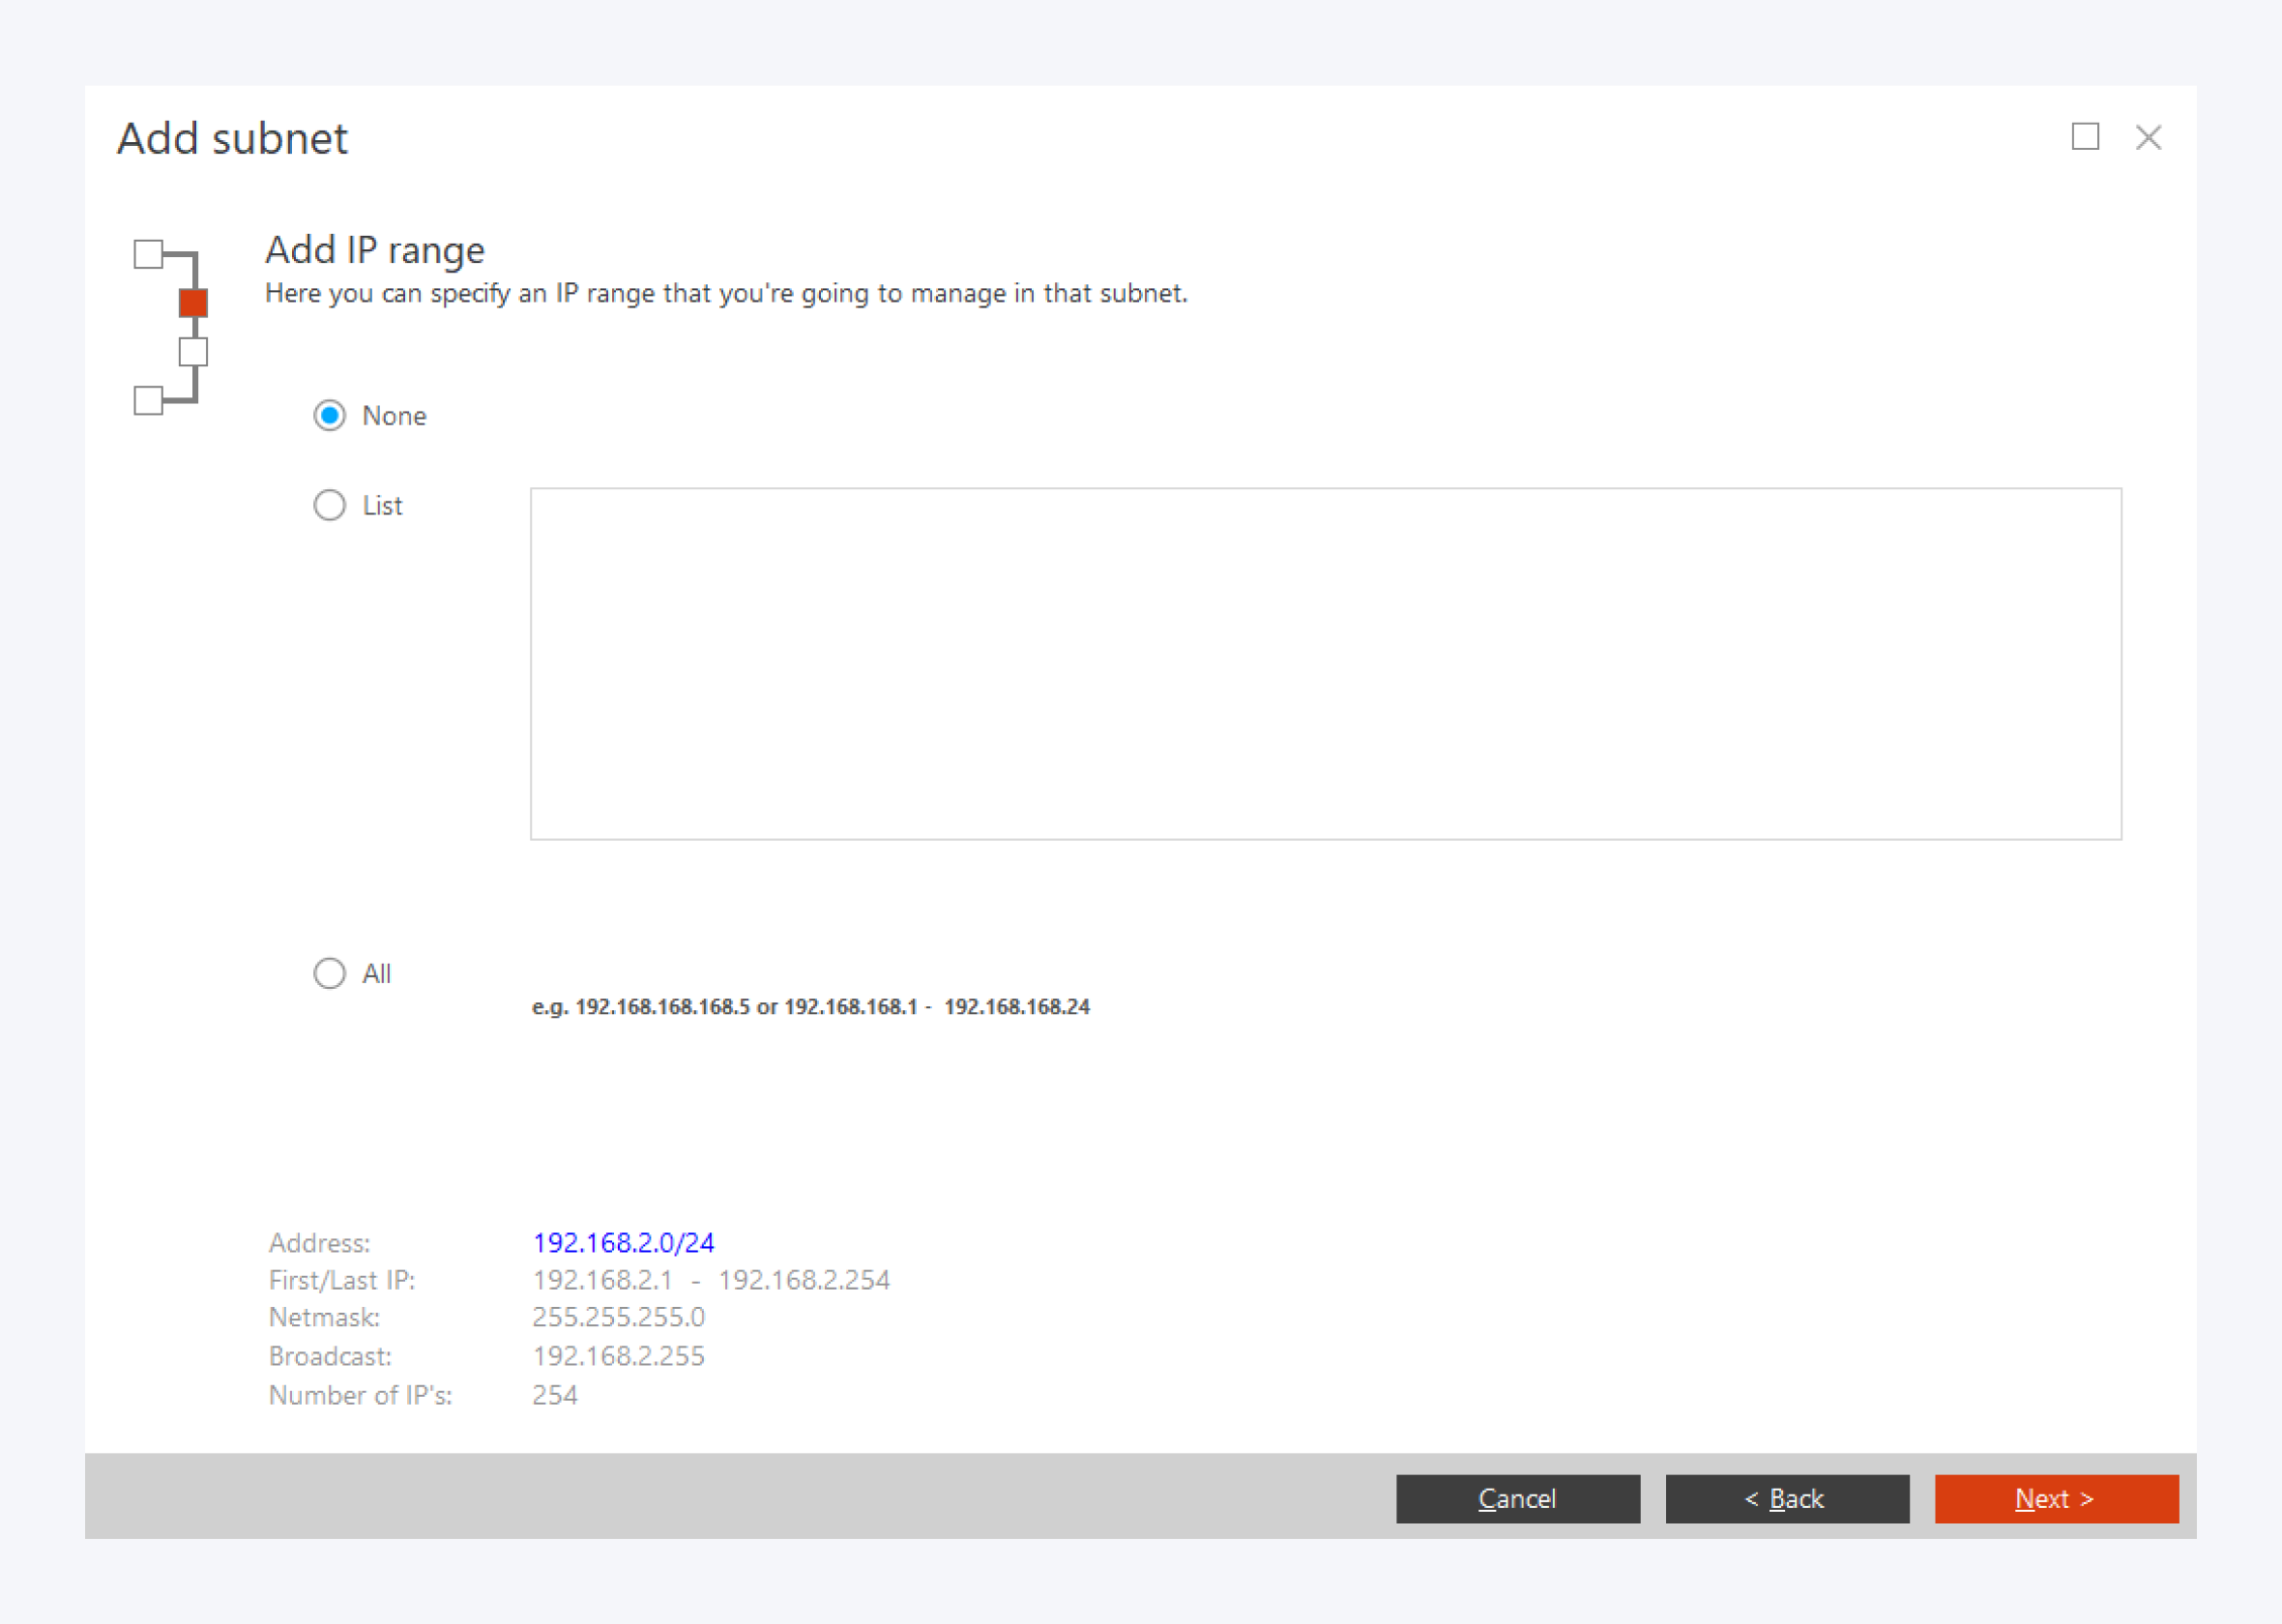
Here you can choose specific IP addresses from your subnet to manage.
To exclude all IP addresses from the subnet, click on None.
To include specific IP addresses from the subnet, click on List and write down the IP addresses.
To include all IP addresses from the subnet, click on All.
Scanning
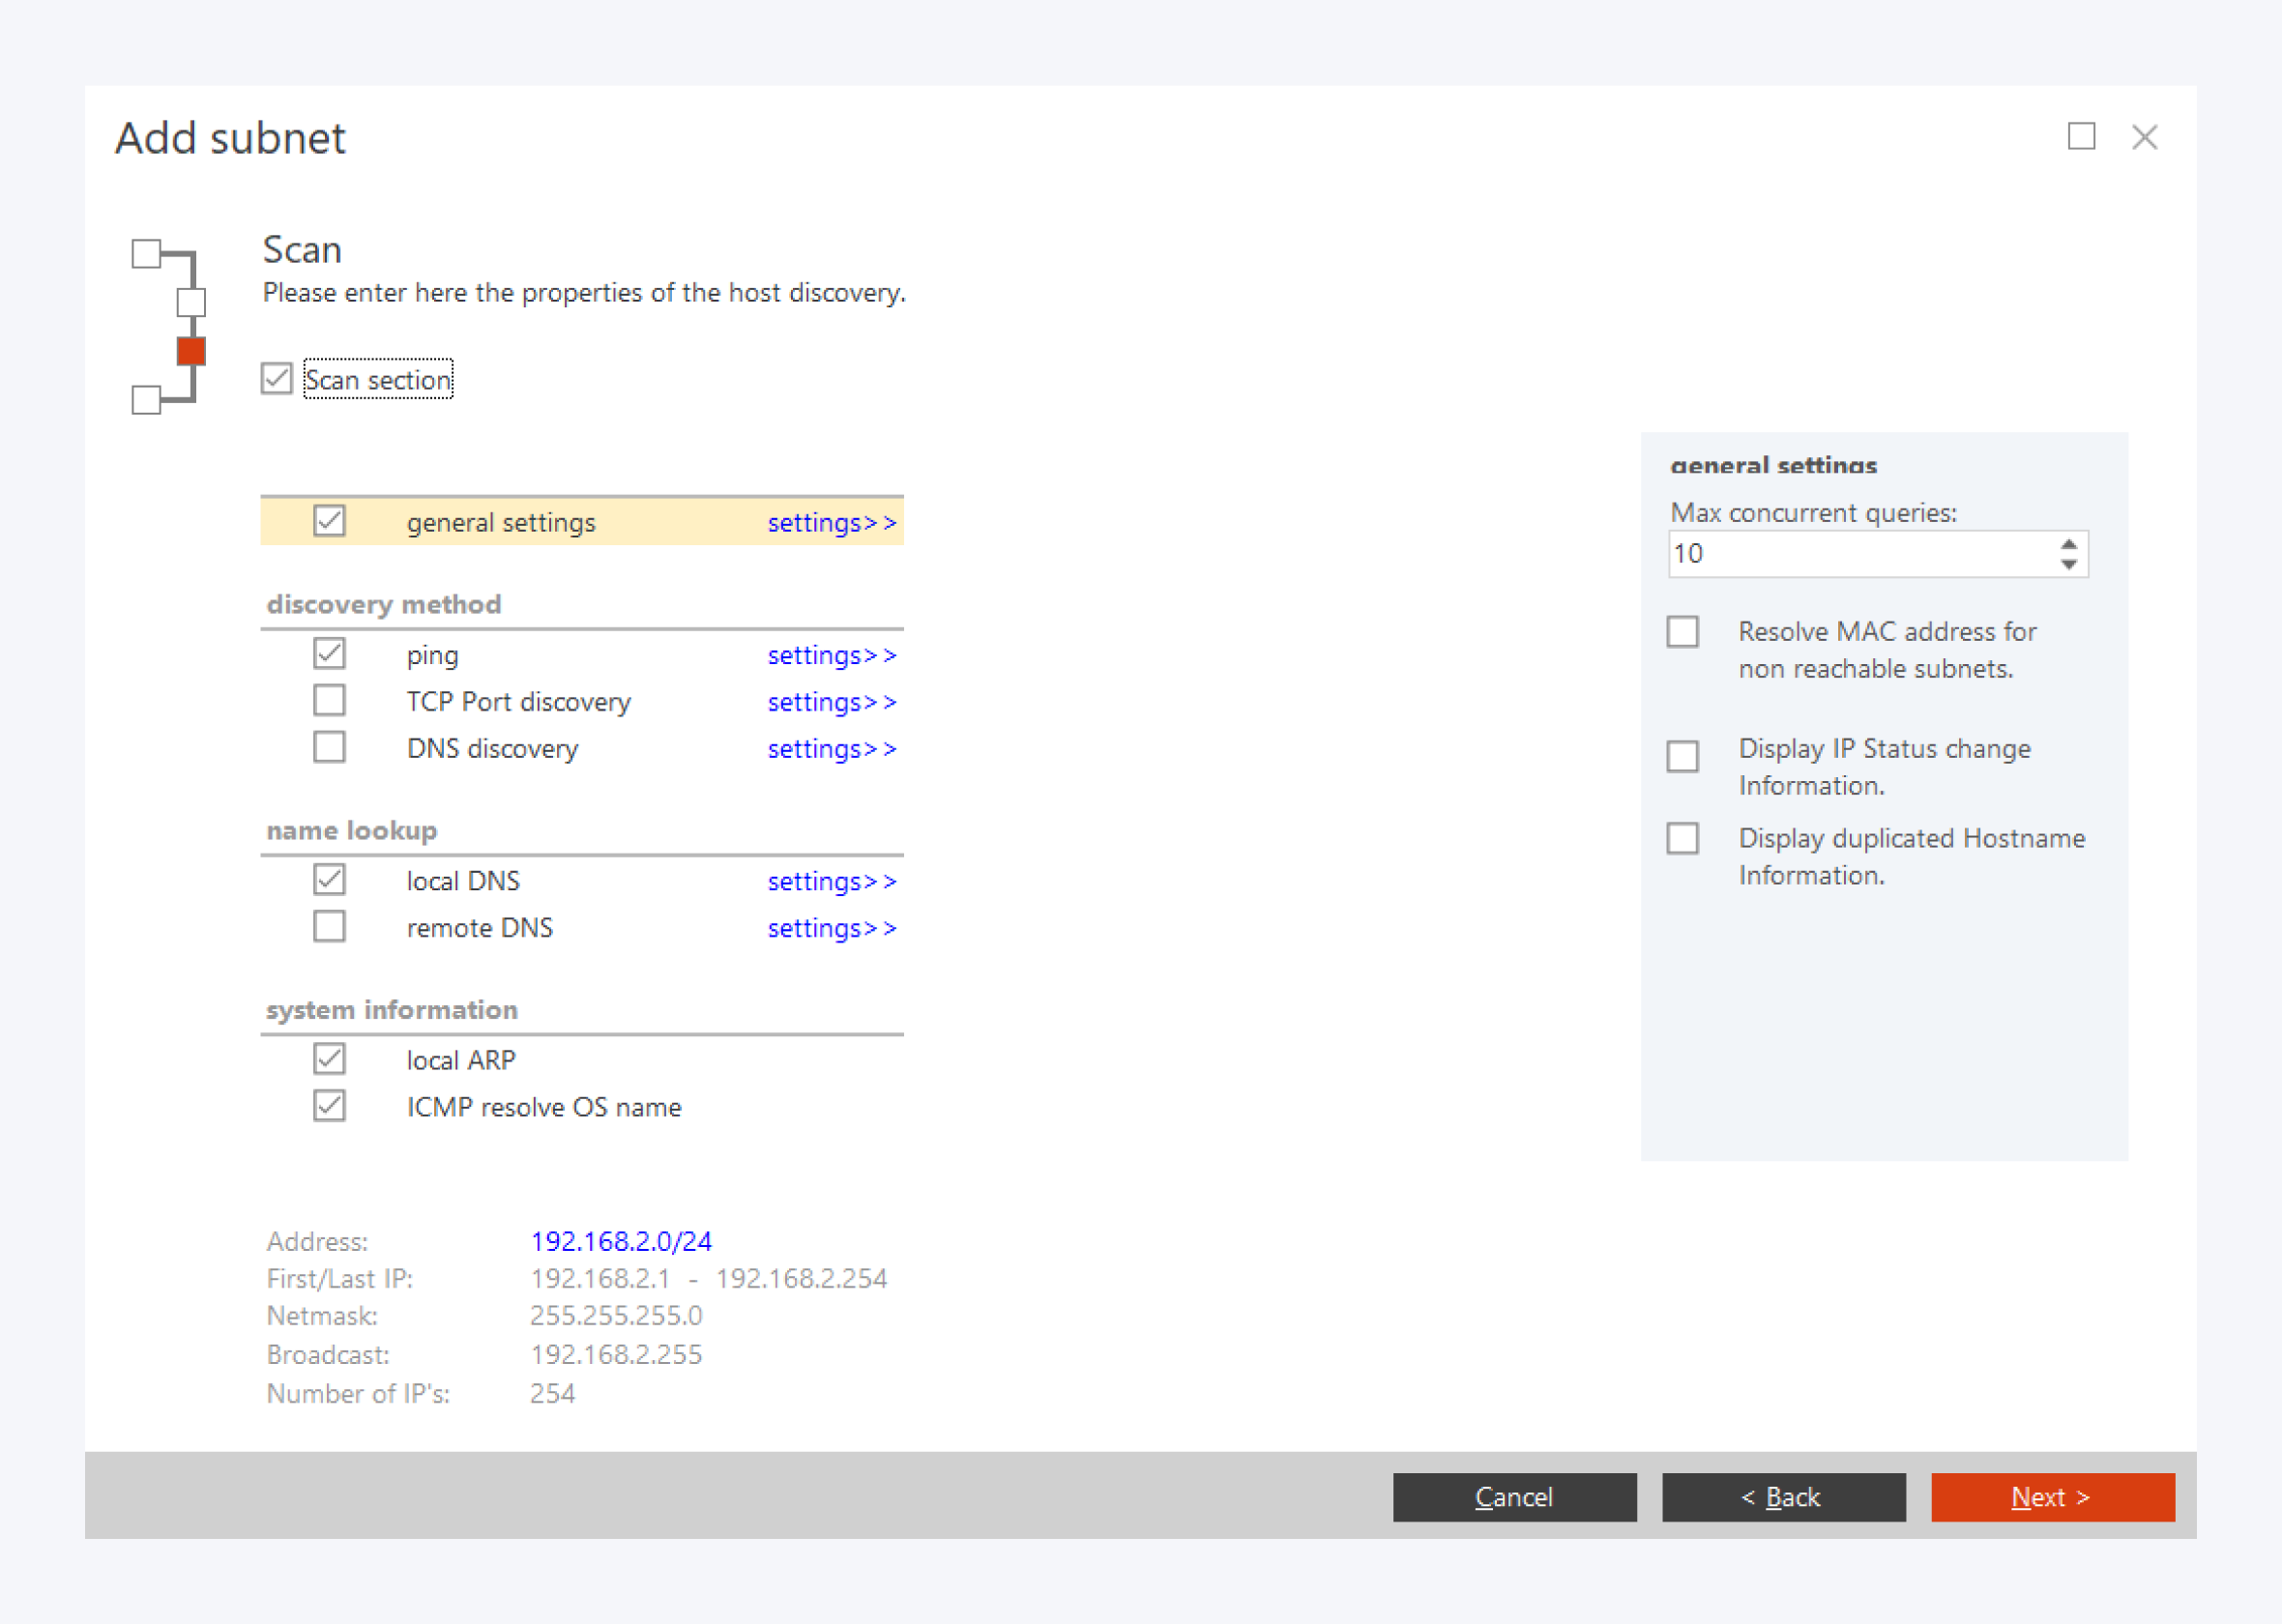
In the scan subnet window, you can select how to search your physical network. You must be in the same network as your components for Pathfinder to accurately identify them. Check the scan selection box to turn on subnet scanning.
In the general settings you can select the number of simultaneous scans, resolve MAC addresses to resolve and information to display.
You can search for components using the following methods:
Ping: You can set the time out in milliseconds, ICMP package size and the time to live (TTL).
TCP port discovery: You can set ports to search for and the time our in milliseconds.
DNS discovery: You can set the DNS server IP address and the ping time out in milliseconds.
You can perform local and remote DNS name lookups as well as some information about the system such as the operating system name.
When you have completed your scan settings, click on Next to start the scan.
IP Subnet Scan
Select IP addresses
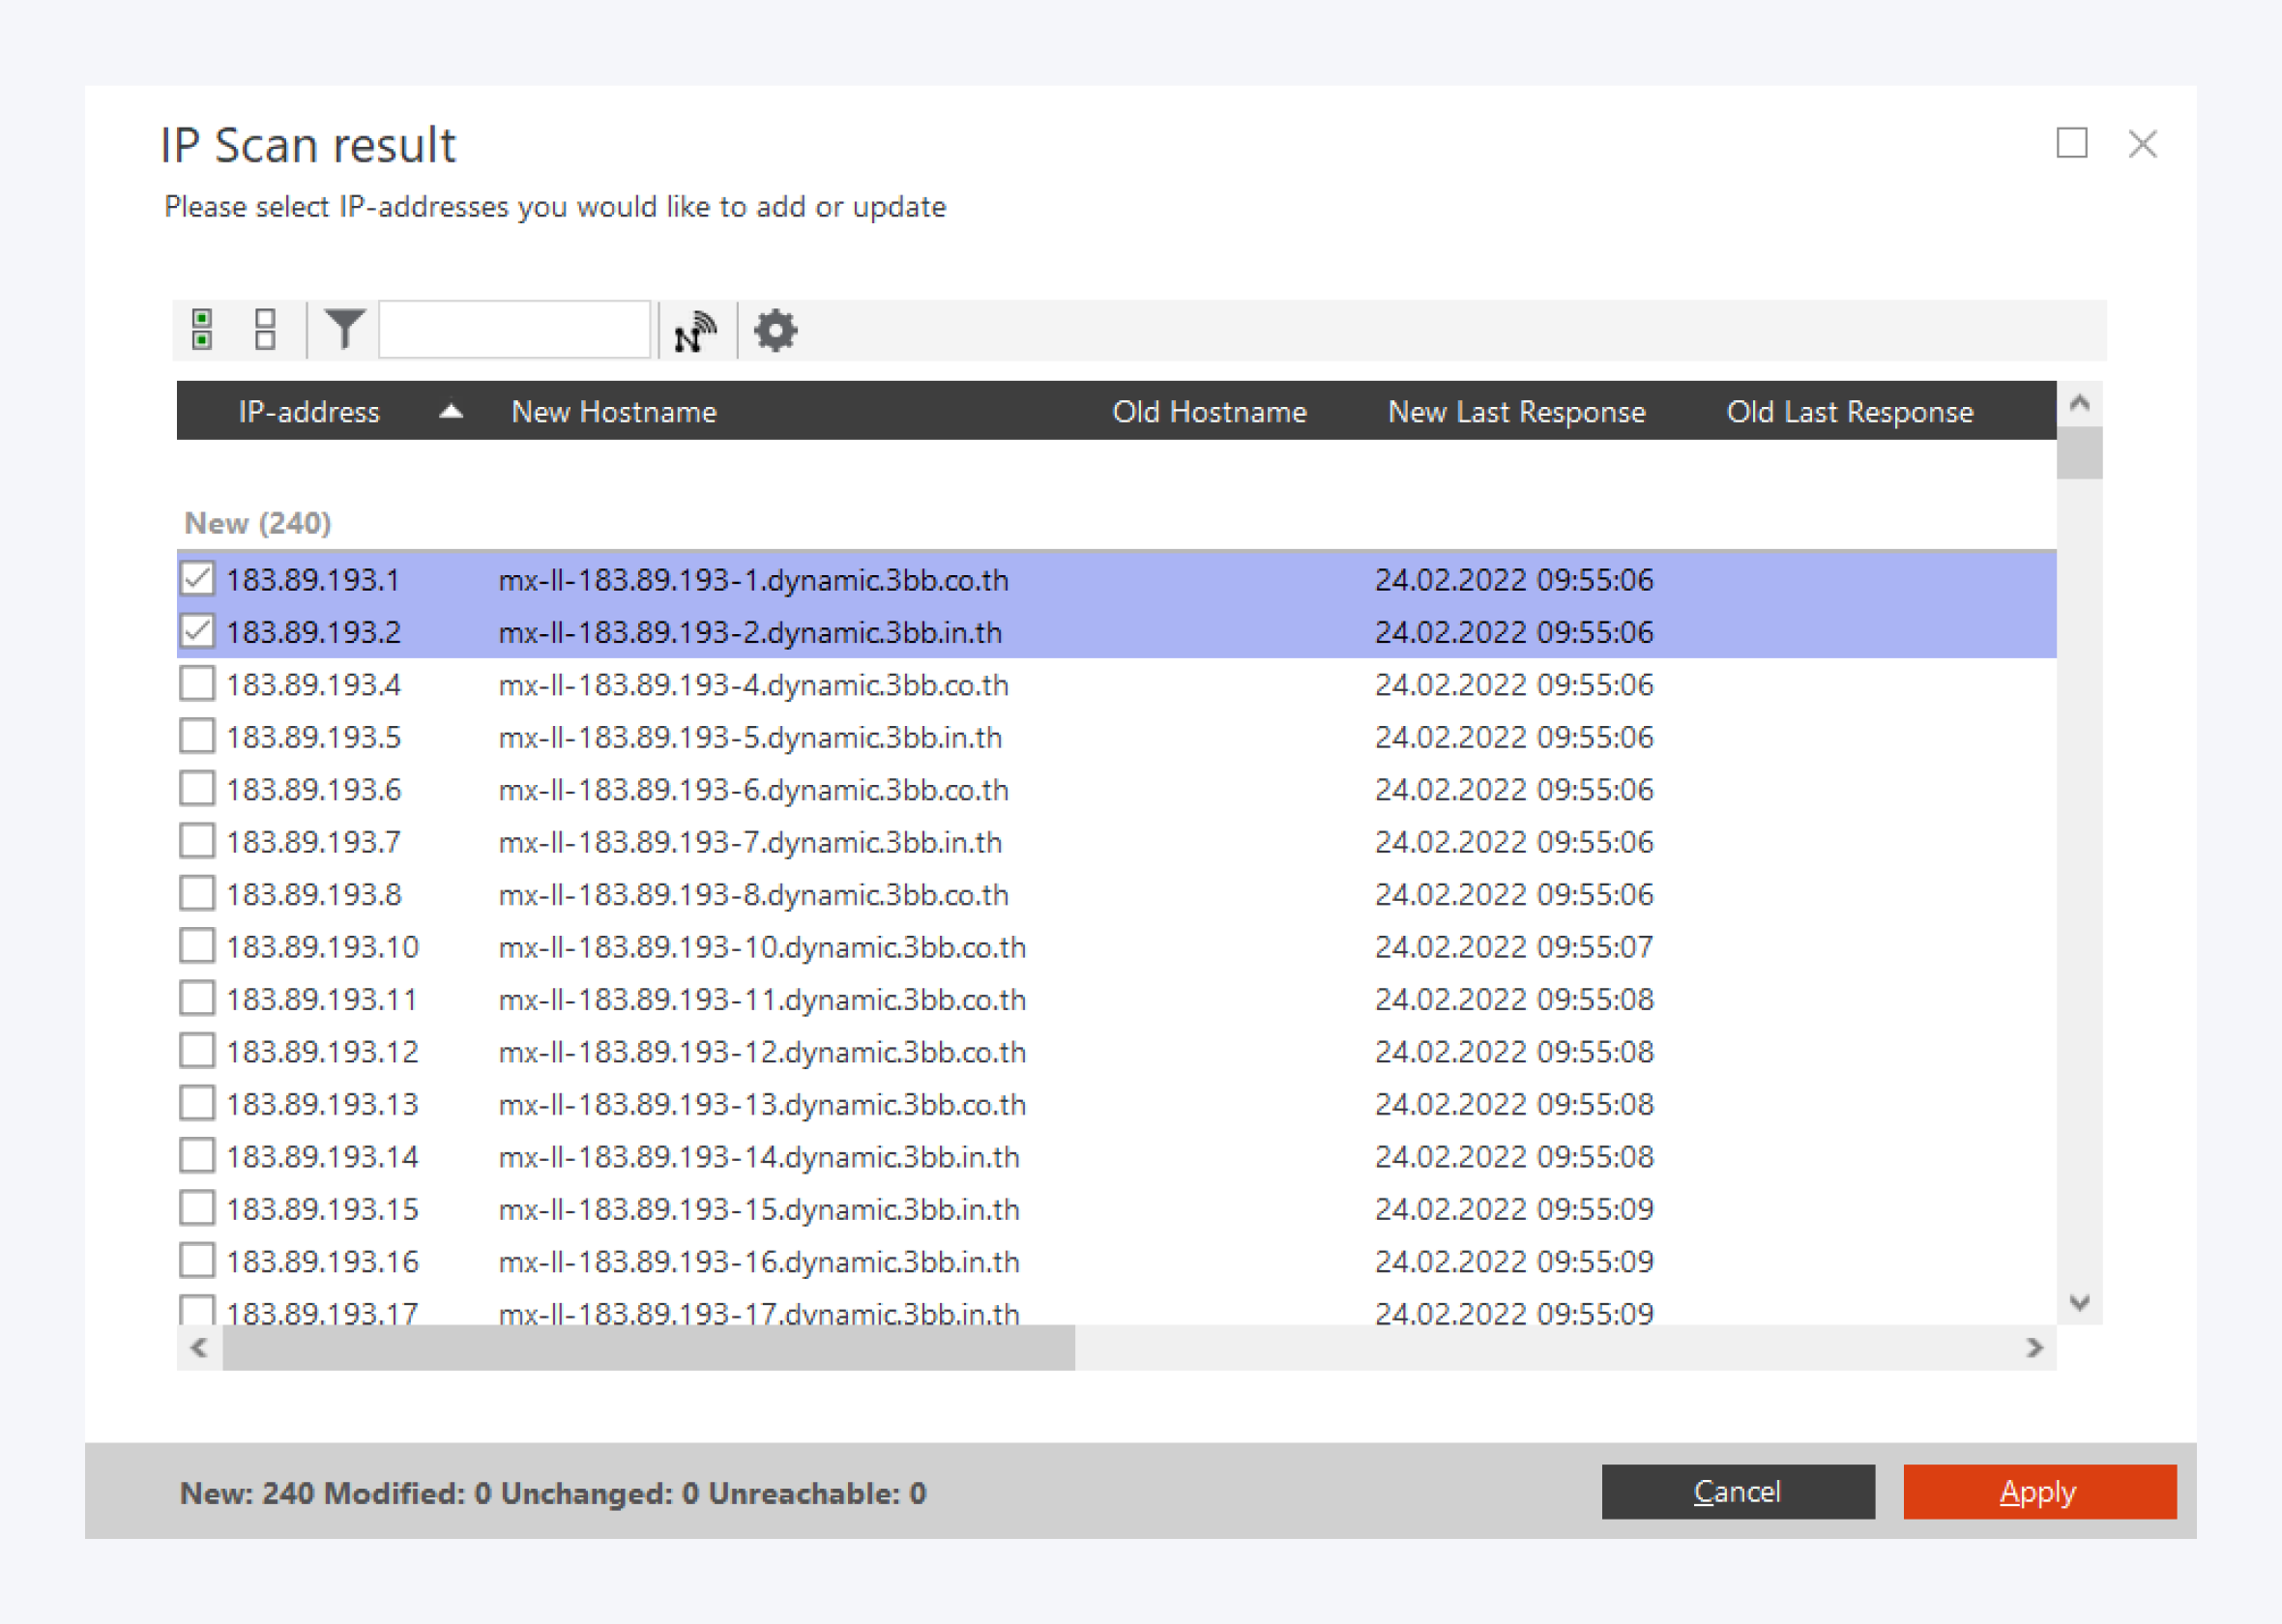
The subnet IP scan will display the results of reachable IP addresses with their MAC addresses and the list of unreachable addresses. Select the IP addresses you want to update and click on apply.
You can add IPv6 addresses in a similar way.
Final summary
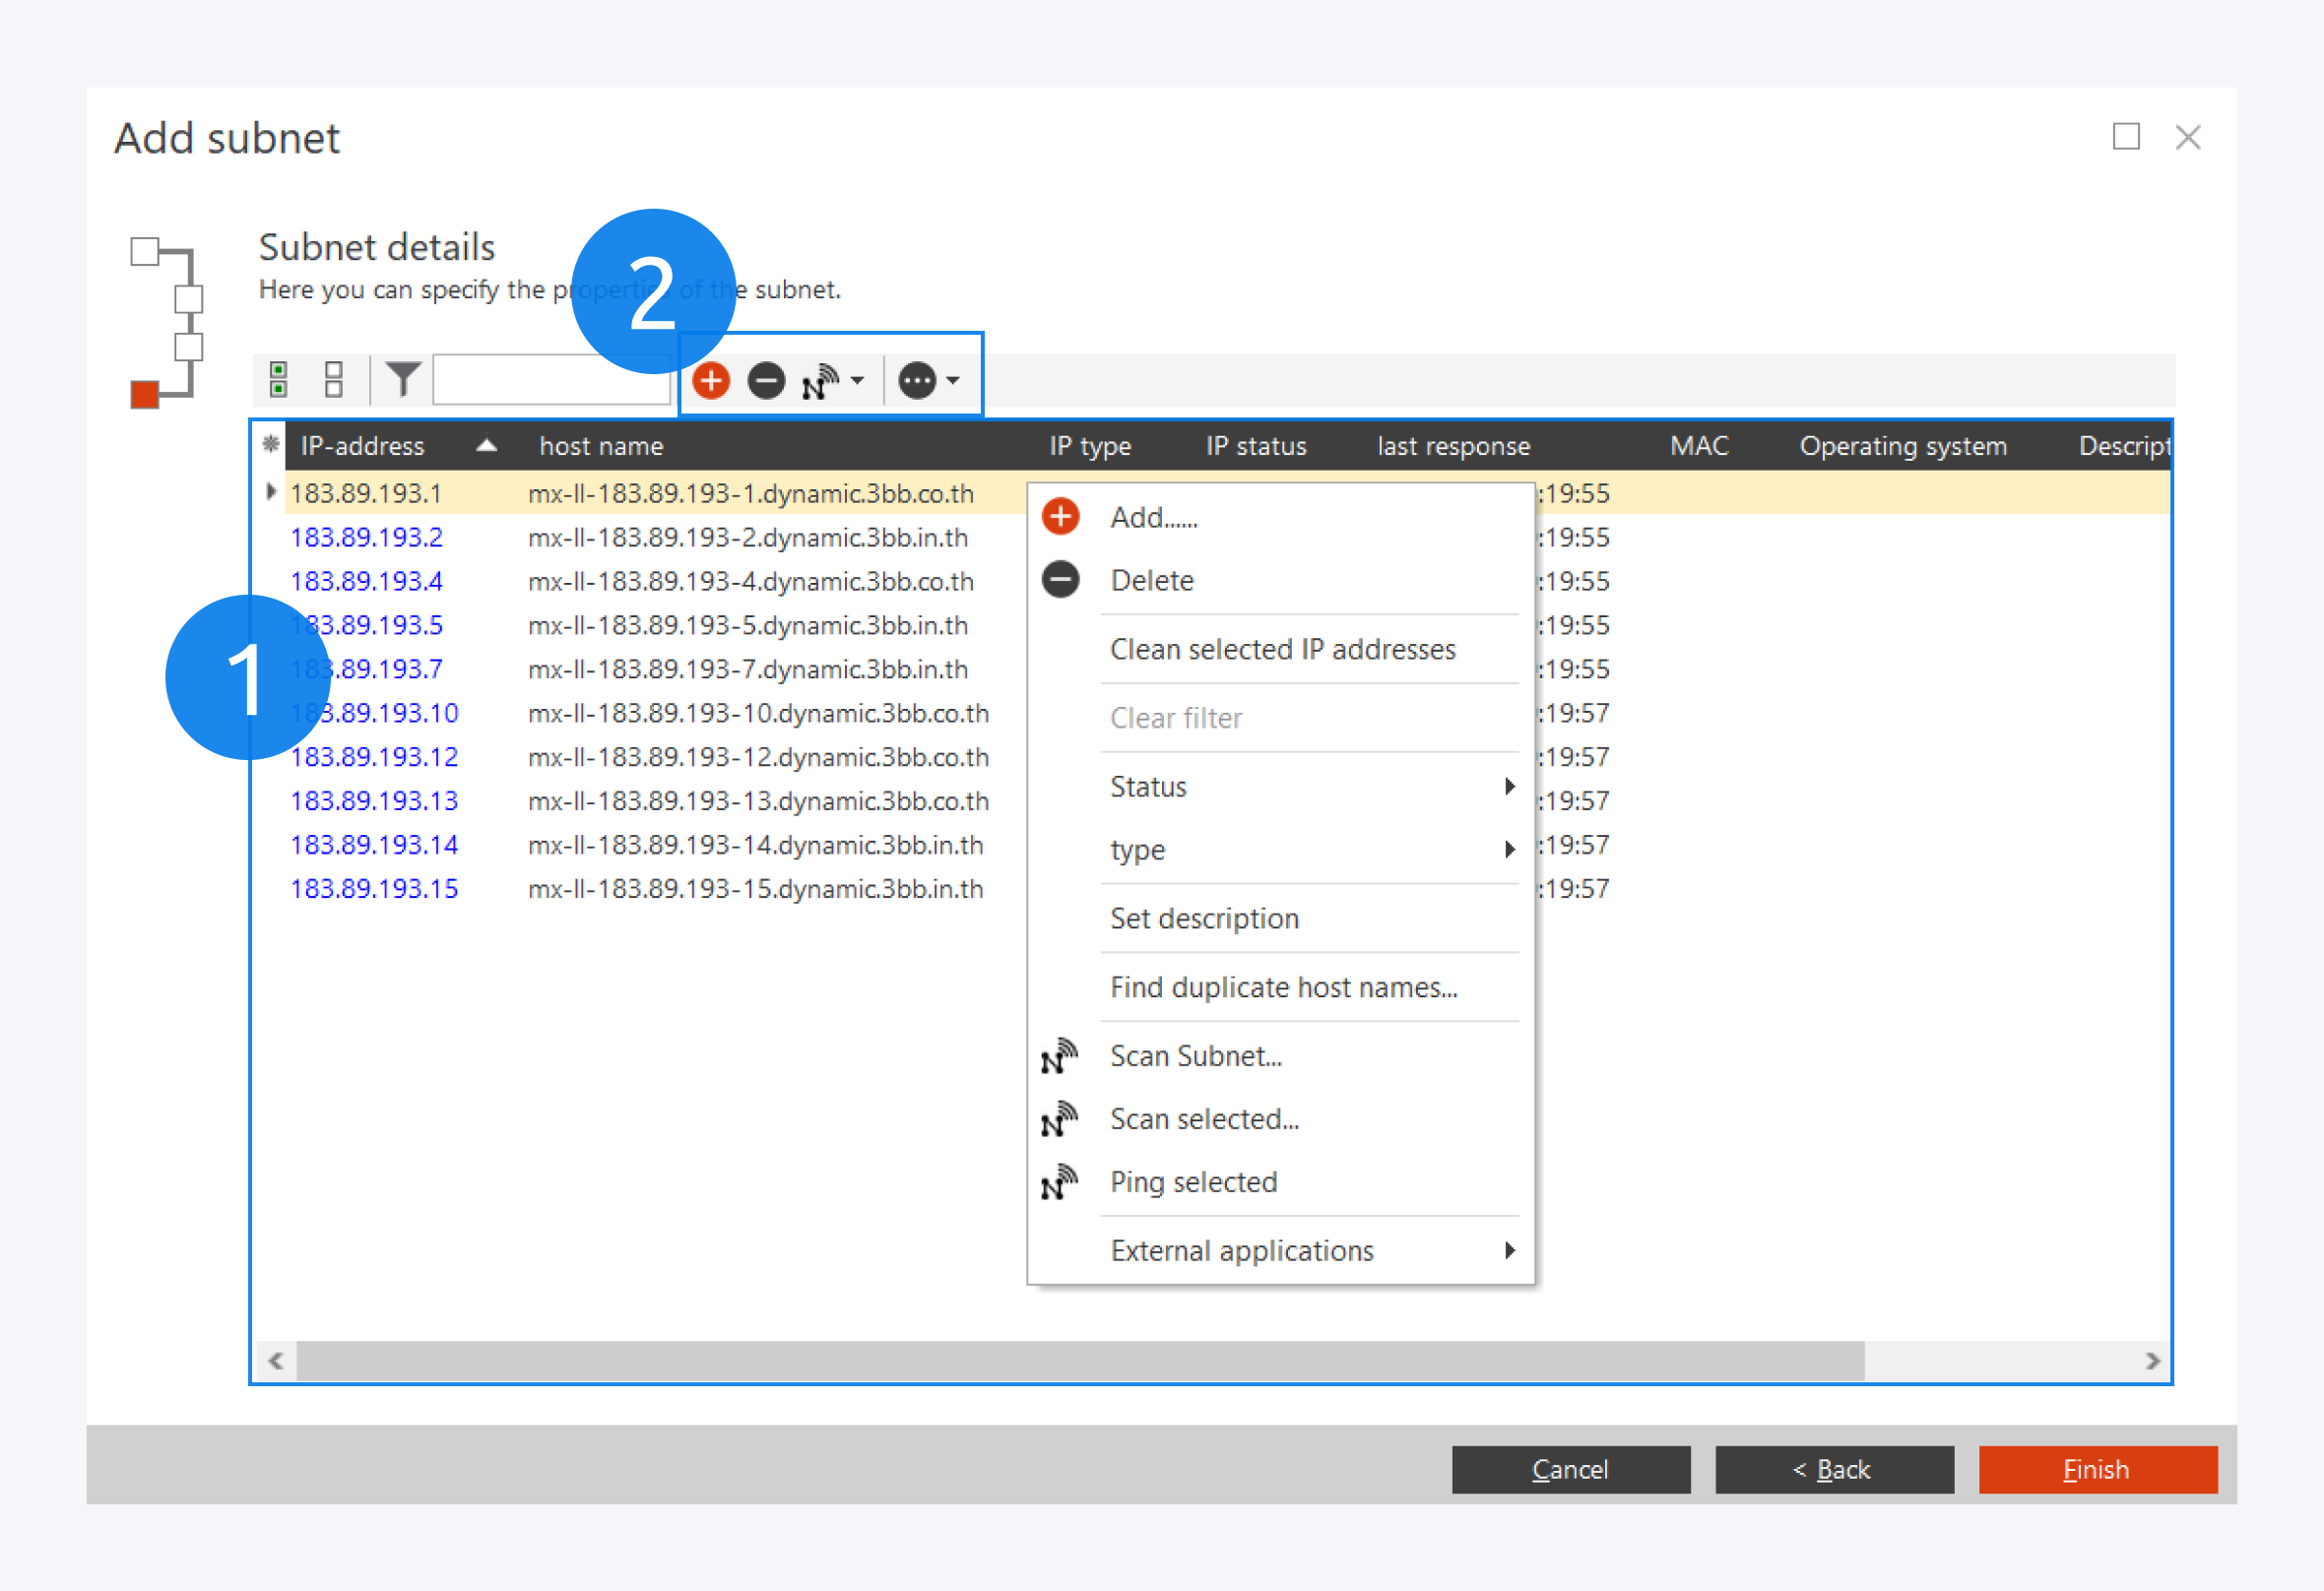
You can select one or multiple IP address here (1).
You can add and delete IP addresses (2), you can rescan your subnet, you can manage duplicate hostnames as well as set IP status and type and more.
Click on Finish to complete your subnet.
Now you can assign these IP addresses to components.
Learn more about the Subnet Properties
Split Subnets
Once you have create a subnet, You can split them into smaller subnets.
Select the split subnet option from the subnet context menu.
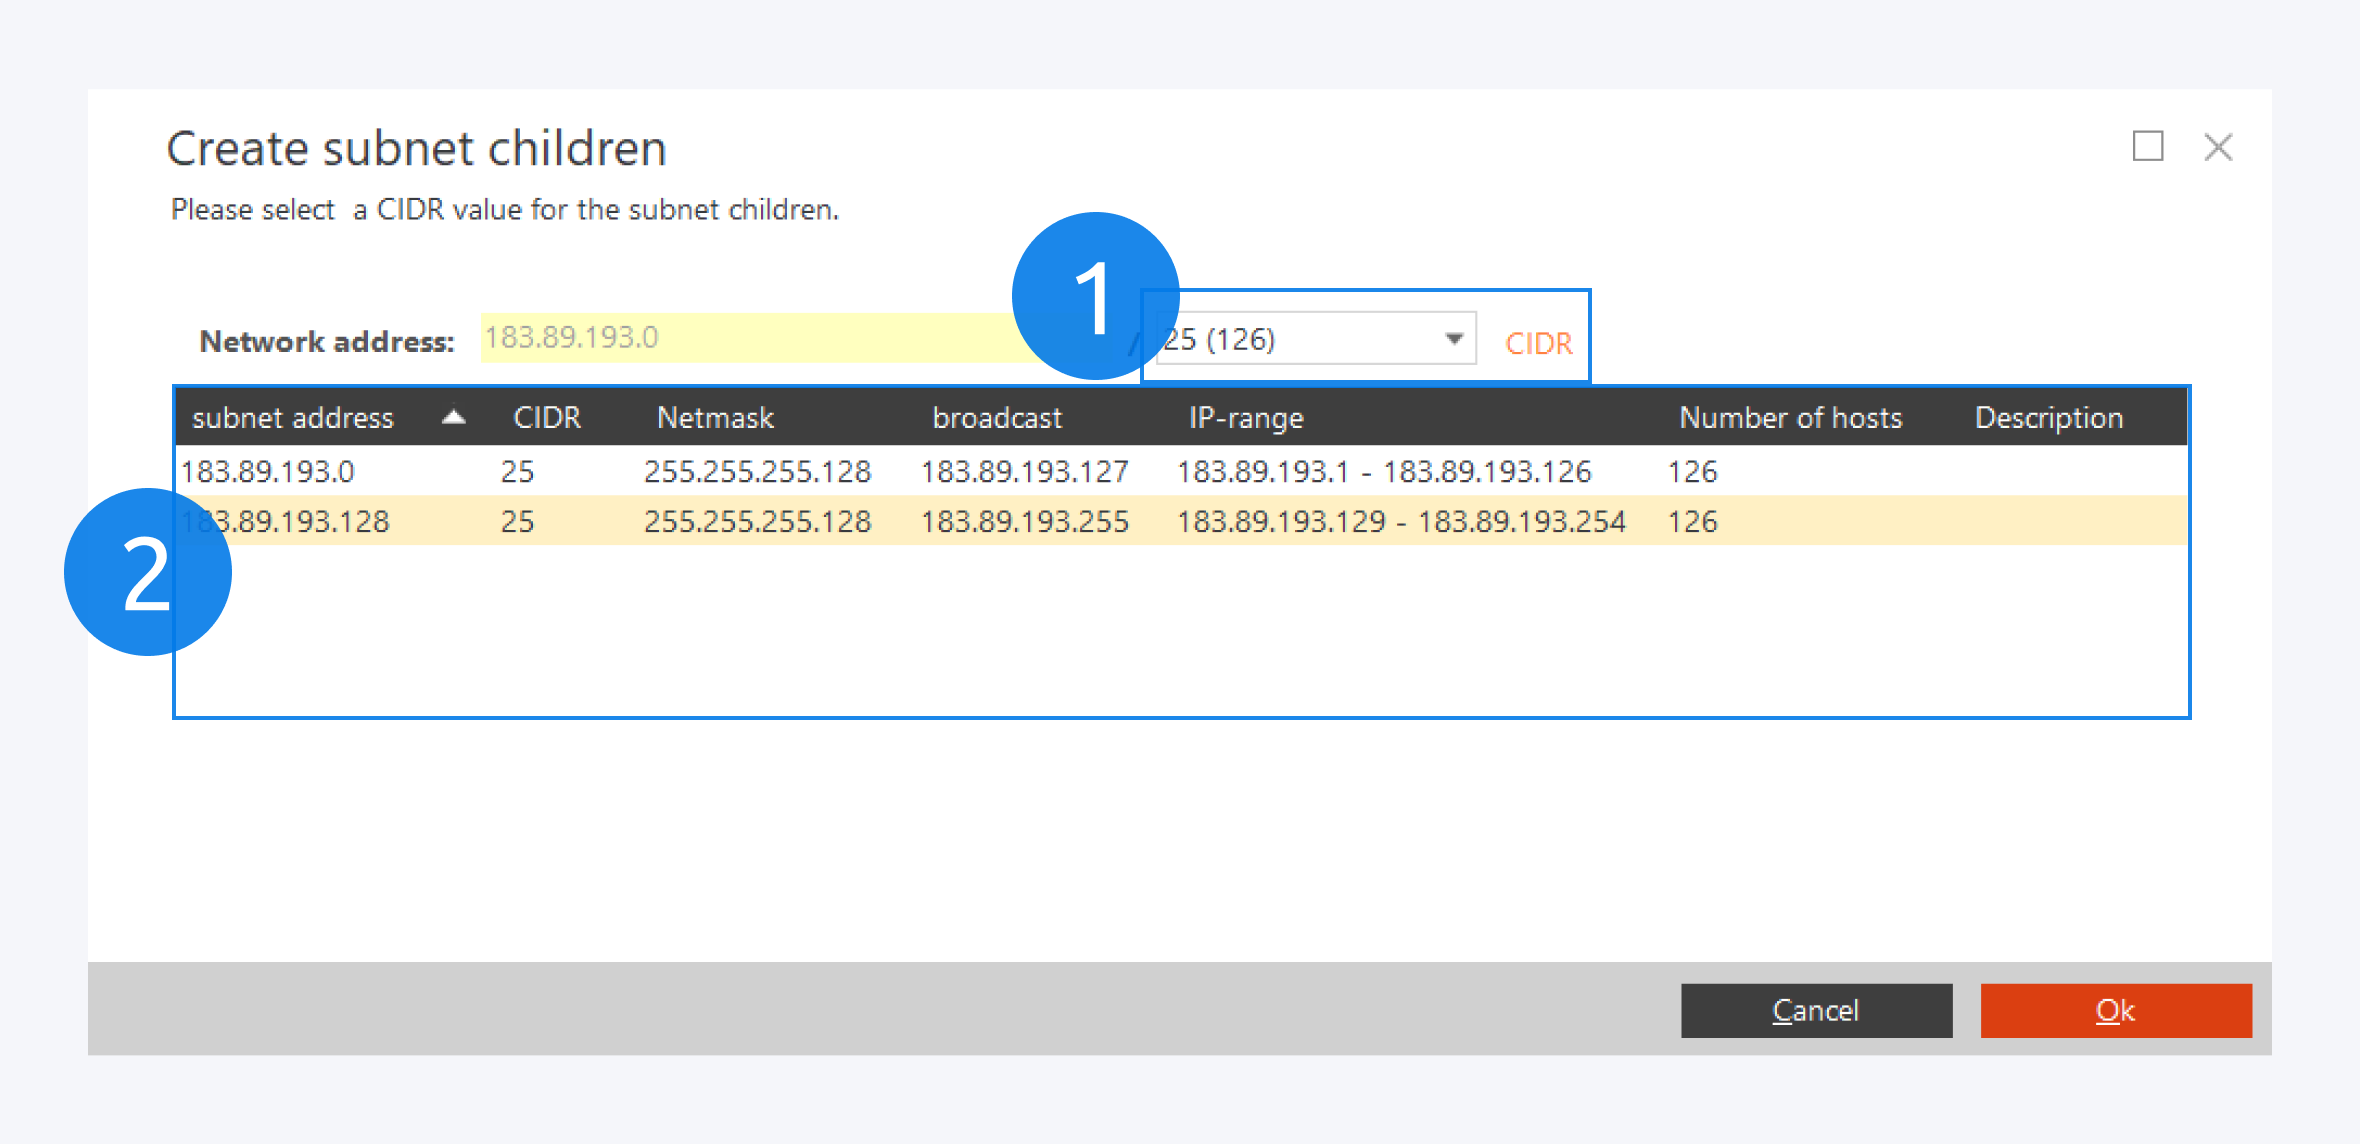
Select the CIDR subnet mask here (1).
Your new subnets will be displayed here (2).
Click on OK to finish splitting your subnet.