SNMP Configuration
This pages describes how to configure the SNMP settings in Pathfinder.
Right click on a component instance to open the context menu. Select SNMP and click on settings.
You can configure a component instance for SNMP to monitor information about components in your physical network in Pathfinder.
SNMP Settings
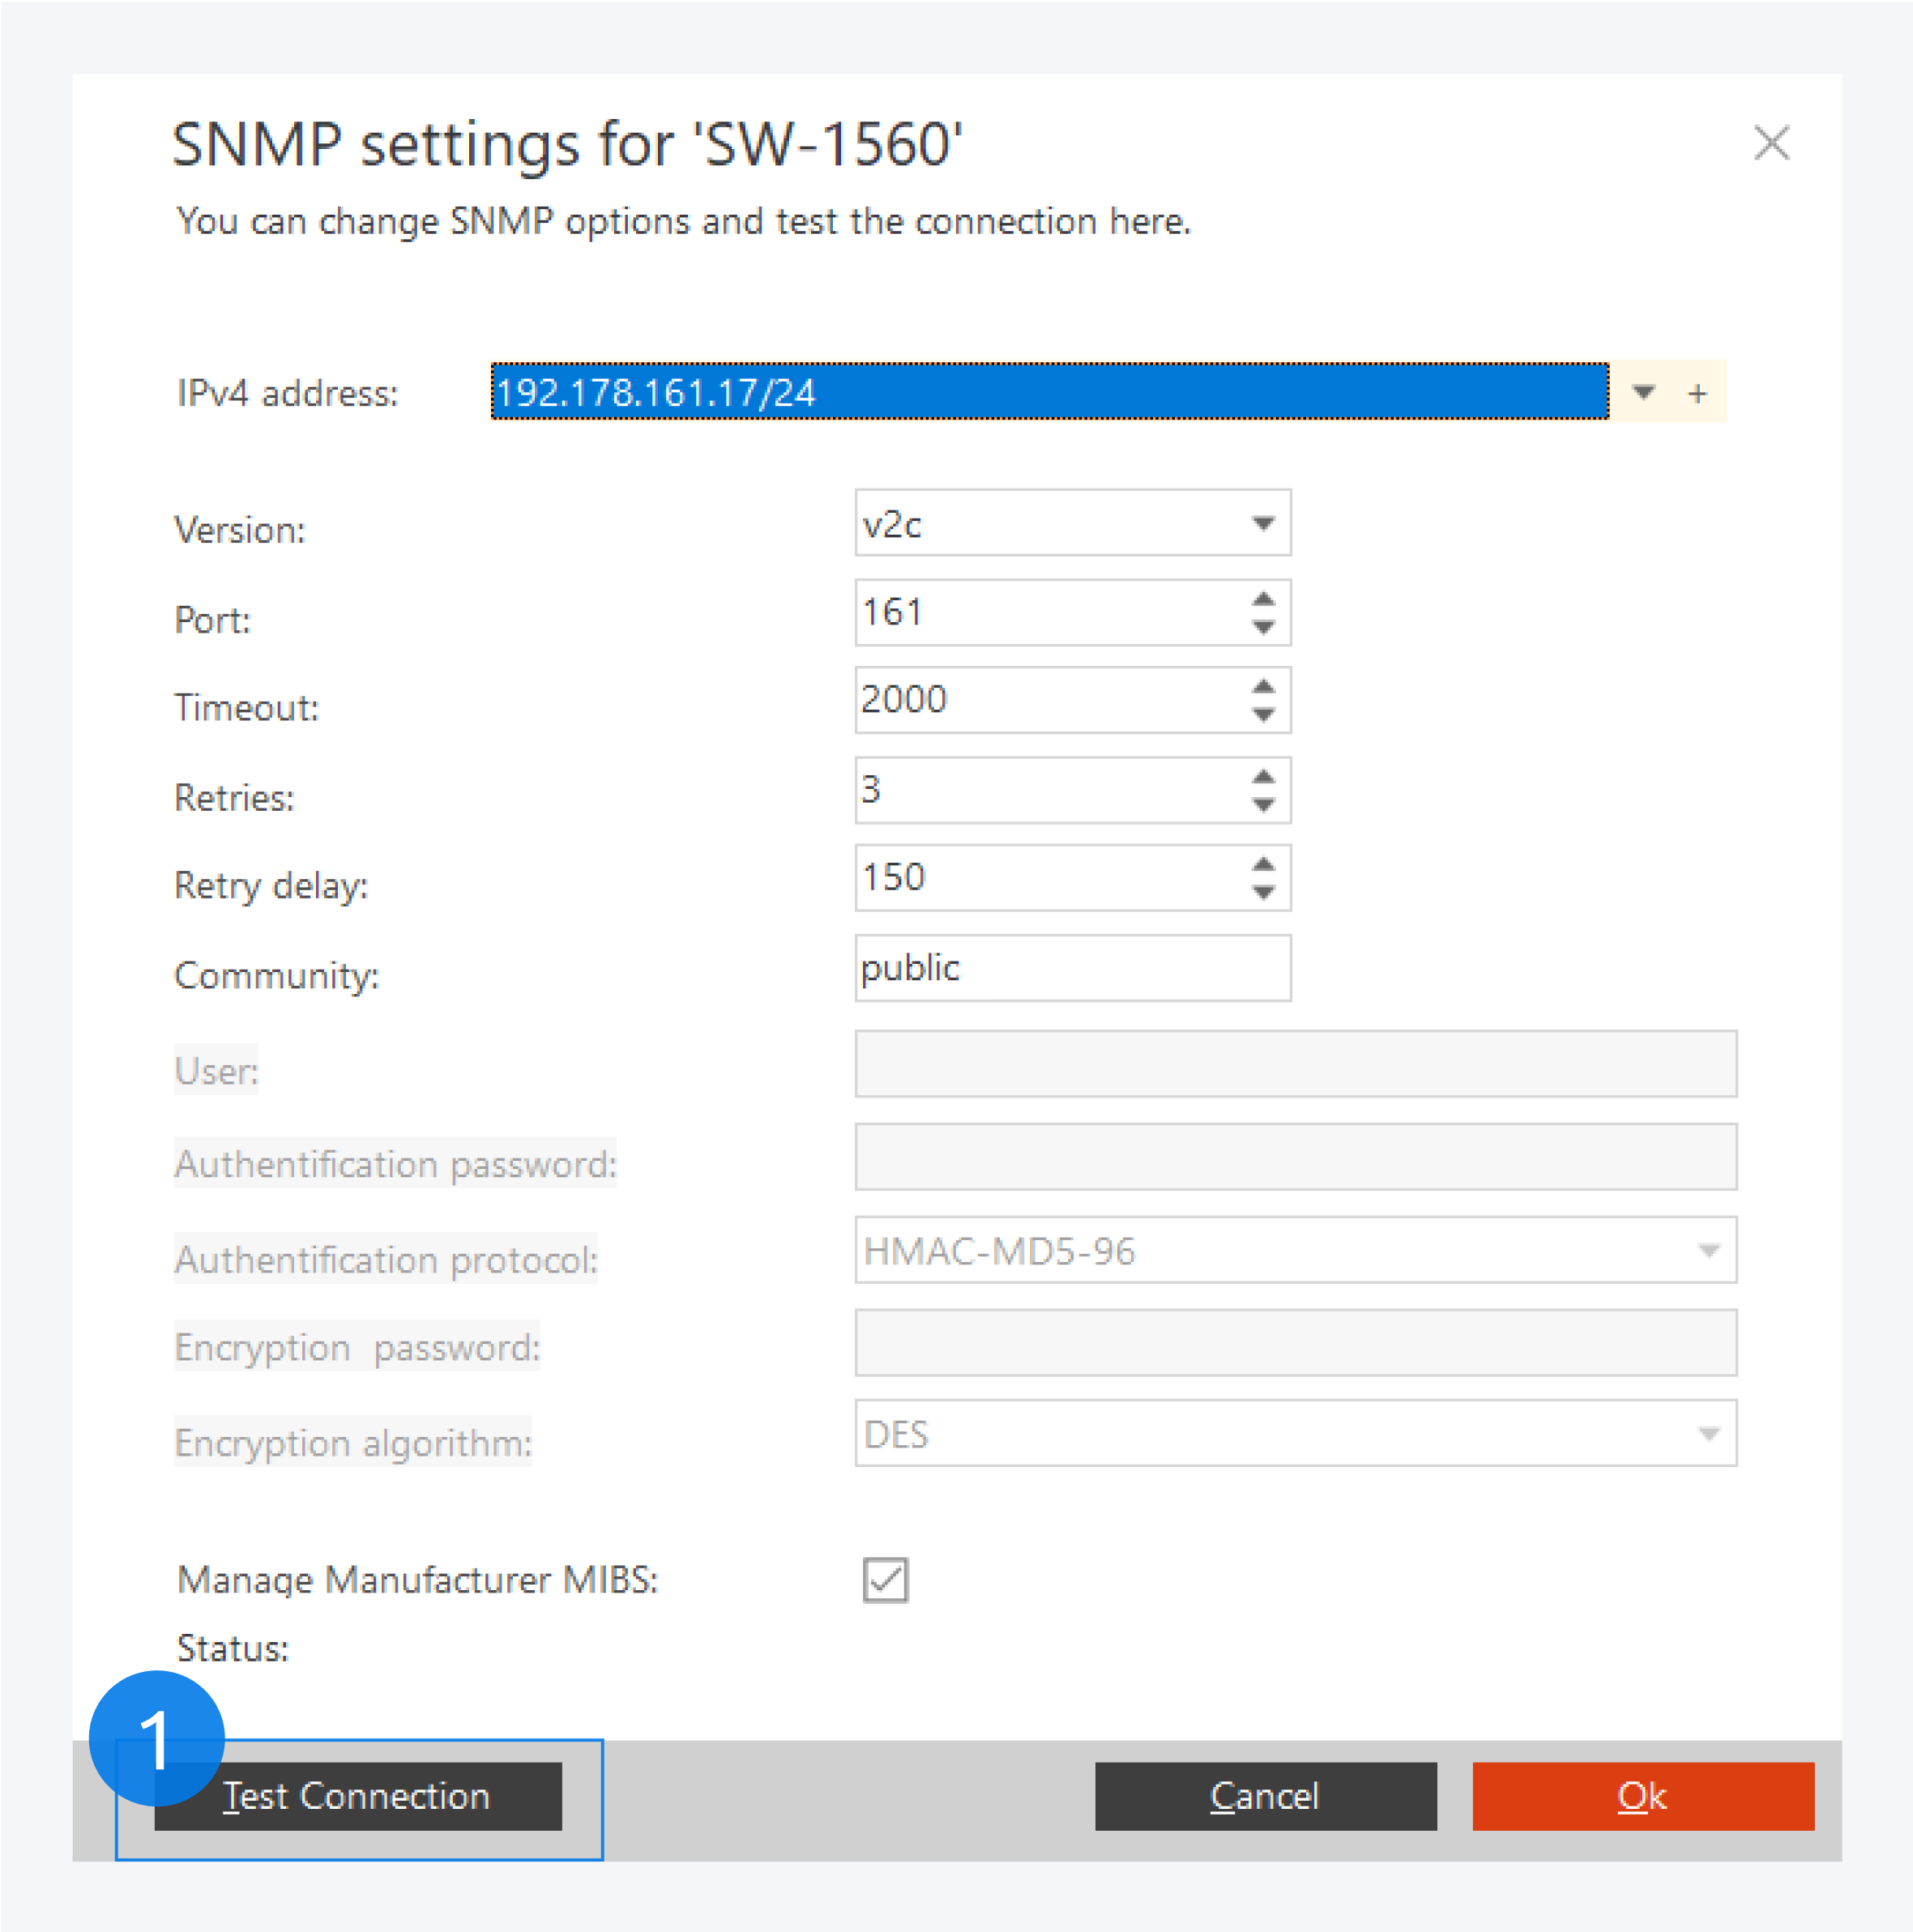
To configure the SNMP settings of a component instance, first select the IP address. If you already have an IP address assigned to your selected component, it will be available for you to select from the list. If you do not have an IP address already assigned, you can assign one from your network subnets to your selected component by clicking on the + icon.
You can select the SNMP version. Currently Pathfinder support v1, v2, v2c and v3. If you select SNMPv3, you will have to fill in the user credentials here.
For SNMP the port number is 161 by default.
Set the timeout time in milliseconds, the number of retries, the delay before retry in milliseconds and the community name.
Test your connection to the IP address here (1).
Click OK to complete your SNMP configuration.
Assigning IP address
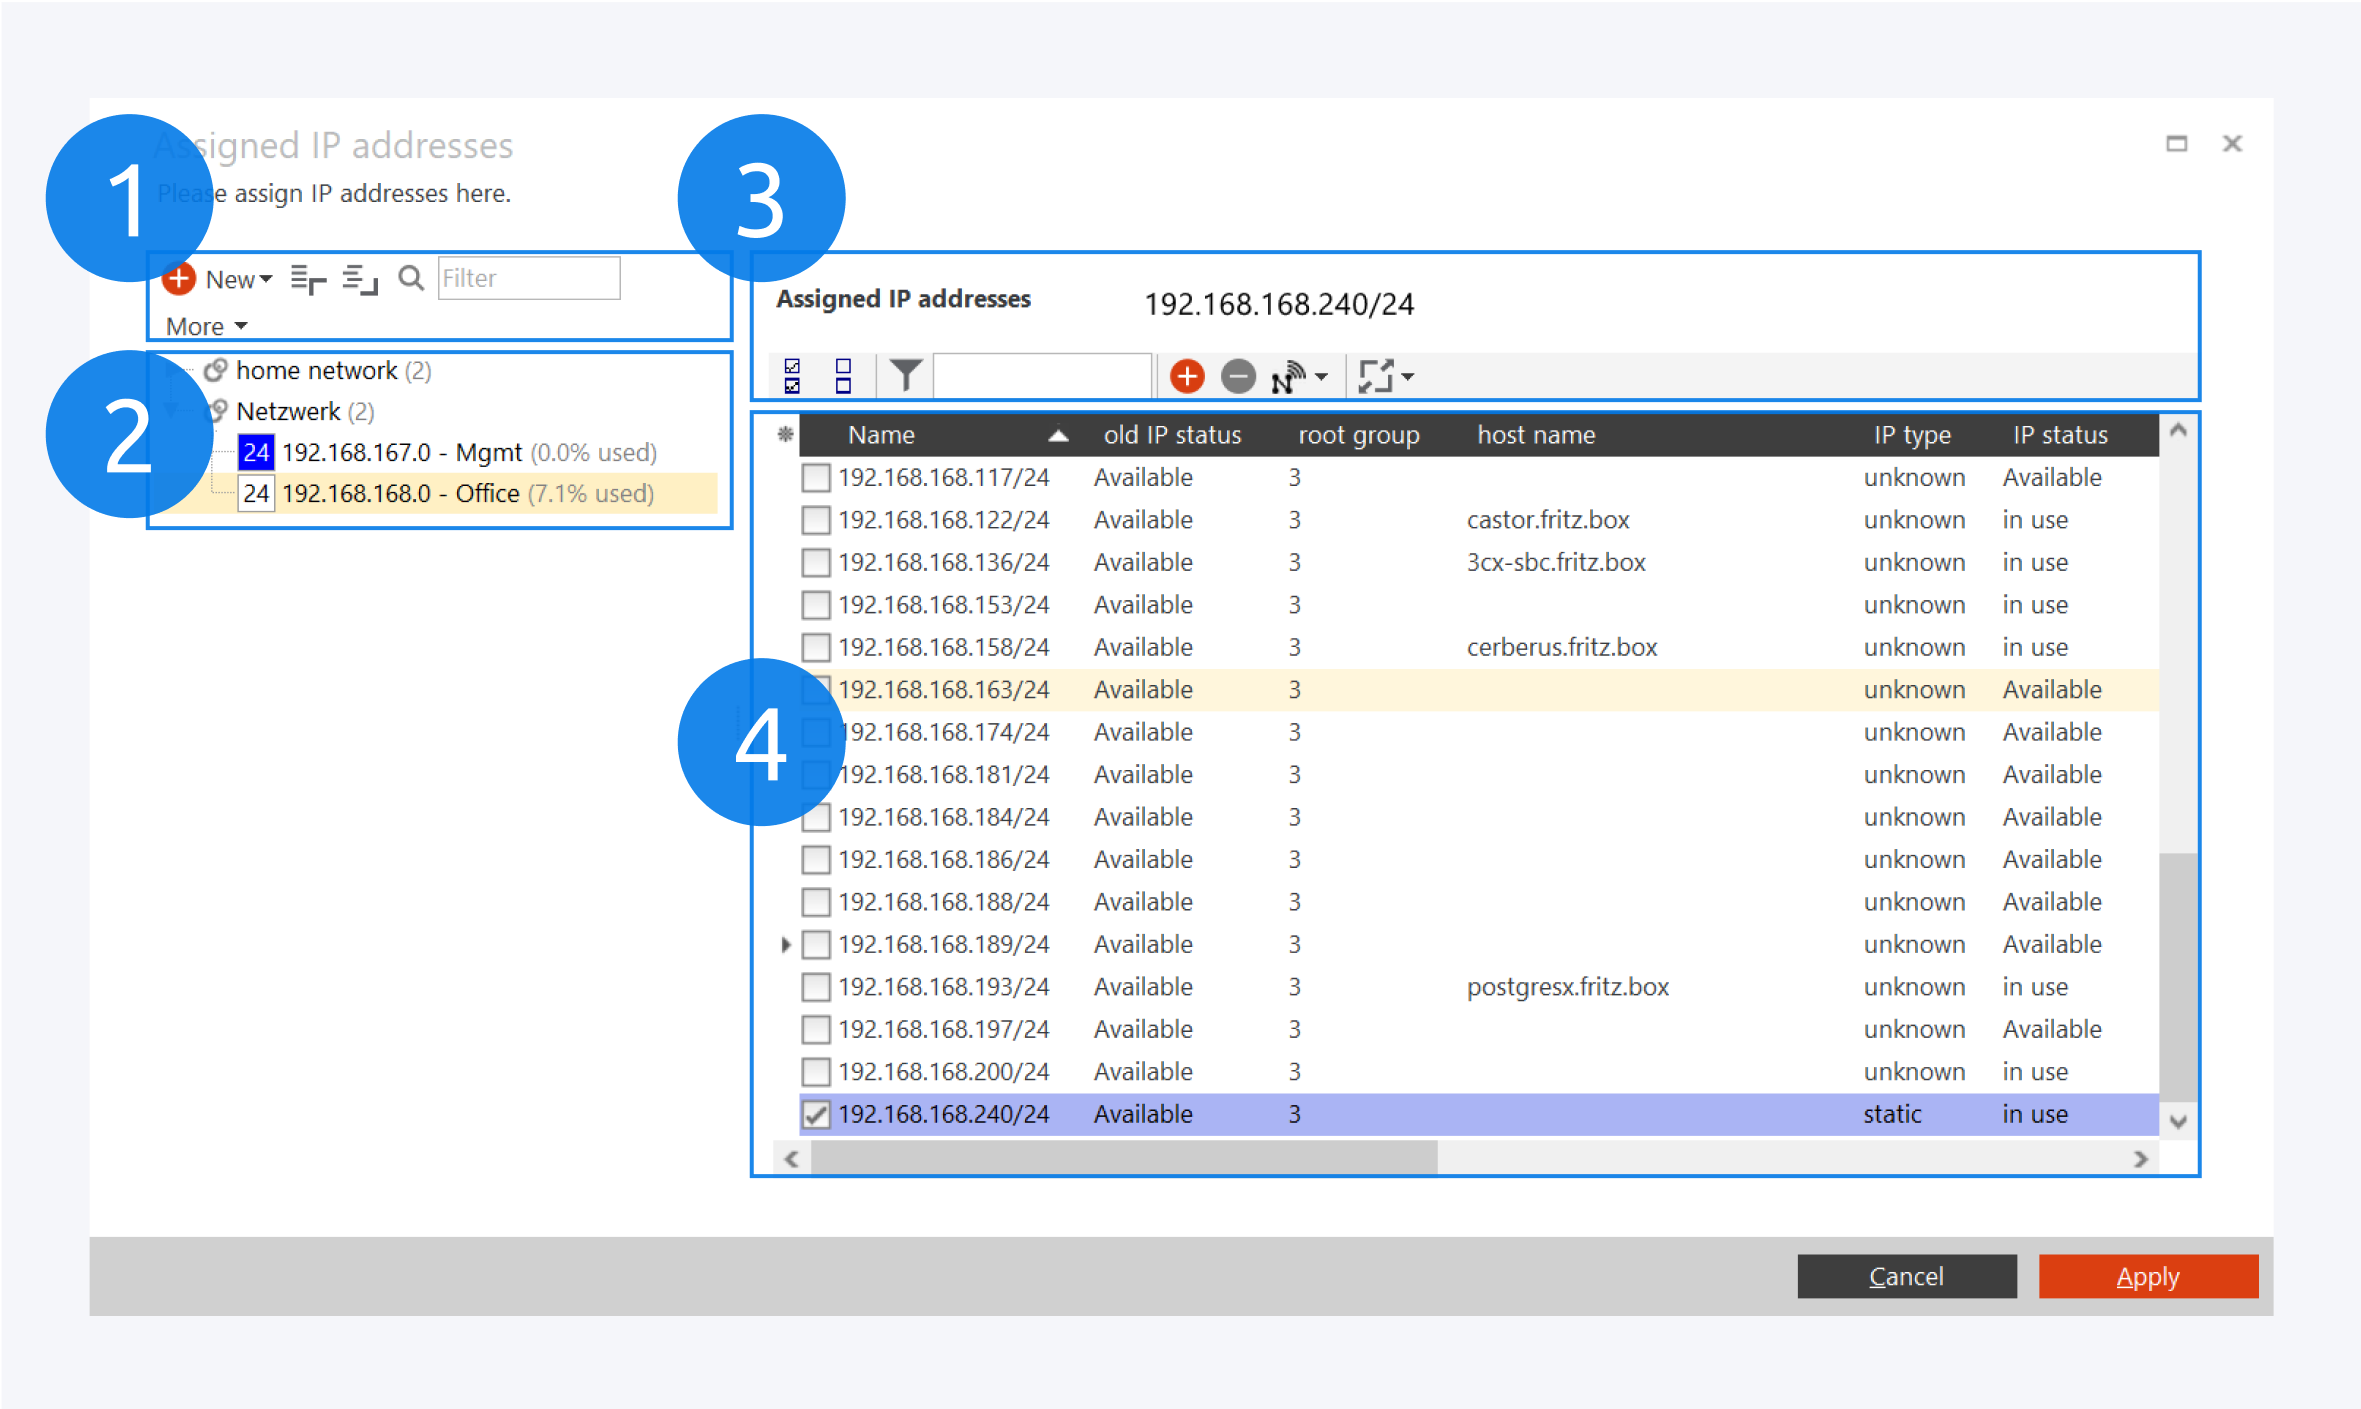
Select and IP address from your network subnet to assign it to your component instance.
You can create new networks and groups here (1). You can also search for IP addresses, filter through IP addresses and more.
Your networks and groups are displayed here (2).
Here you can search for an IP address, add and delete IP addresses, scan scan subnets for IP addresses and more (3).
Your list of IP addresses in the subnet is displayed here (4).
Click on Apply to assign the IP address to your component.
You can assign one or multiple IP addresses to a component.