Place Installation Cables (Advanced)
In order to create more complex installation cable connections you can use the advanced dialog.
Select the Place Cables (Advanced) option from the cable management section.
A installation cable is part of the network backbone which function as a permanent cabling in the active network.
Selecting ports and cables
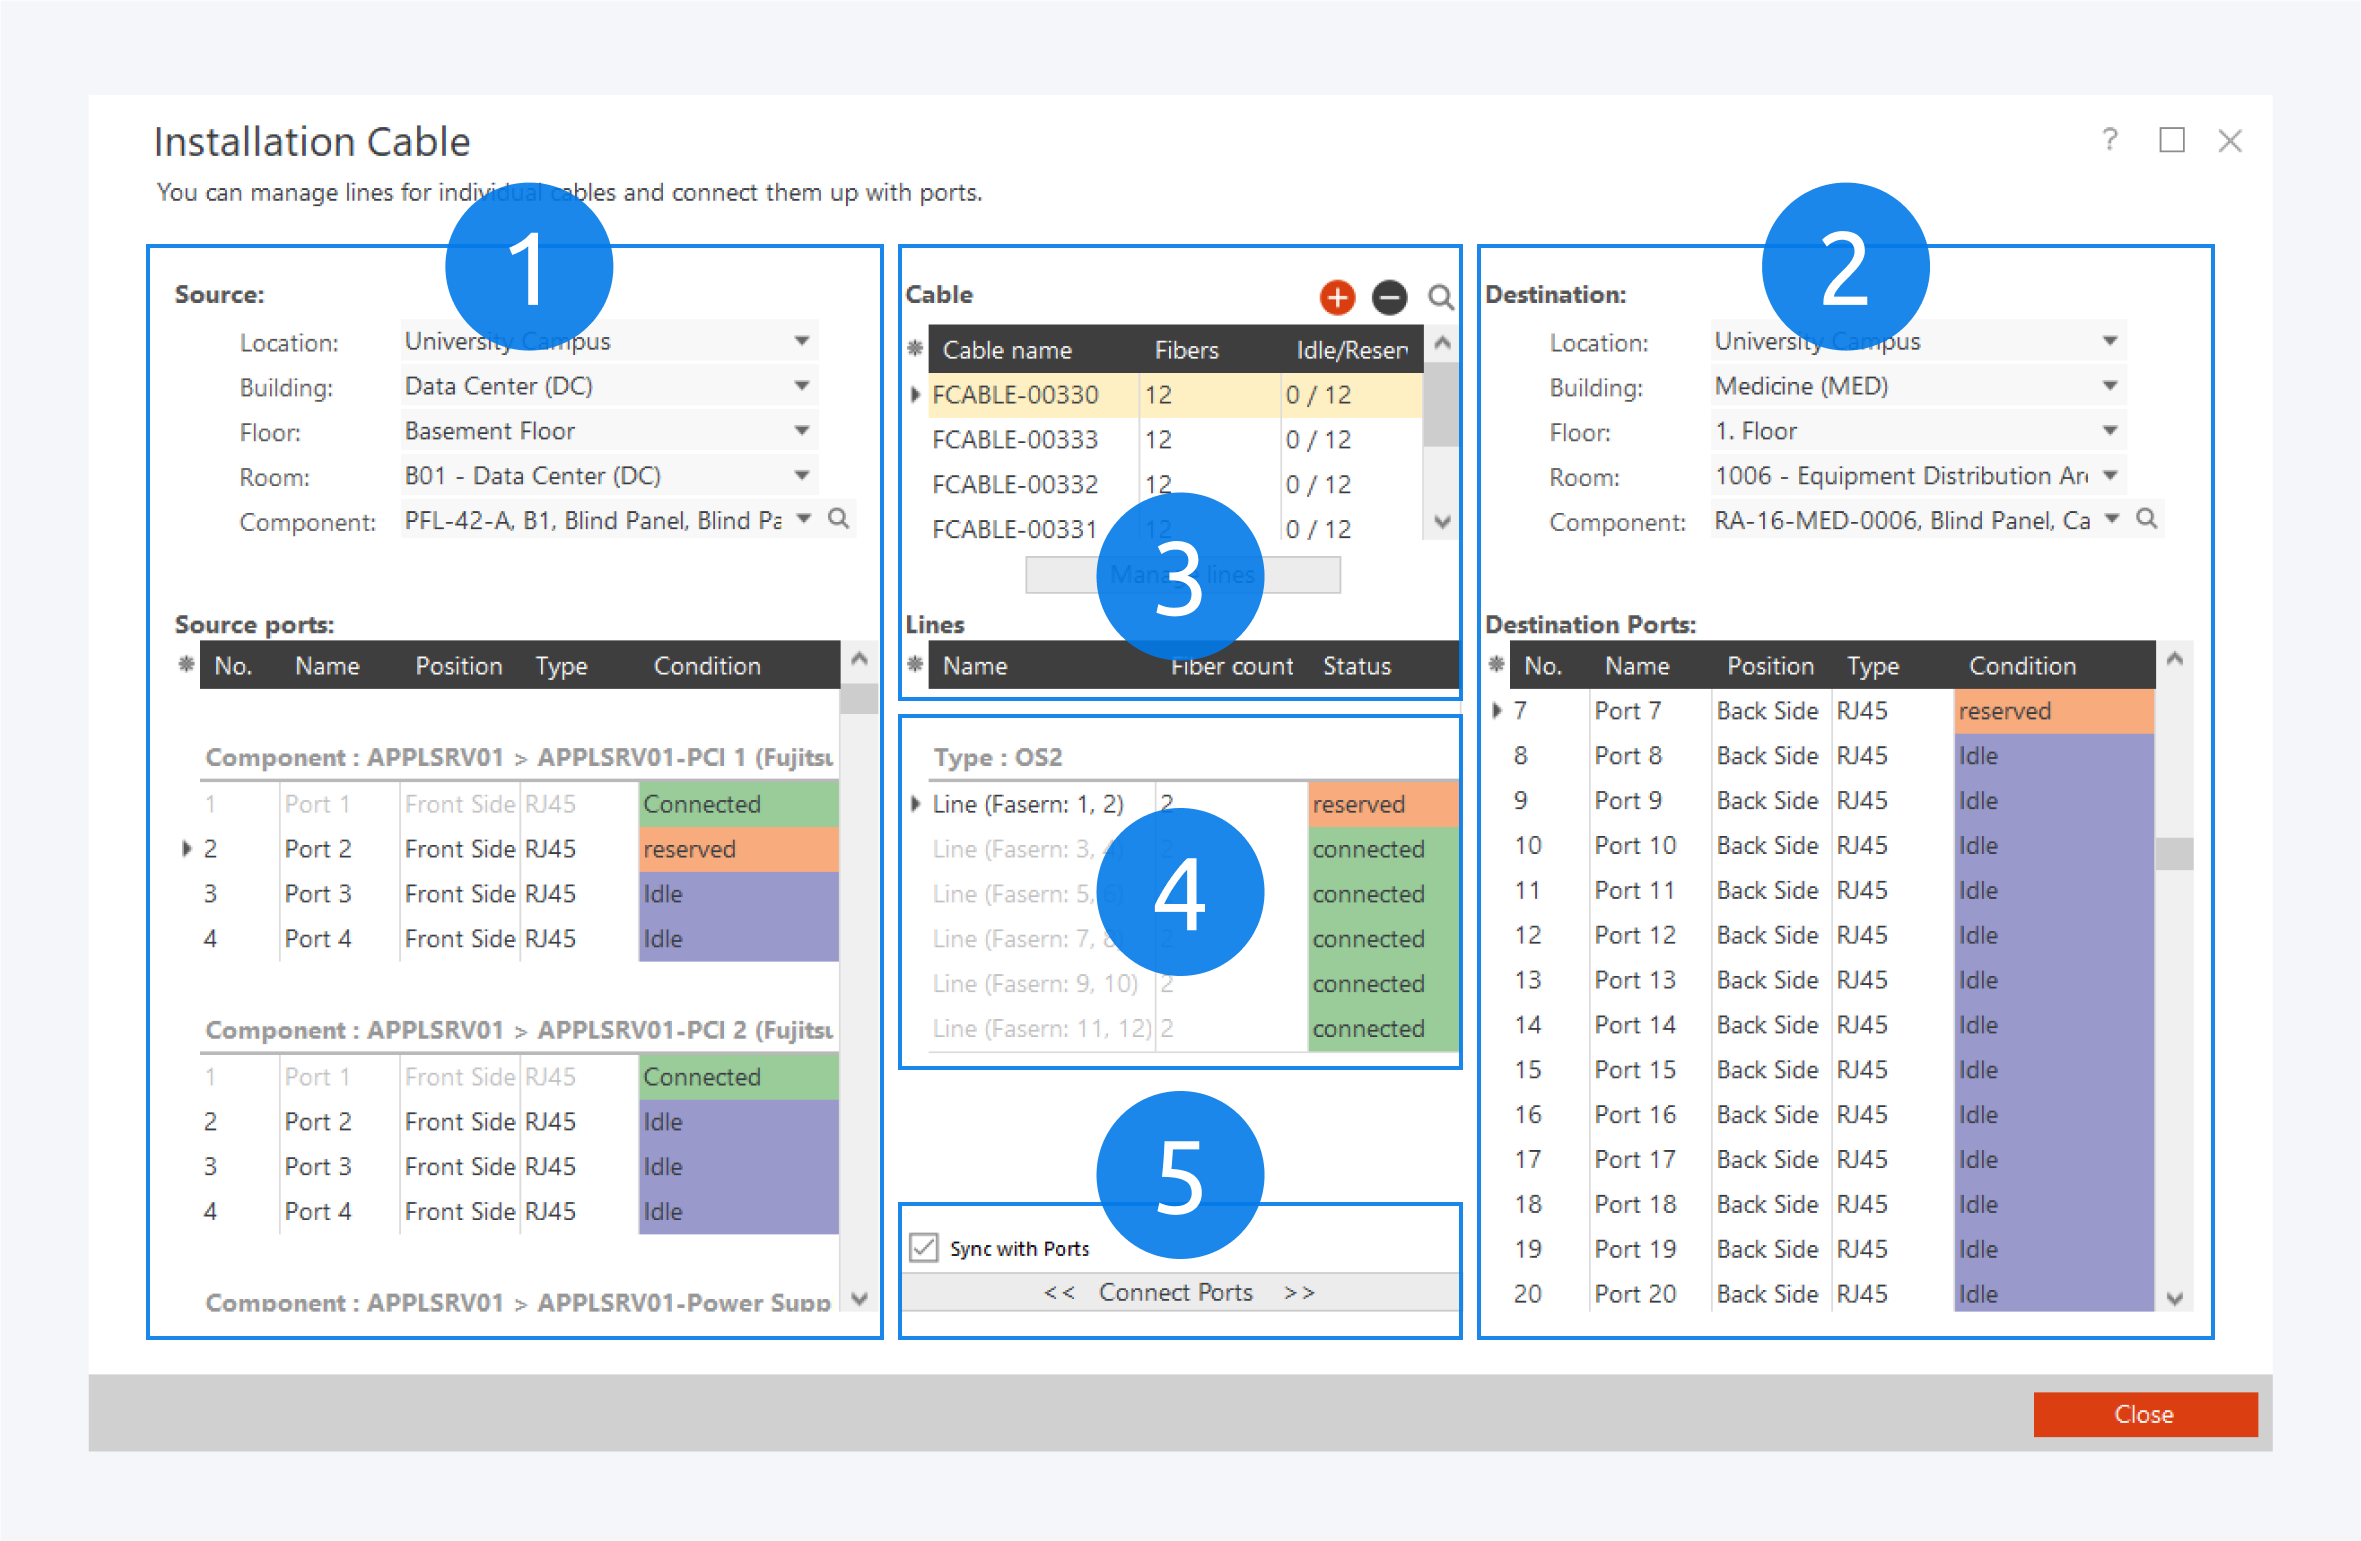
On the left (1) select the source components. Double click an idle port to mark it for connection. Select the destination ports on the right (2) the same way.
In the middle at the top (3) there is a list of all available installation cables between the source and destination rooms. In order to create a new cable use the + icon. Click Manage lines to specify how many fibers/wires will be used for a single connection.
Once the lines have been created they can be marked for connection via double click (4). Finally click Connect Ports (5) to establish a connection between the reserved ports using the reserved lines. While Sync with Ports is activated, the ports on both sides of a connection will be highlighted when a line is selected.
Managing lines
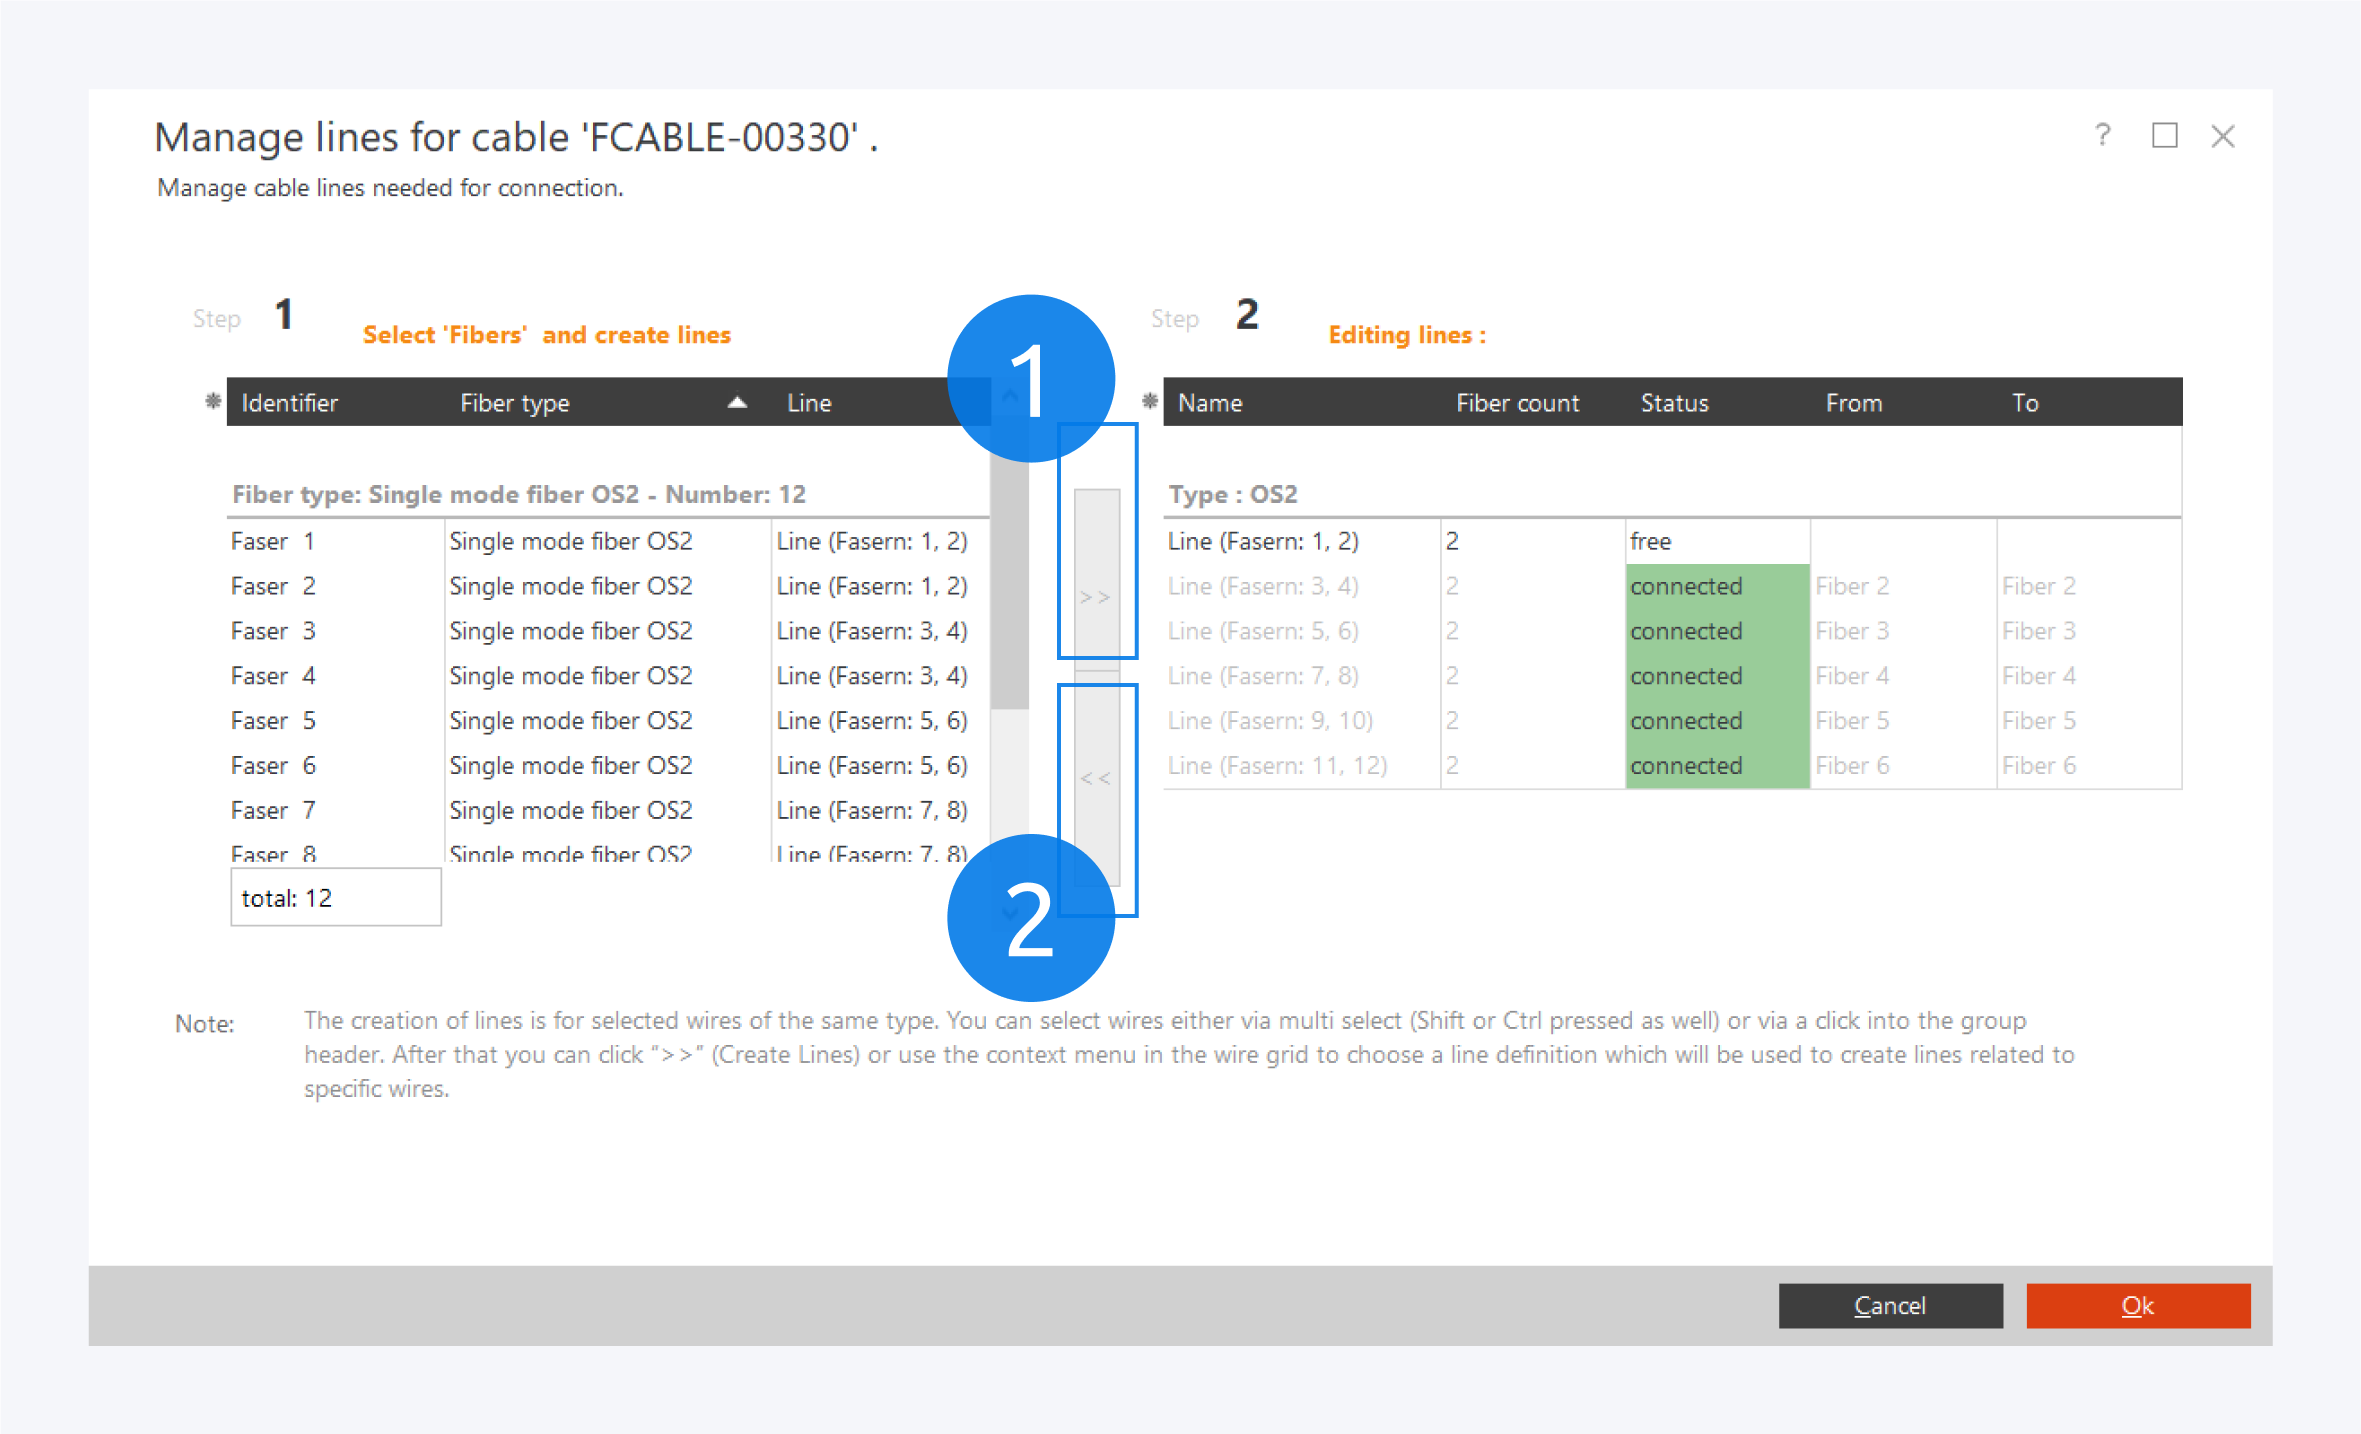
First select the fibers/wires you want to create lines for. You can use Shift and Control to select multiple fibers/wires or click the cable header to select the entire cable. Then click >> (1) and select a line type to specify how many fibers/wires will be used for each line. You can also remove existing lines unless they are in use (2).