Patch Cable Connections
There are multiple ways of creating patch connections in Pathfinder but they all fall under either the (1:n) or (n:n) connection rule. The patch cabling can be done from the cable management section or from the cabinet itself.
Drag&Drop
Selecting the Ports
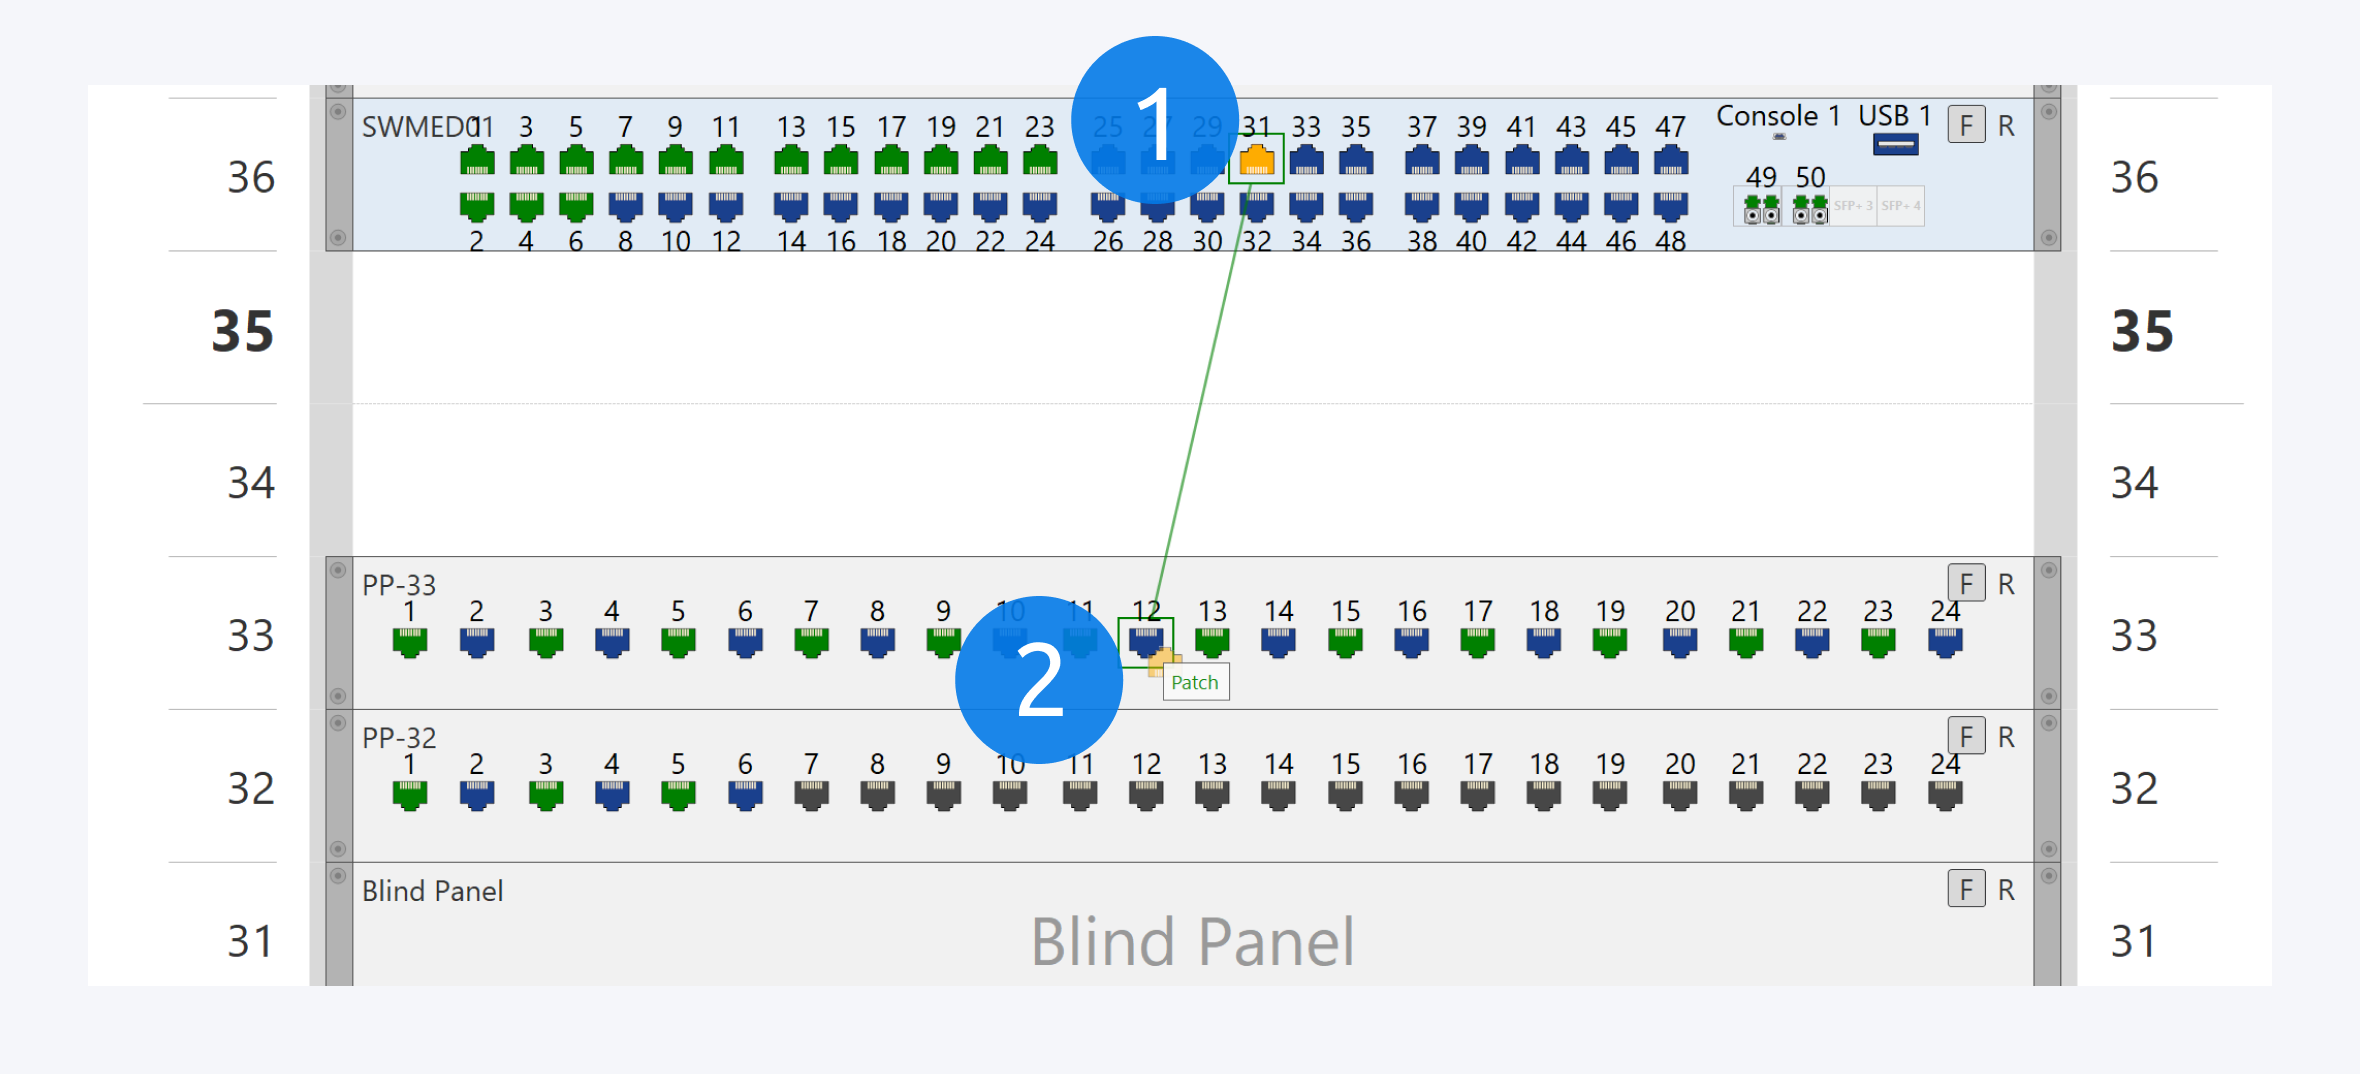
The easiest way to create a 1:1 patch connection is via drag&drop. You can select and hold the source port (1) from a component and then drag and drop it on the destination port (2) of a component to begin the patch creation process.
You can also access patching via the context menu of a port or a component. There you will find the dialog for parallel (n:n) patching, too.
Selecting the Cable Definition
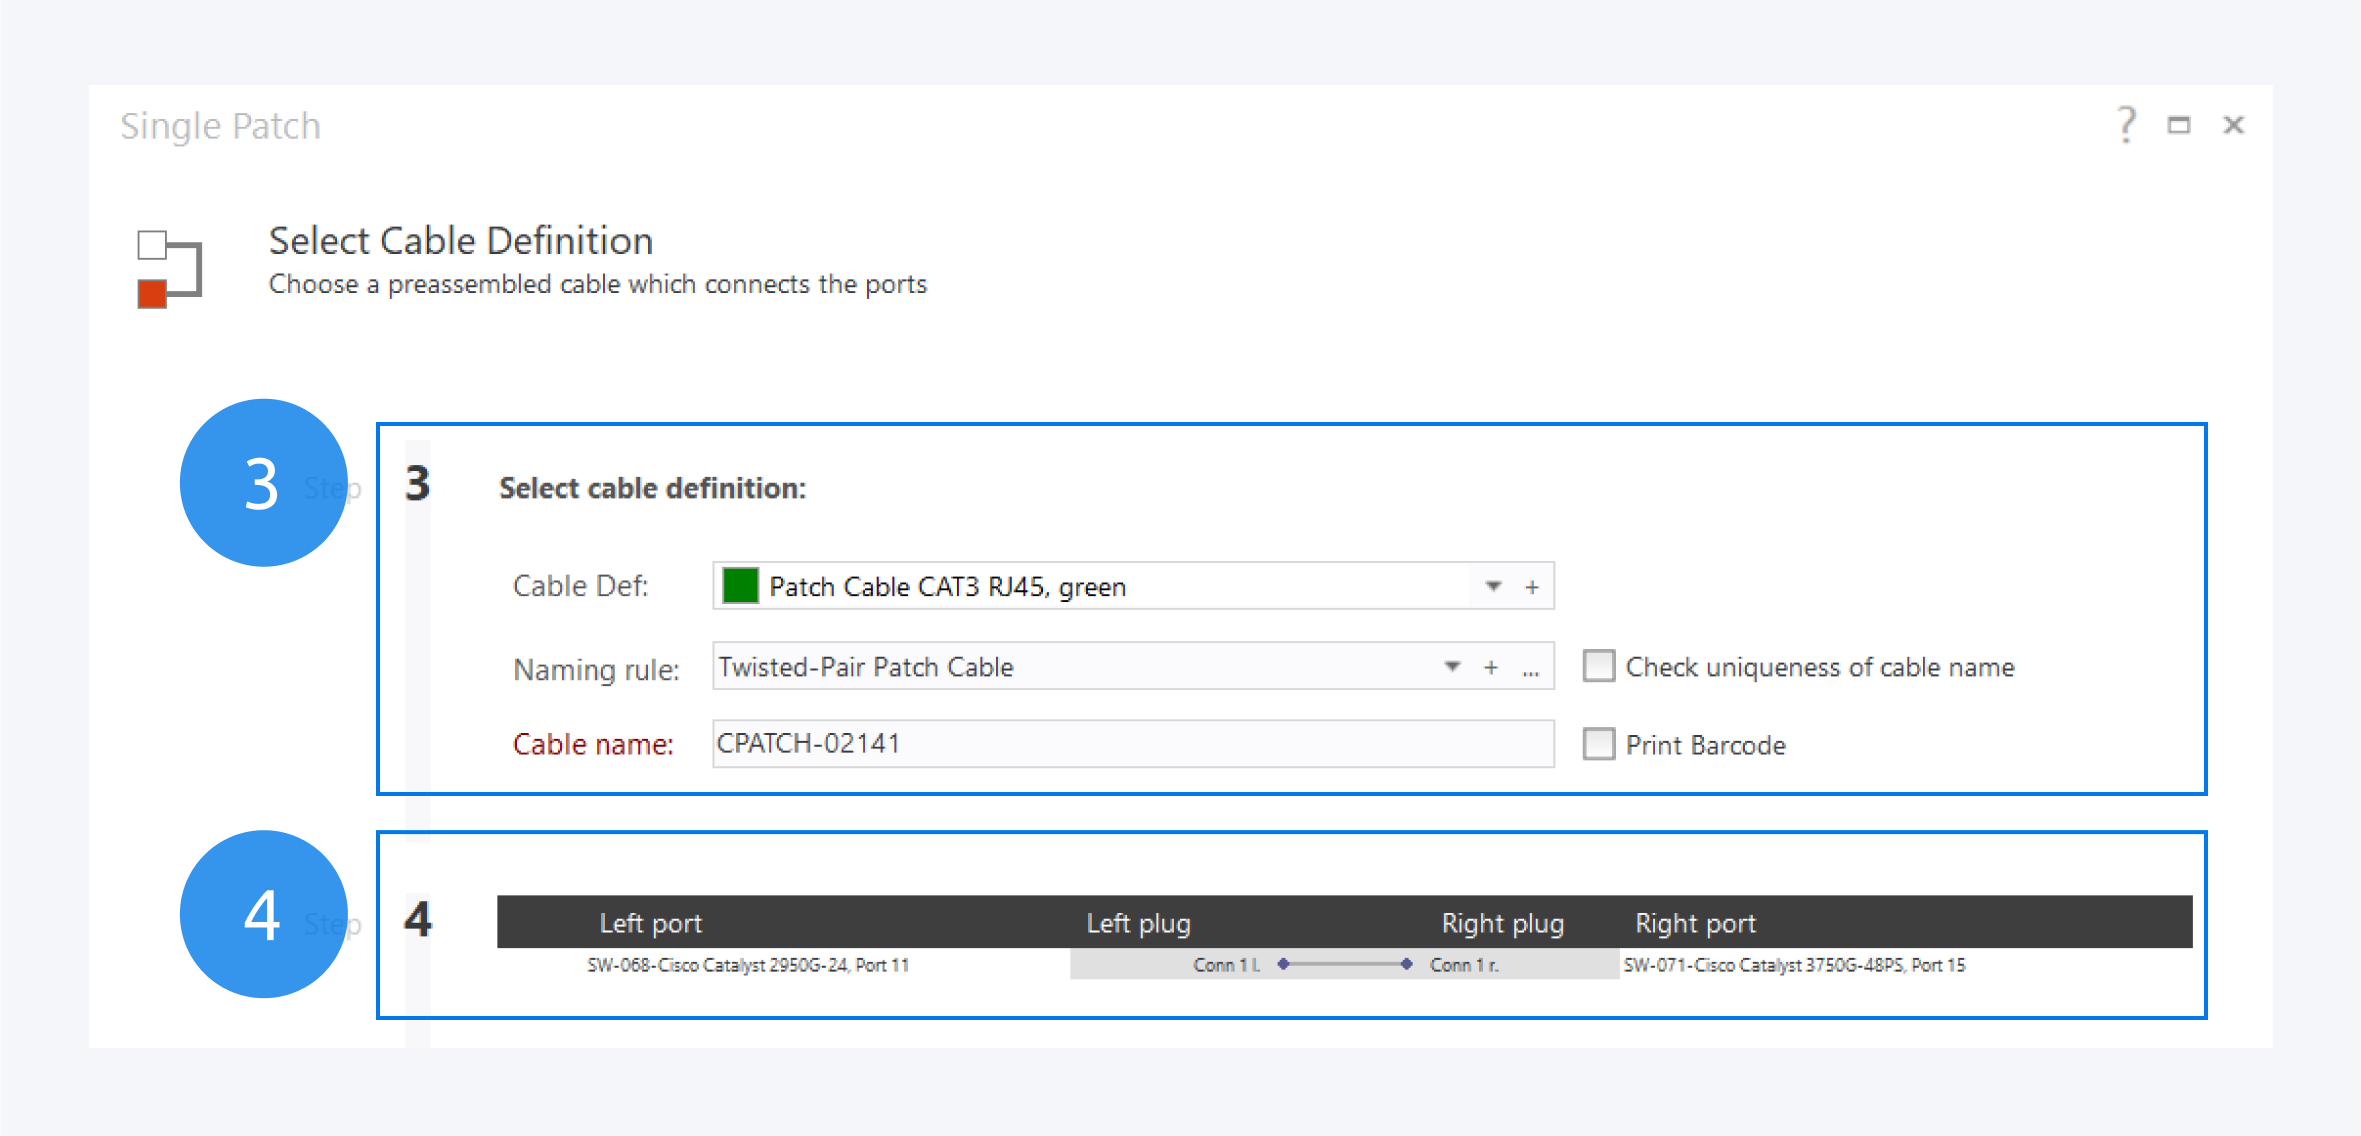
Once you have selected the two ports, you can then select the cable definition (3).
Since both the ports are Ethernet ports, the cable definition and naming rules are automatically selected for twisted pair patch cables.
Here you can also name your cable, check for the uniqueness of your cable name and print a barcode to label your physical network cable.
The connection overview is available below (4). Once all the selections are complete, click on finish to complete your single network cable connection.
Showing Connections
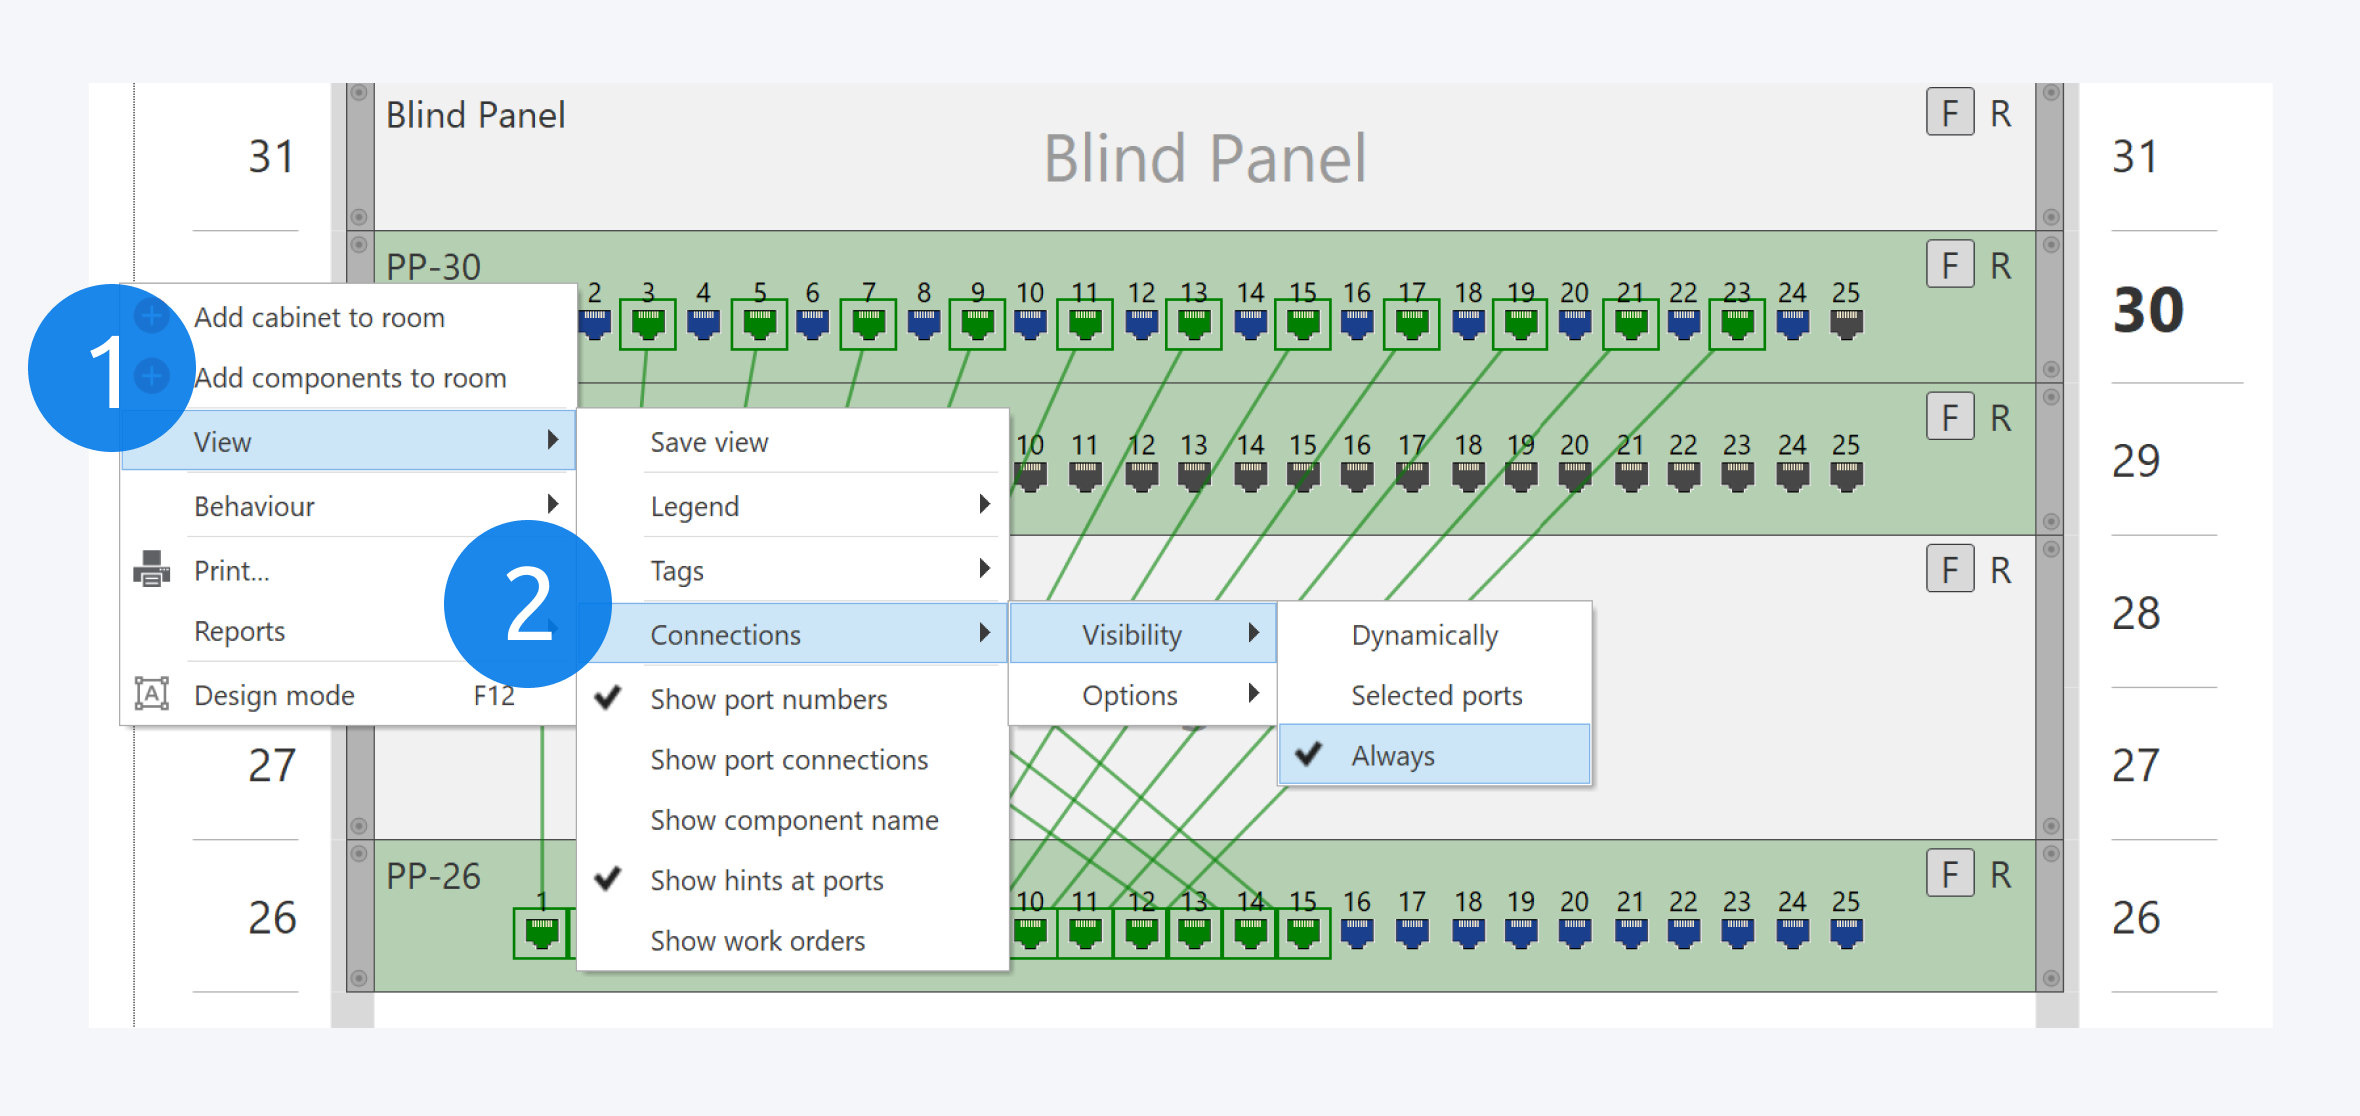
To see active network connections and cables, right click outside the cabinet to bring up the context menu, go to View (1) and select “Show all patch connections“ (2).
To learn more about the other methods for creating network connections, go to: Cable Management.
Removing Cable Connections
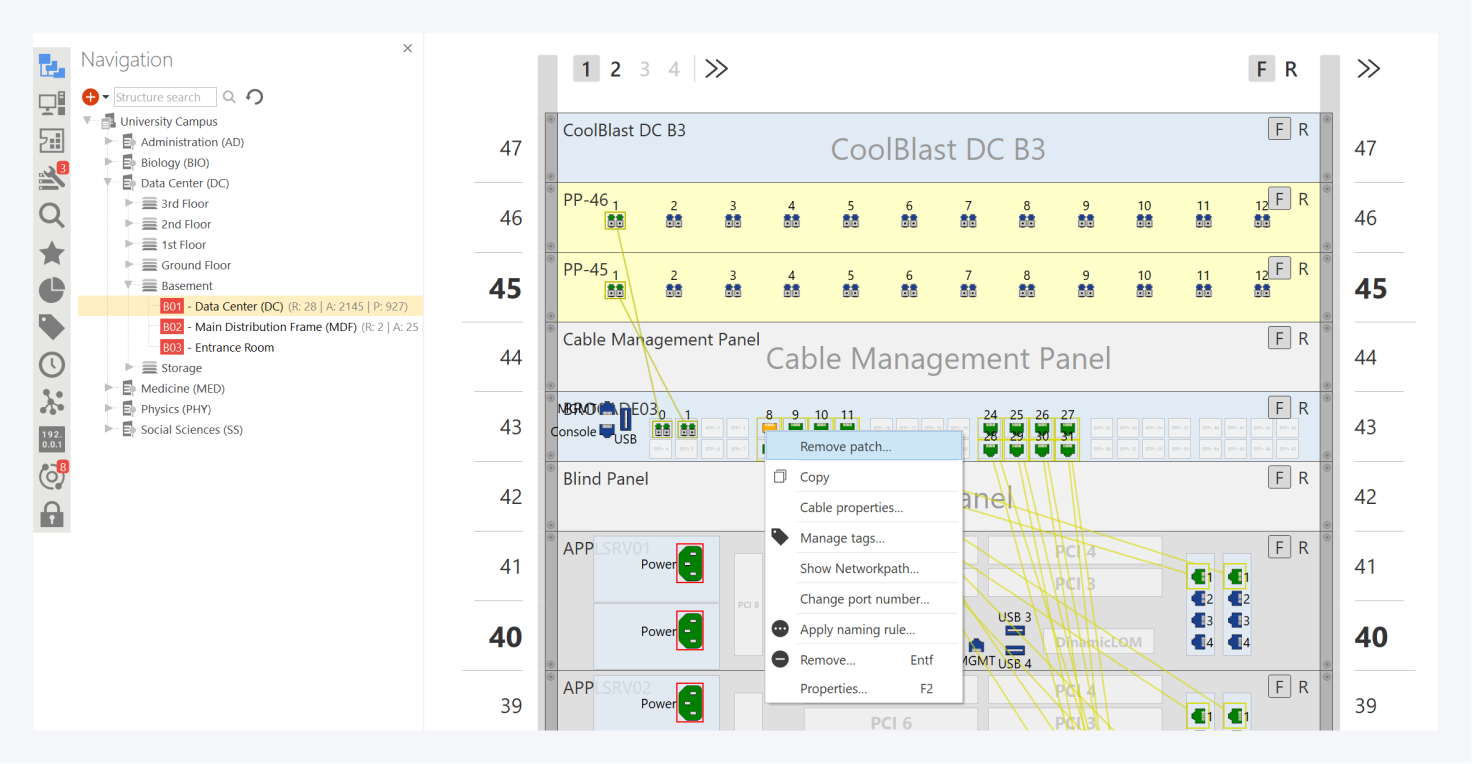
To remove a cable connection, right click on the port you want to disconnect and select Remove patch.
In the next window, you can select the cables you want to remove. Select OK to continue and OK again to finish removing the cable connection.
https://www.youtube.com/watch?v=EexOVYe7FQ4&t=110s