Locations and Infrastructure
In Pathfinder, it is possible to define nested infrastructures and therefore, accurately reproduce realistic construction conditions for buildings, floors and rooms. This can be done easily from the Navigation module in the sidebar.
Creating Locations
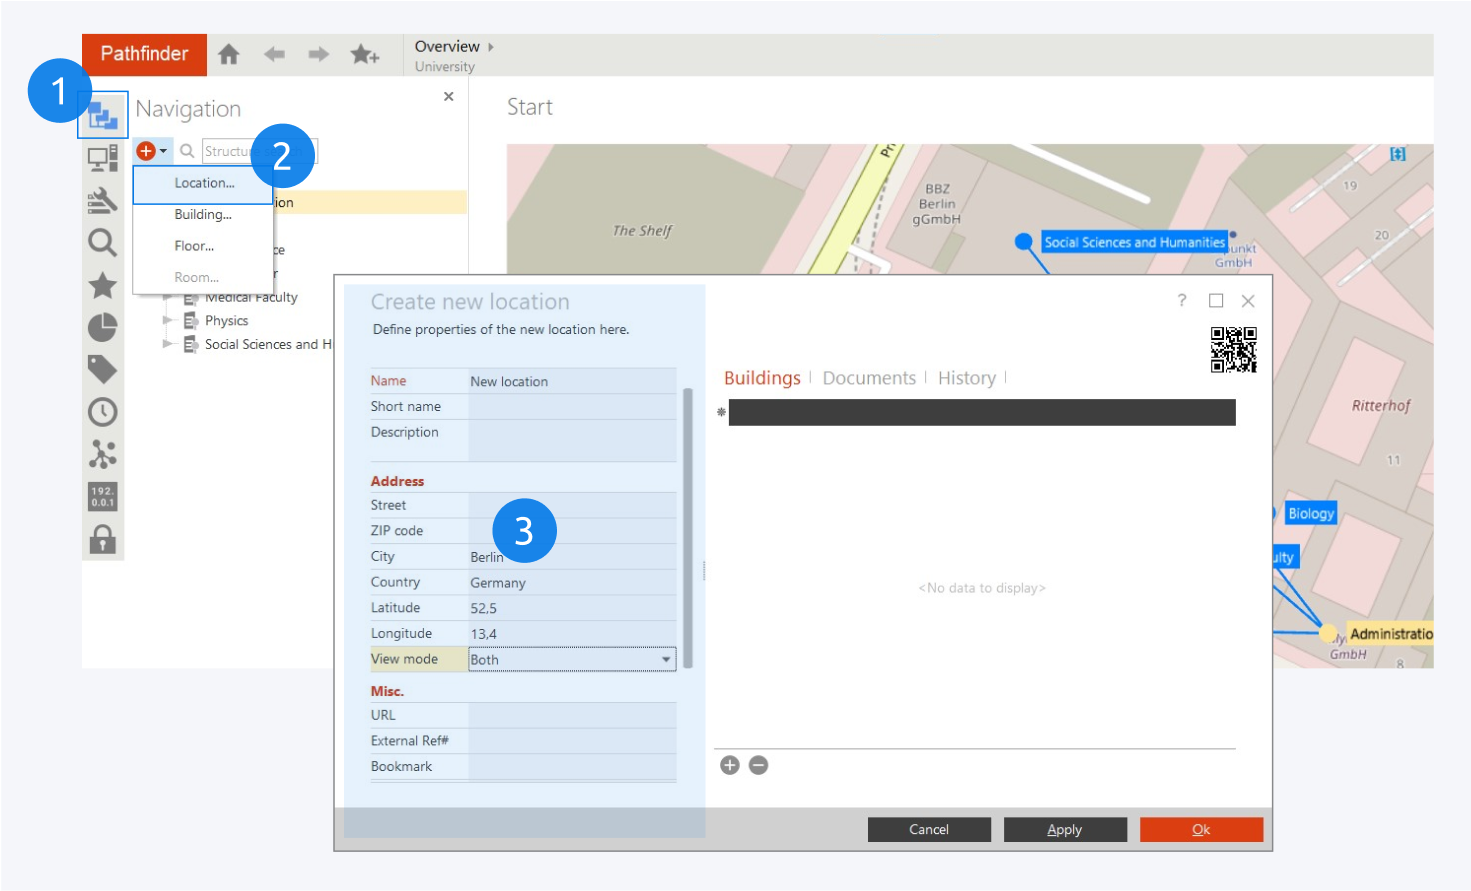
To create a new location, click on the navigation icon (1) on the sidebar (Alt + N). Click the add-icon and select Location (2) from the drop down menu. Fill out the information for your new location (3) and select OK to add your location on the map.
You can attach files (lists, maps, etc.) directly to it via the Documents tab.
Creating Buildings
Creating buildings can be done in the same way as creating locations.
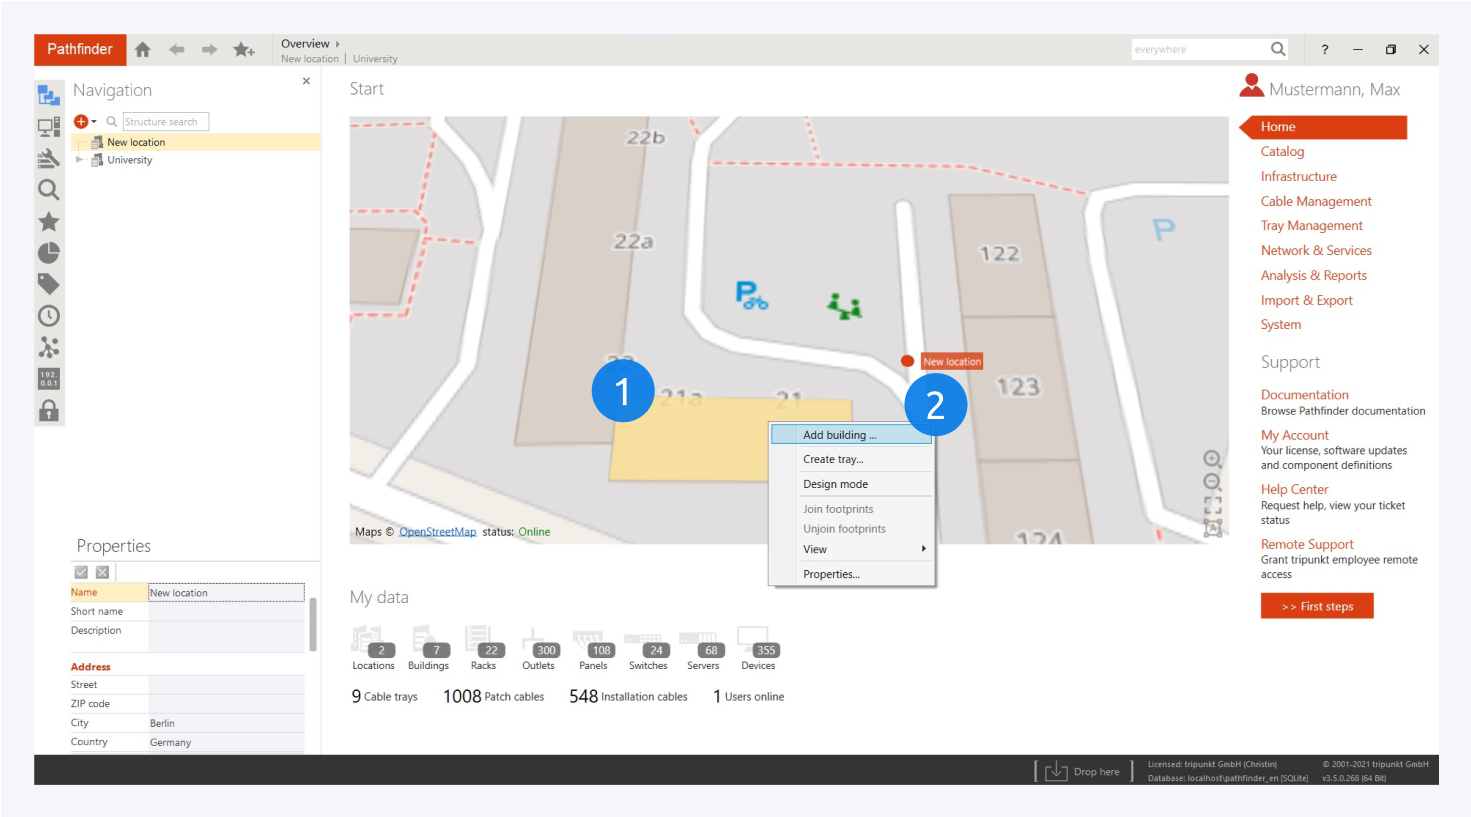
Alternatively it is possible to select and right click a building blue print on the map (1) and select Add building in the context menu (2) to access the creation dialog.
You can create multiple buildings for a single location.
You can move an object to a different parent in the navigation tree via drag&drop (e.g. a building to a different location).
Creating Floors
After having created your buildings, you can add floors to your building in the same way.
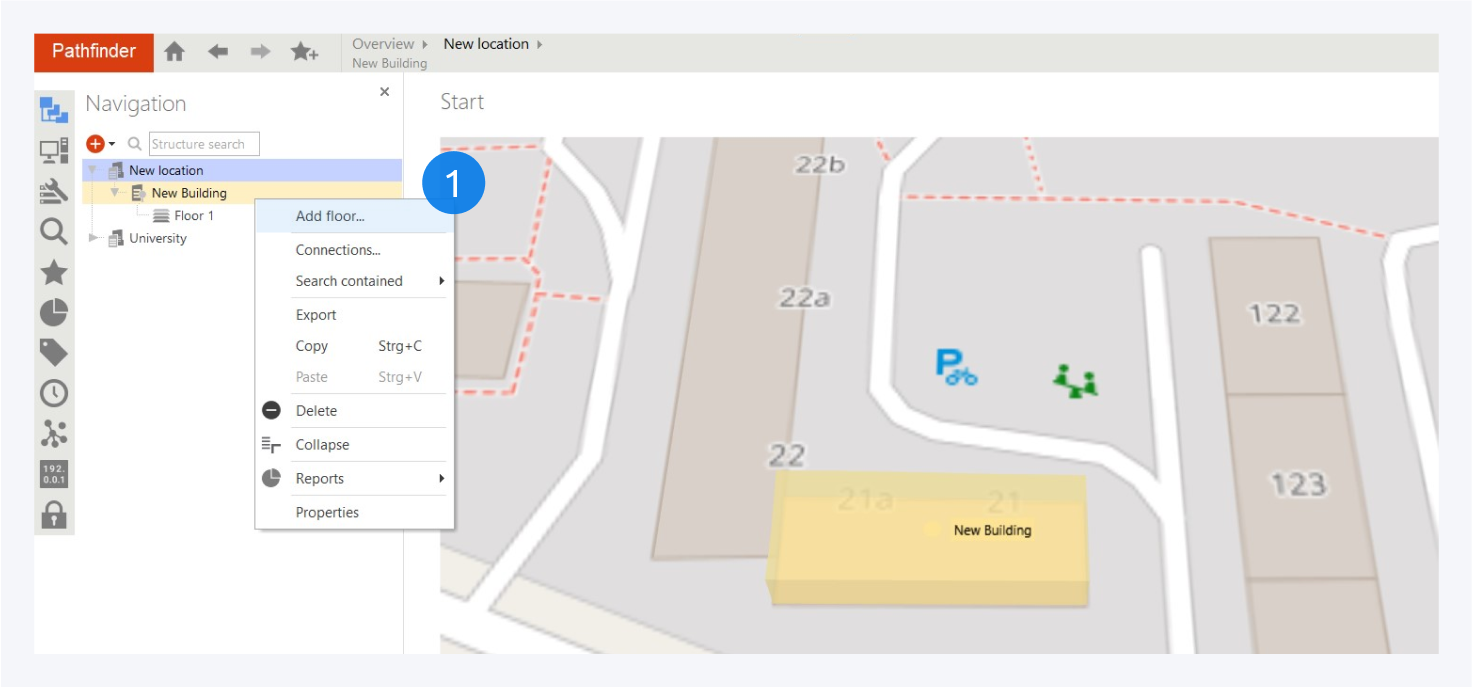
Right click on your newly created building from the navigation tab or map and select add floor (1) from the context menu.
Fill out the information for your floor and click OK. Repeat this process until all floors have been created.
Double clicking the building name in the navigation sidebar module will open the detailed view of that building including all floors.
Top View and Design Mode
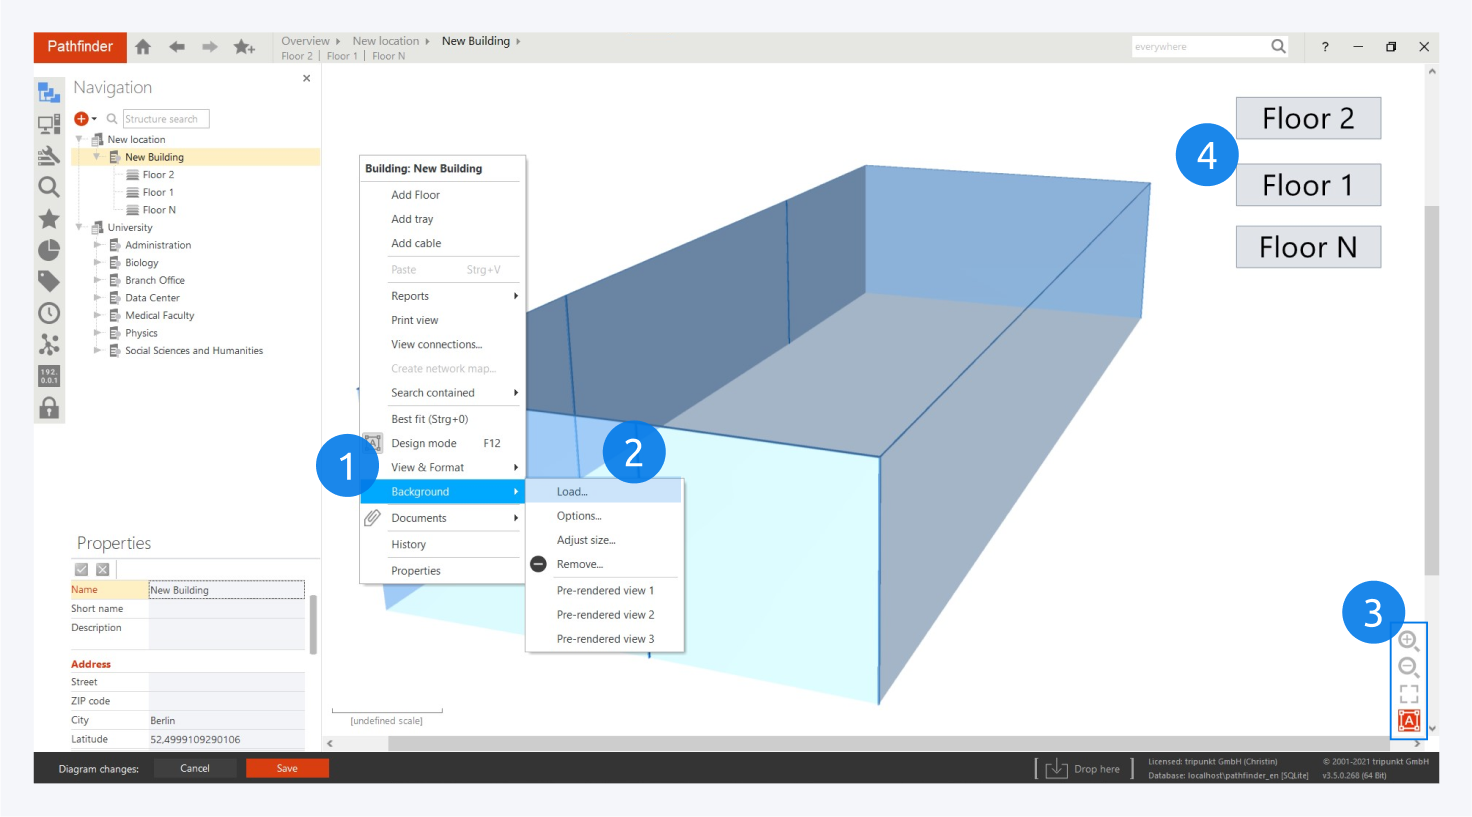
Inside an infrastructure object you can create a more detailed depiction of the site. You can set a background picture by right clicking anywhere in the view, selecting Background (1) from the drop down menu and clicking on load (2). The background image can either be copied and stored within the Pathfinder database or simply be linked to which allows Pathfinder to detect changes made to the file.
For buildings which are linked to a blueprint on the map, you have the option to generate pre-rendered views as the background image.
You can edit the viewing area using by zooming or scaling to best fit and also access the design mode (F12) (3).
You can also resize and move objects in design mode (4)
https://www.youtube.com/watch?v=kHeCsiW16RM
Creating Rooms
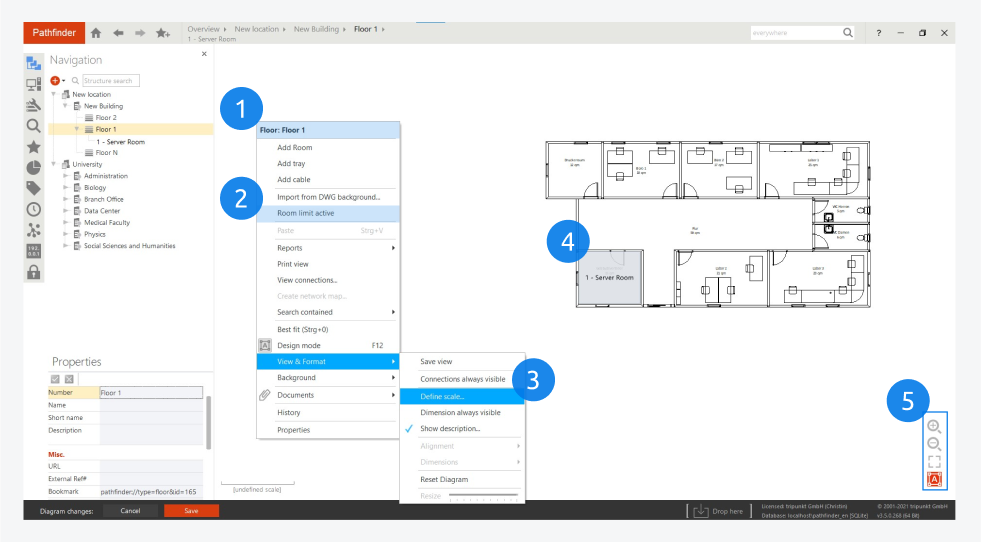
Once the floors are created, enter one of the floors to start creating the rooms in the same way as the buildings and floors were created. Select add room (1) to insert a room object in the floor.
Right click anywhere in the room and turn the room limit active on (2) and define the scale (3) to create components in the room to scale. To define the perimeters of room (4) Click on the Design mode (5) or press F12 and resize the room area limit.
For more information about design mode, formatting and other visuals in Pathfinder, go to: Visualization.
Defining Room Limits
With room limit active checked, click on the design mode icon or press F12 to enter design mode.
Select the room for which you want to define the perimeters. A blue interactive box will appear around the selected room. Resize the box to define the perimeter of your room.
Right click on the room and select Background from floor from Background option to use the room perimeters from the floor as the background of that room.
You can also import multiple rooms at once from an AutoCAD .DWG file as the background image by importing it from the DWG background.