Setup and installation MS SQLServer Express 2019
Resources
Please install the following files:
Installation
Install SQL Server Express
Run the downloaded file SQLServer2019-SSEI-Expr.exe and follow the instructions of the installation wizard.
Select the installation type. For Pathfinder, the basic setup option is sufficient.
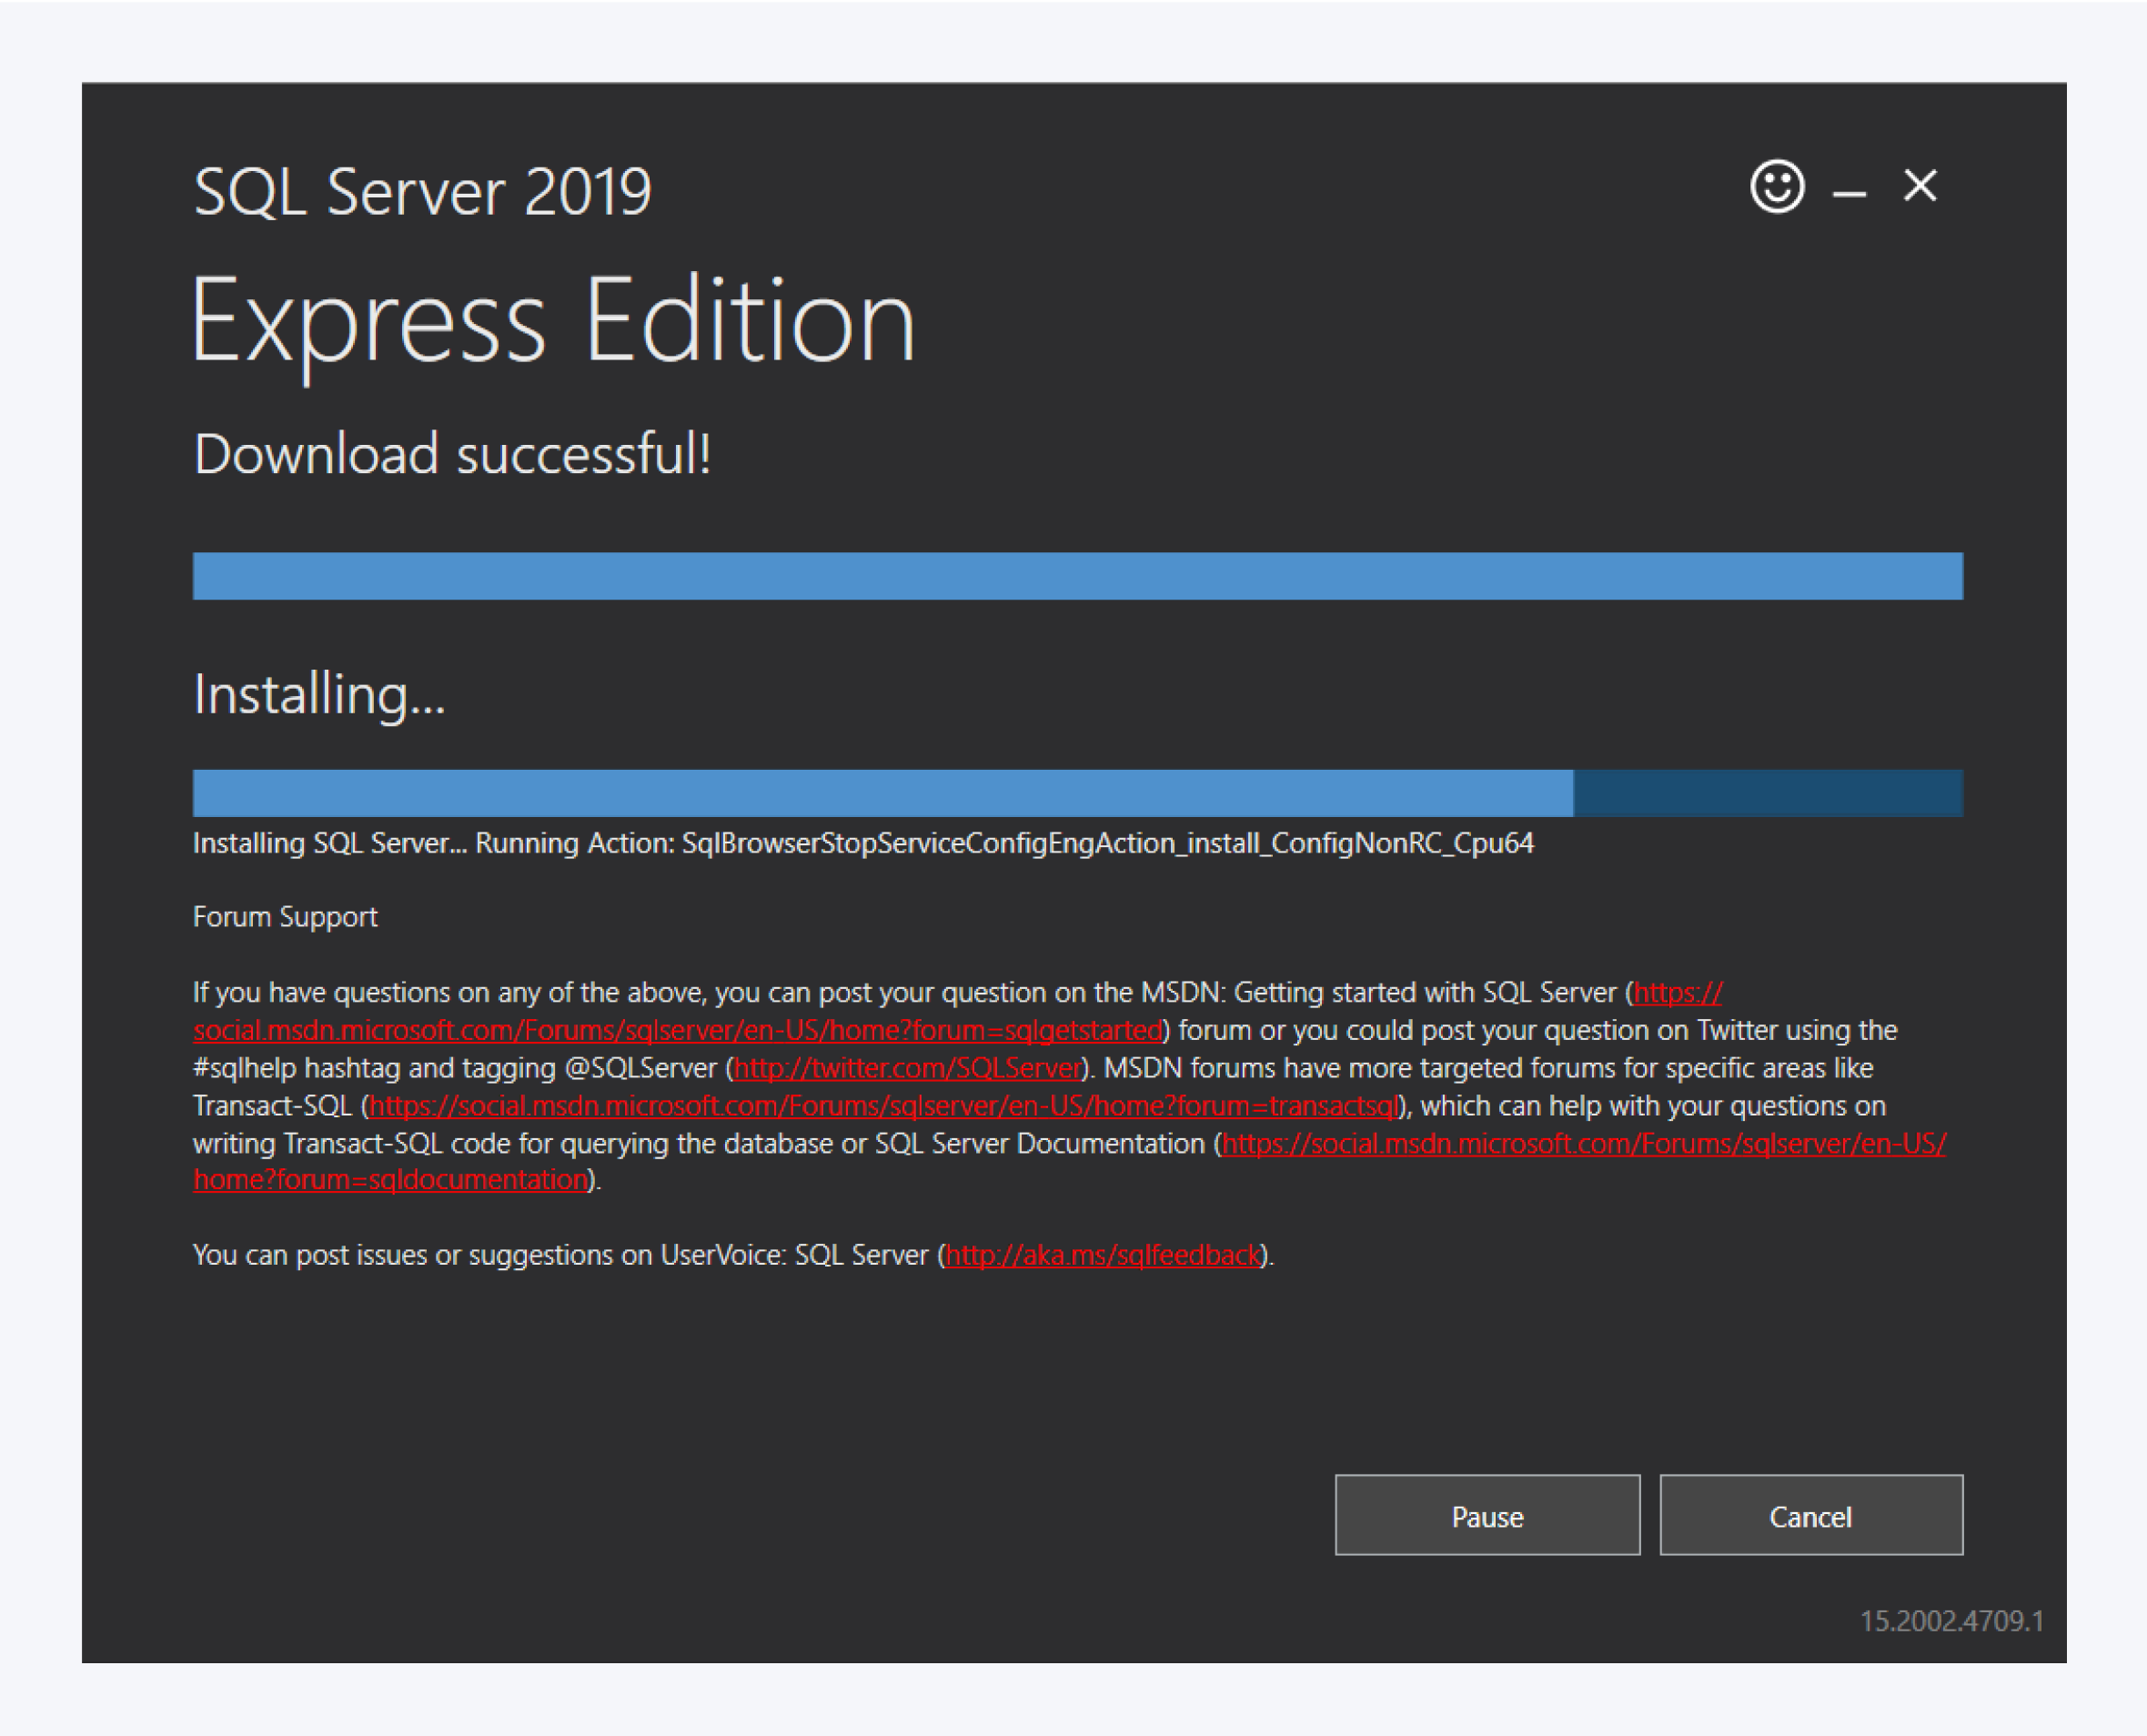
Follow the installation procedure. Confirm the license agreement and select your installation path.
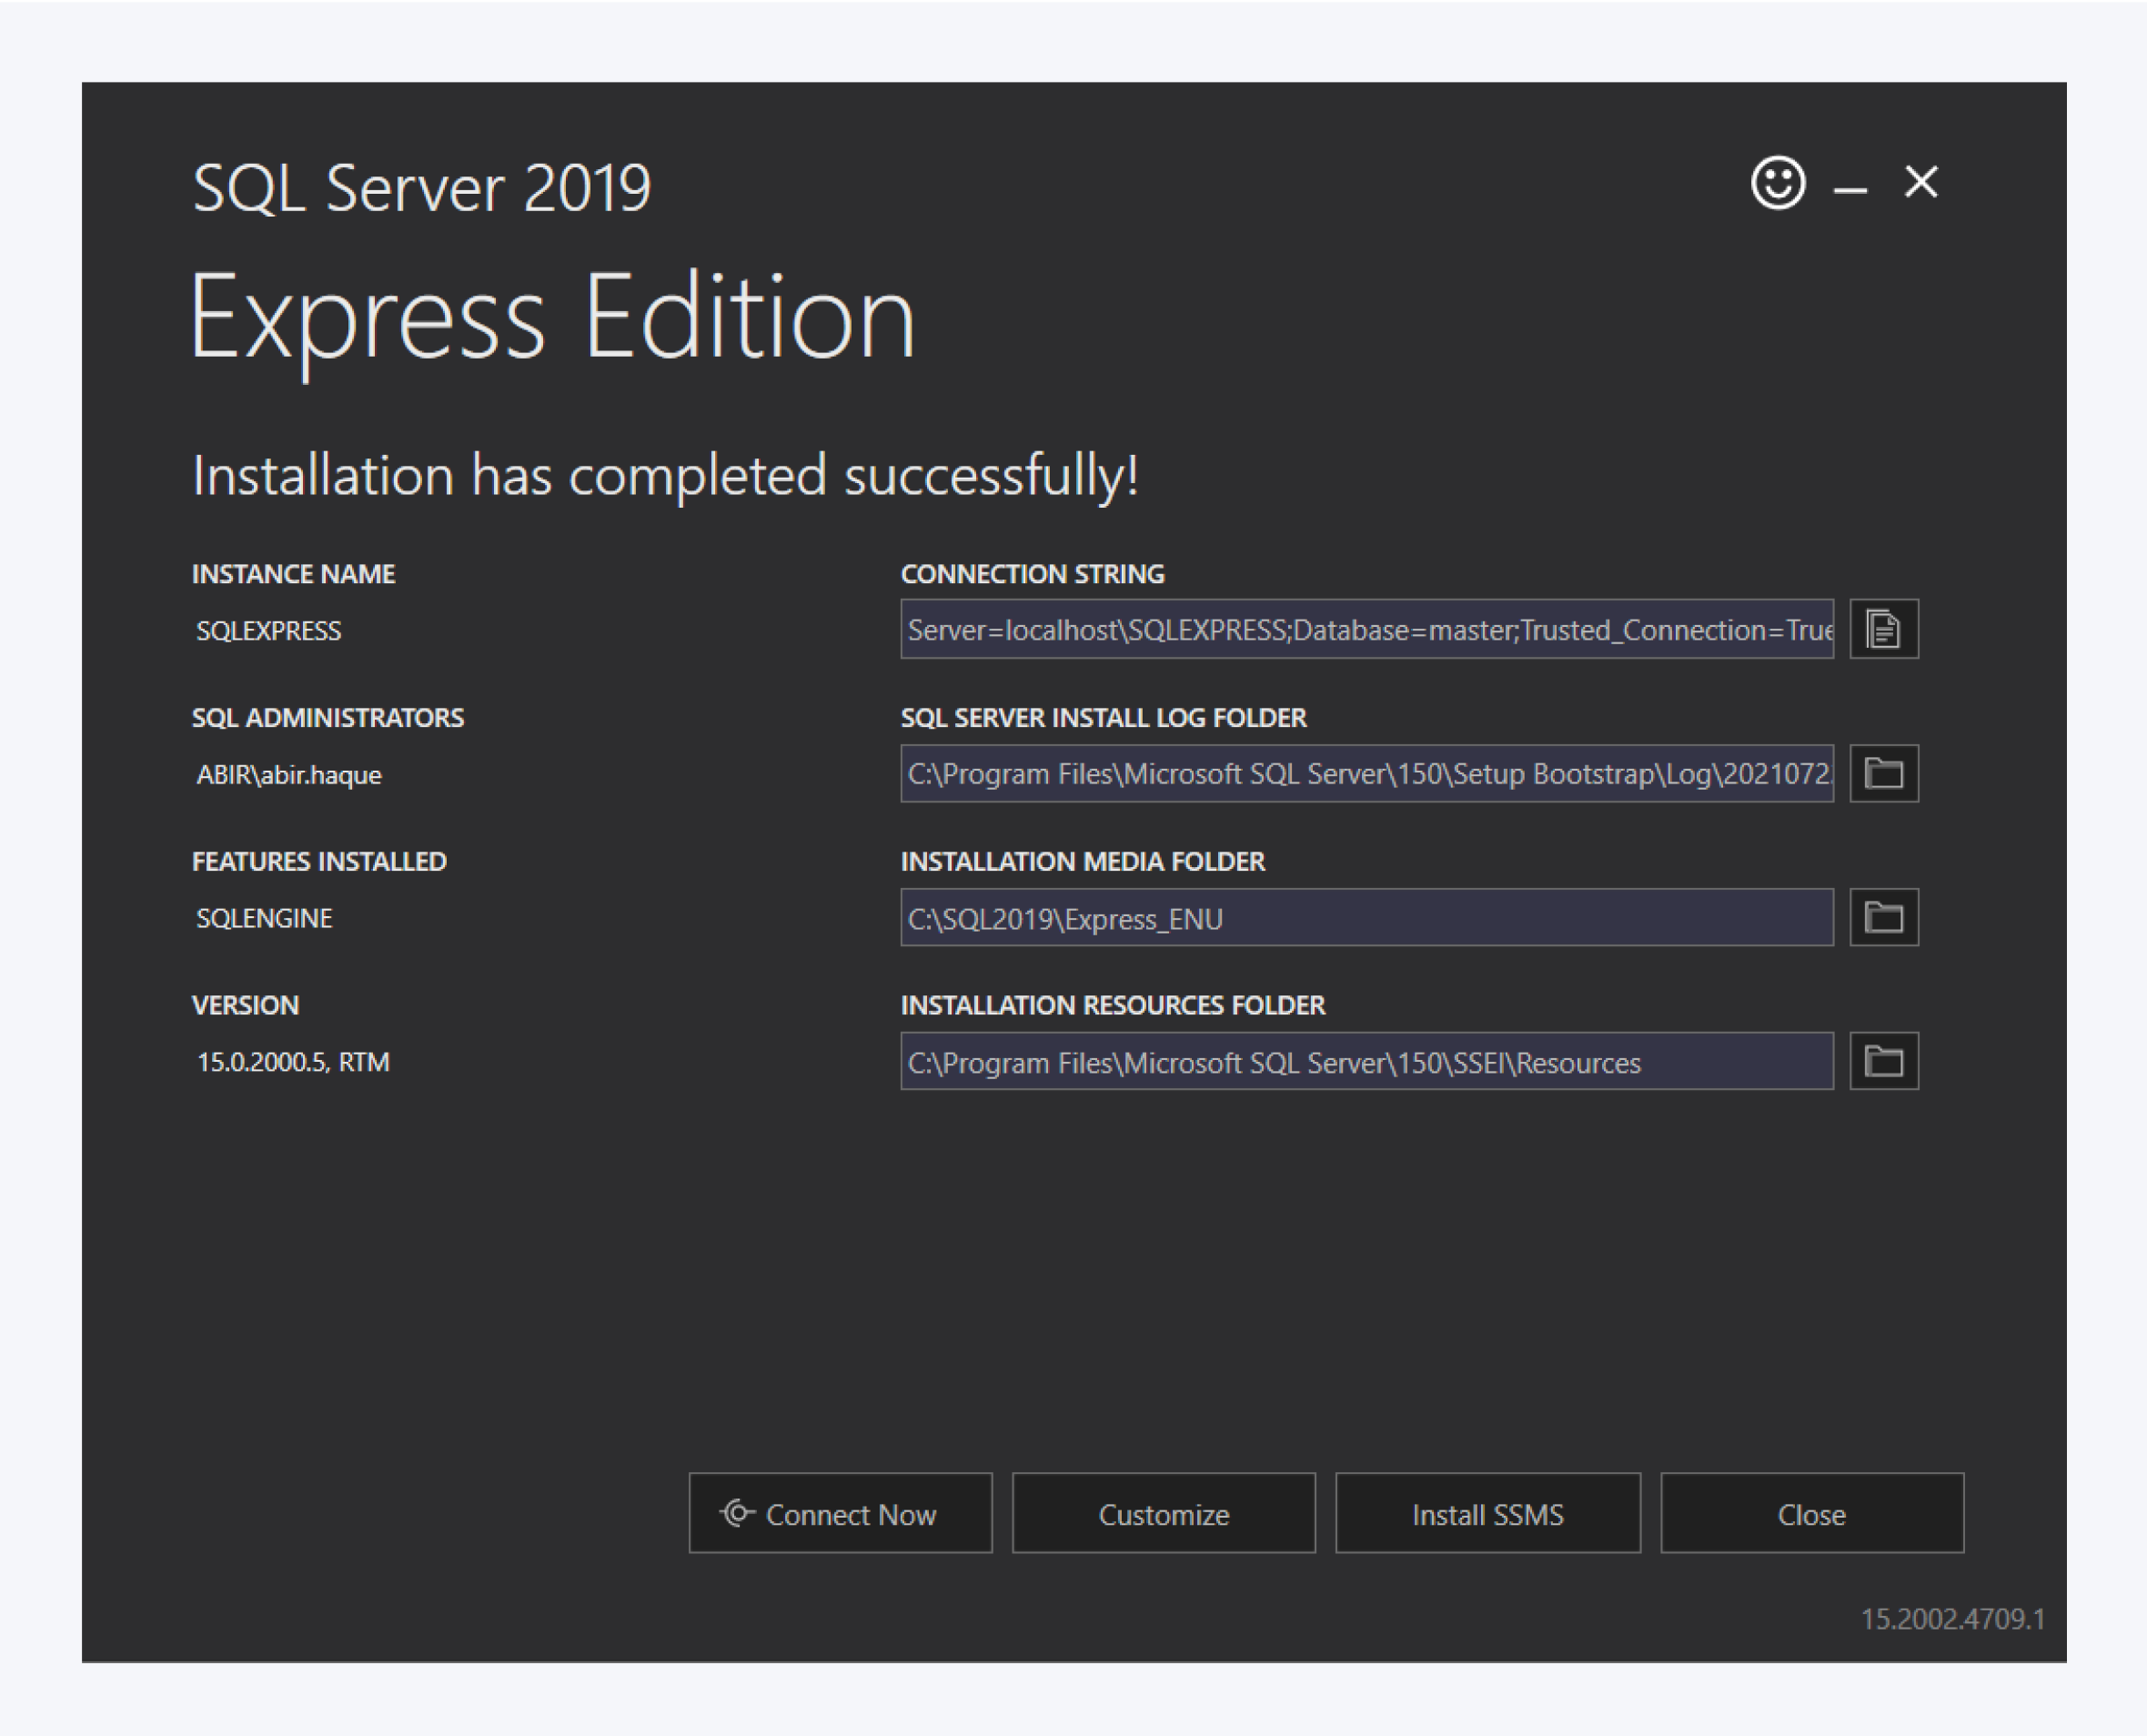
Once the installation is complete, you should now install the SQL Server Management Studio.
You can download it by clicking on the Install SSMS option or use the link provided in the Resources section of this page.
Install SQL Server Management Studio
Run the downloaded file SSMS-Setup-ENU.exe and follow the instructions of the installation wizard.
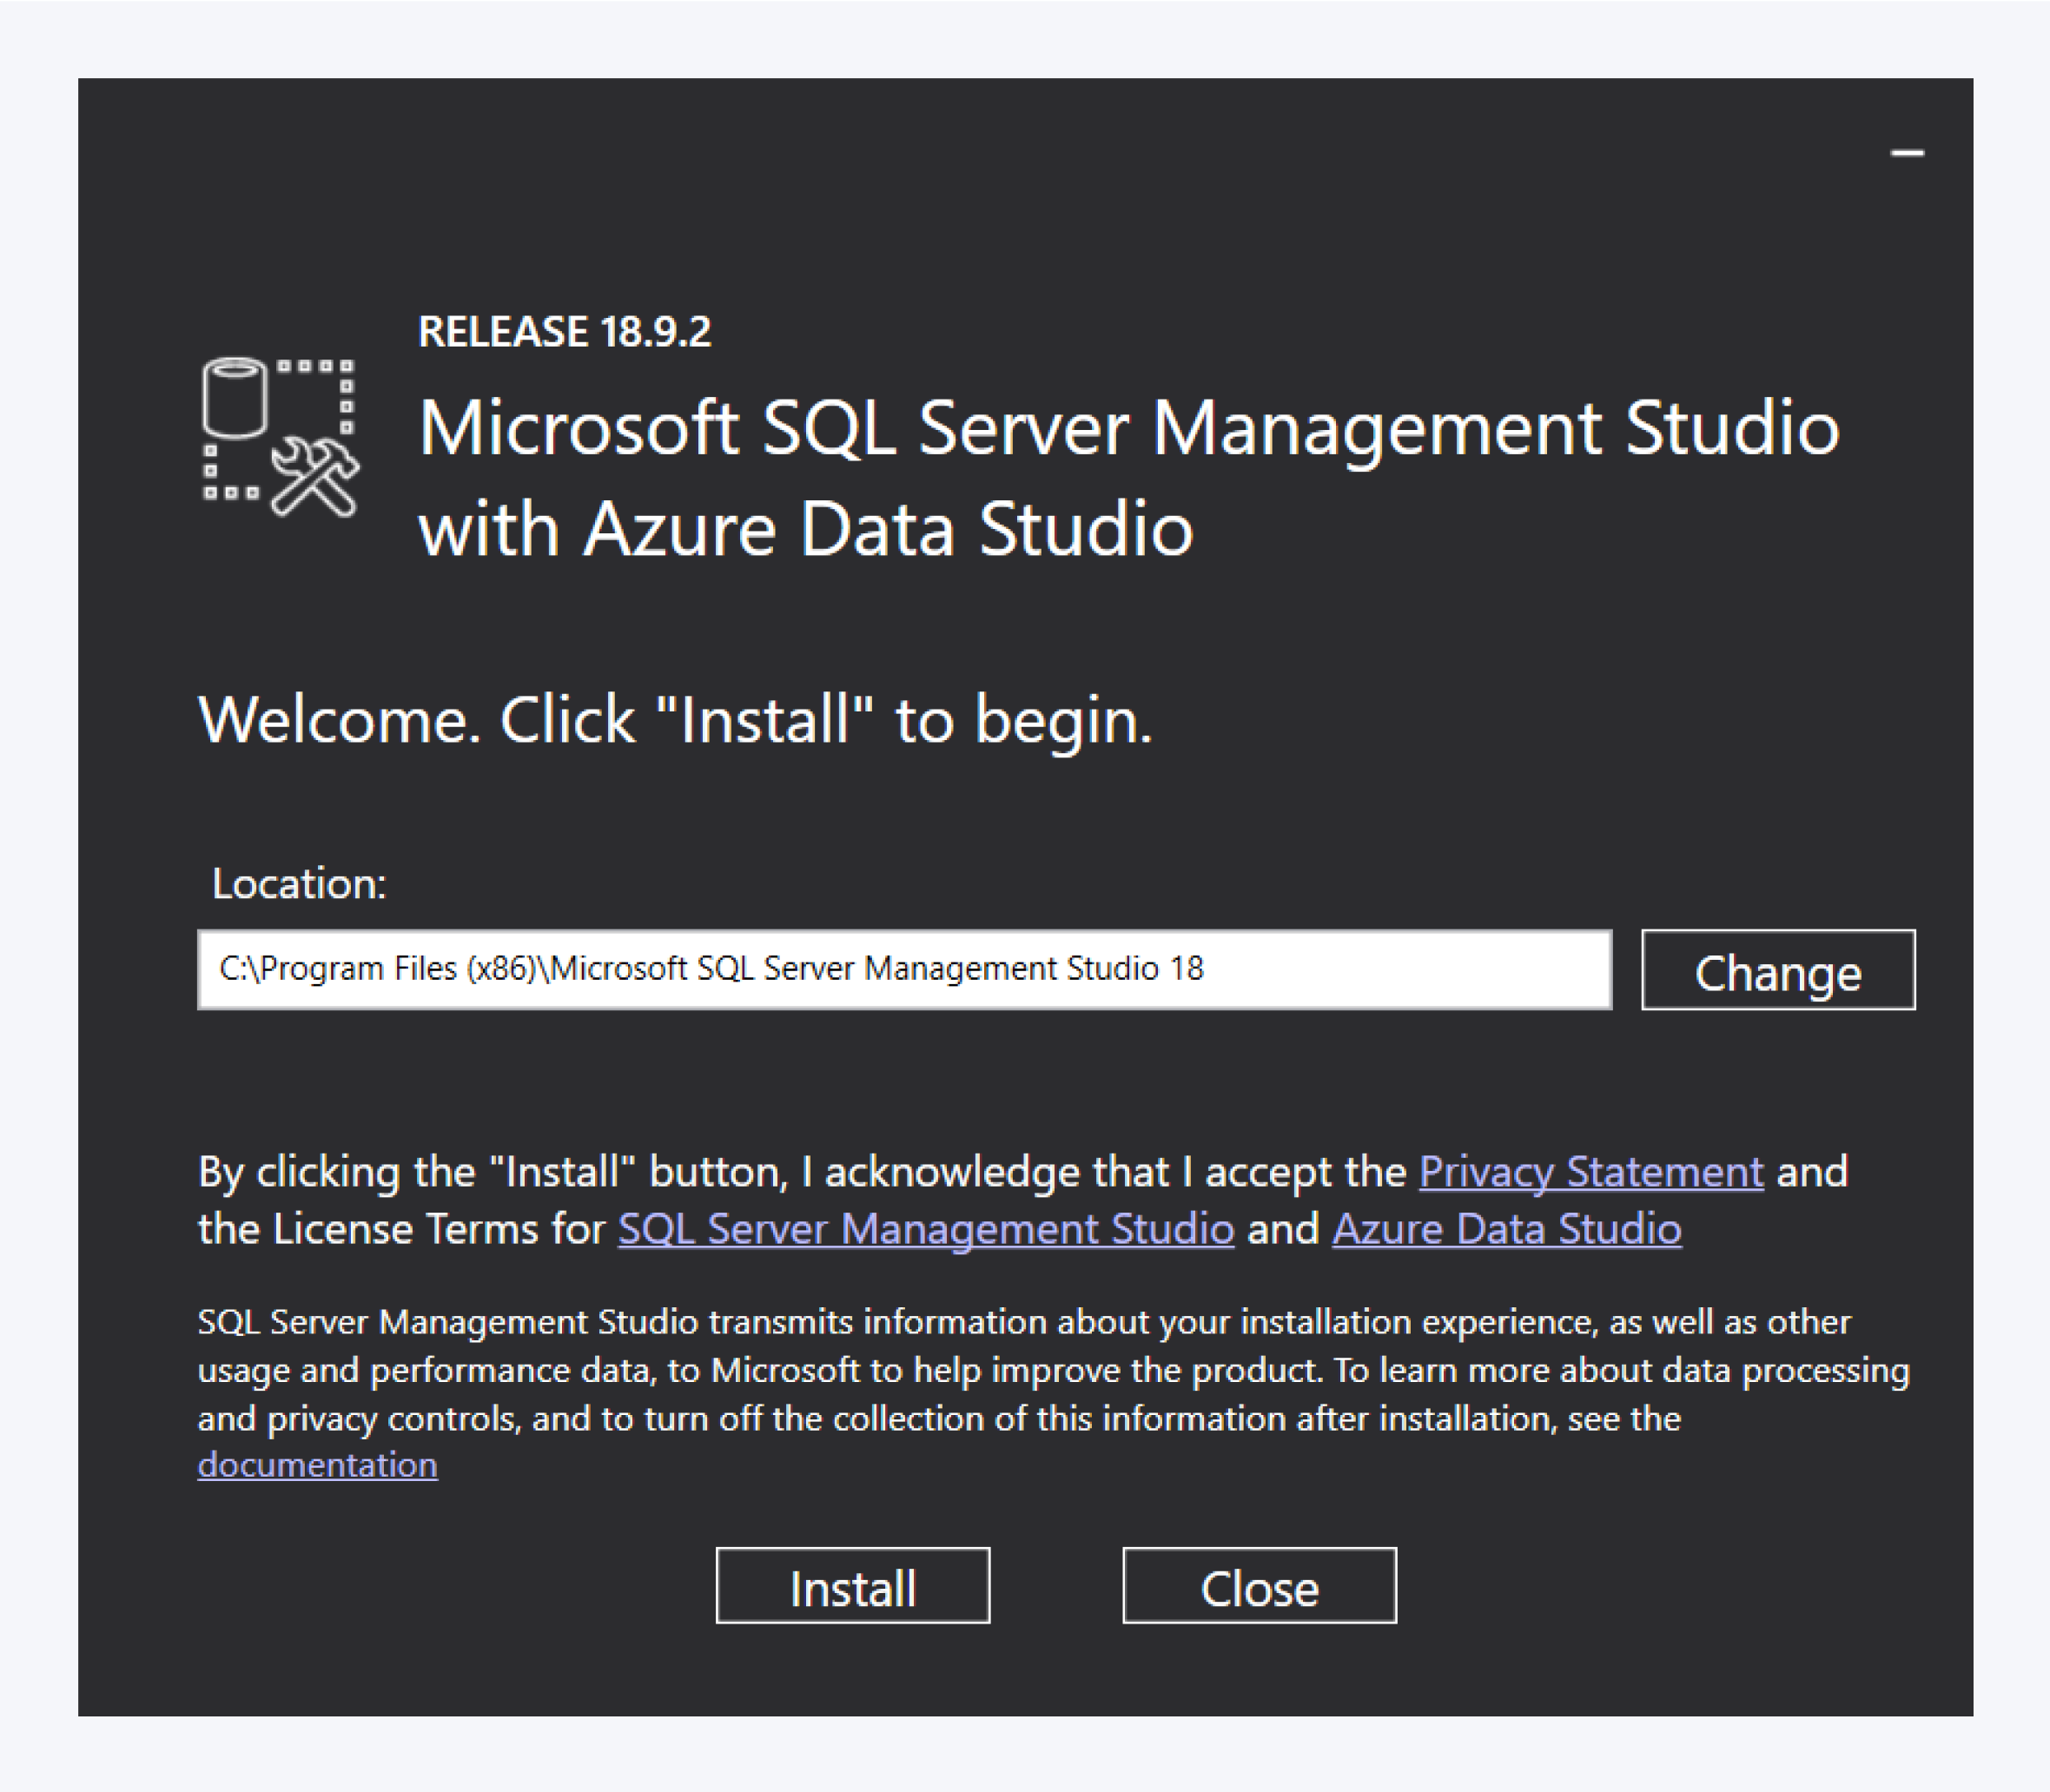
Select your installation location and click on Install to continue the installation process.
You might need to restart your computer for the installation process to complete. Click on Restart in the wizard if available.
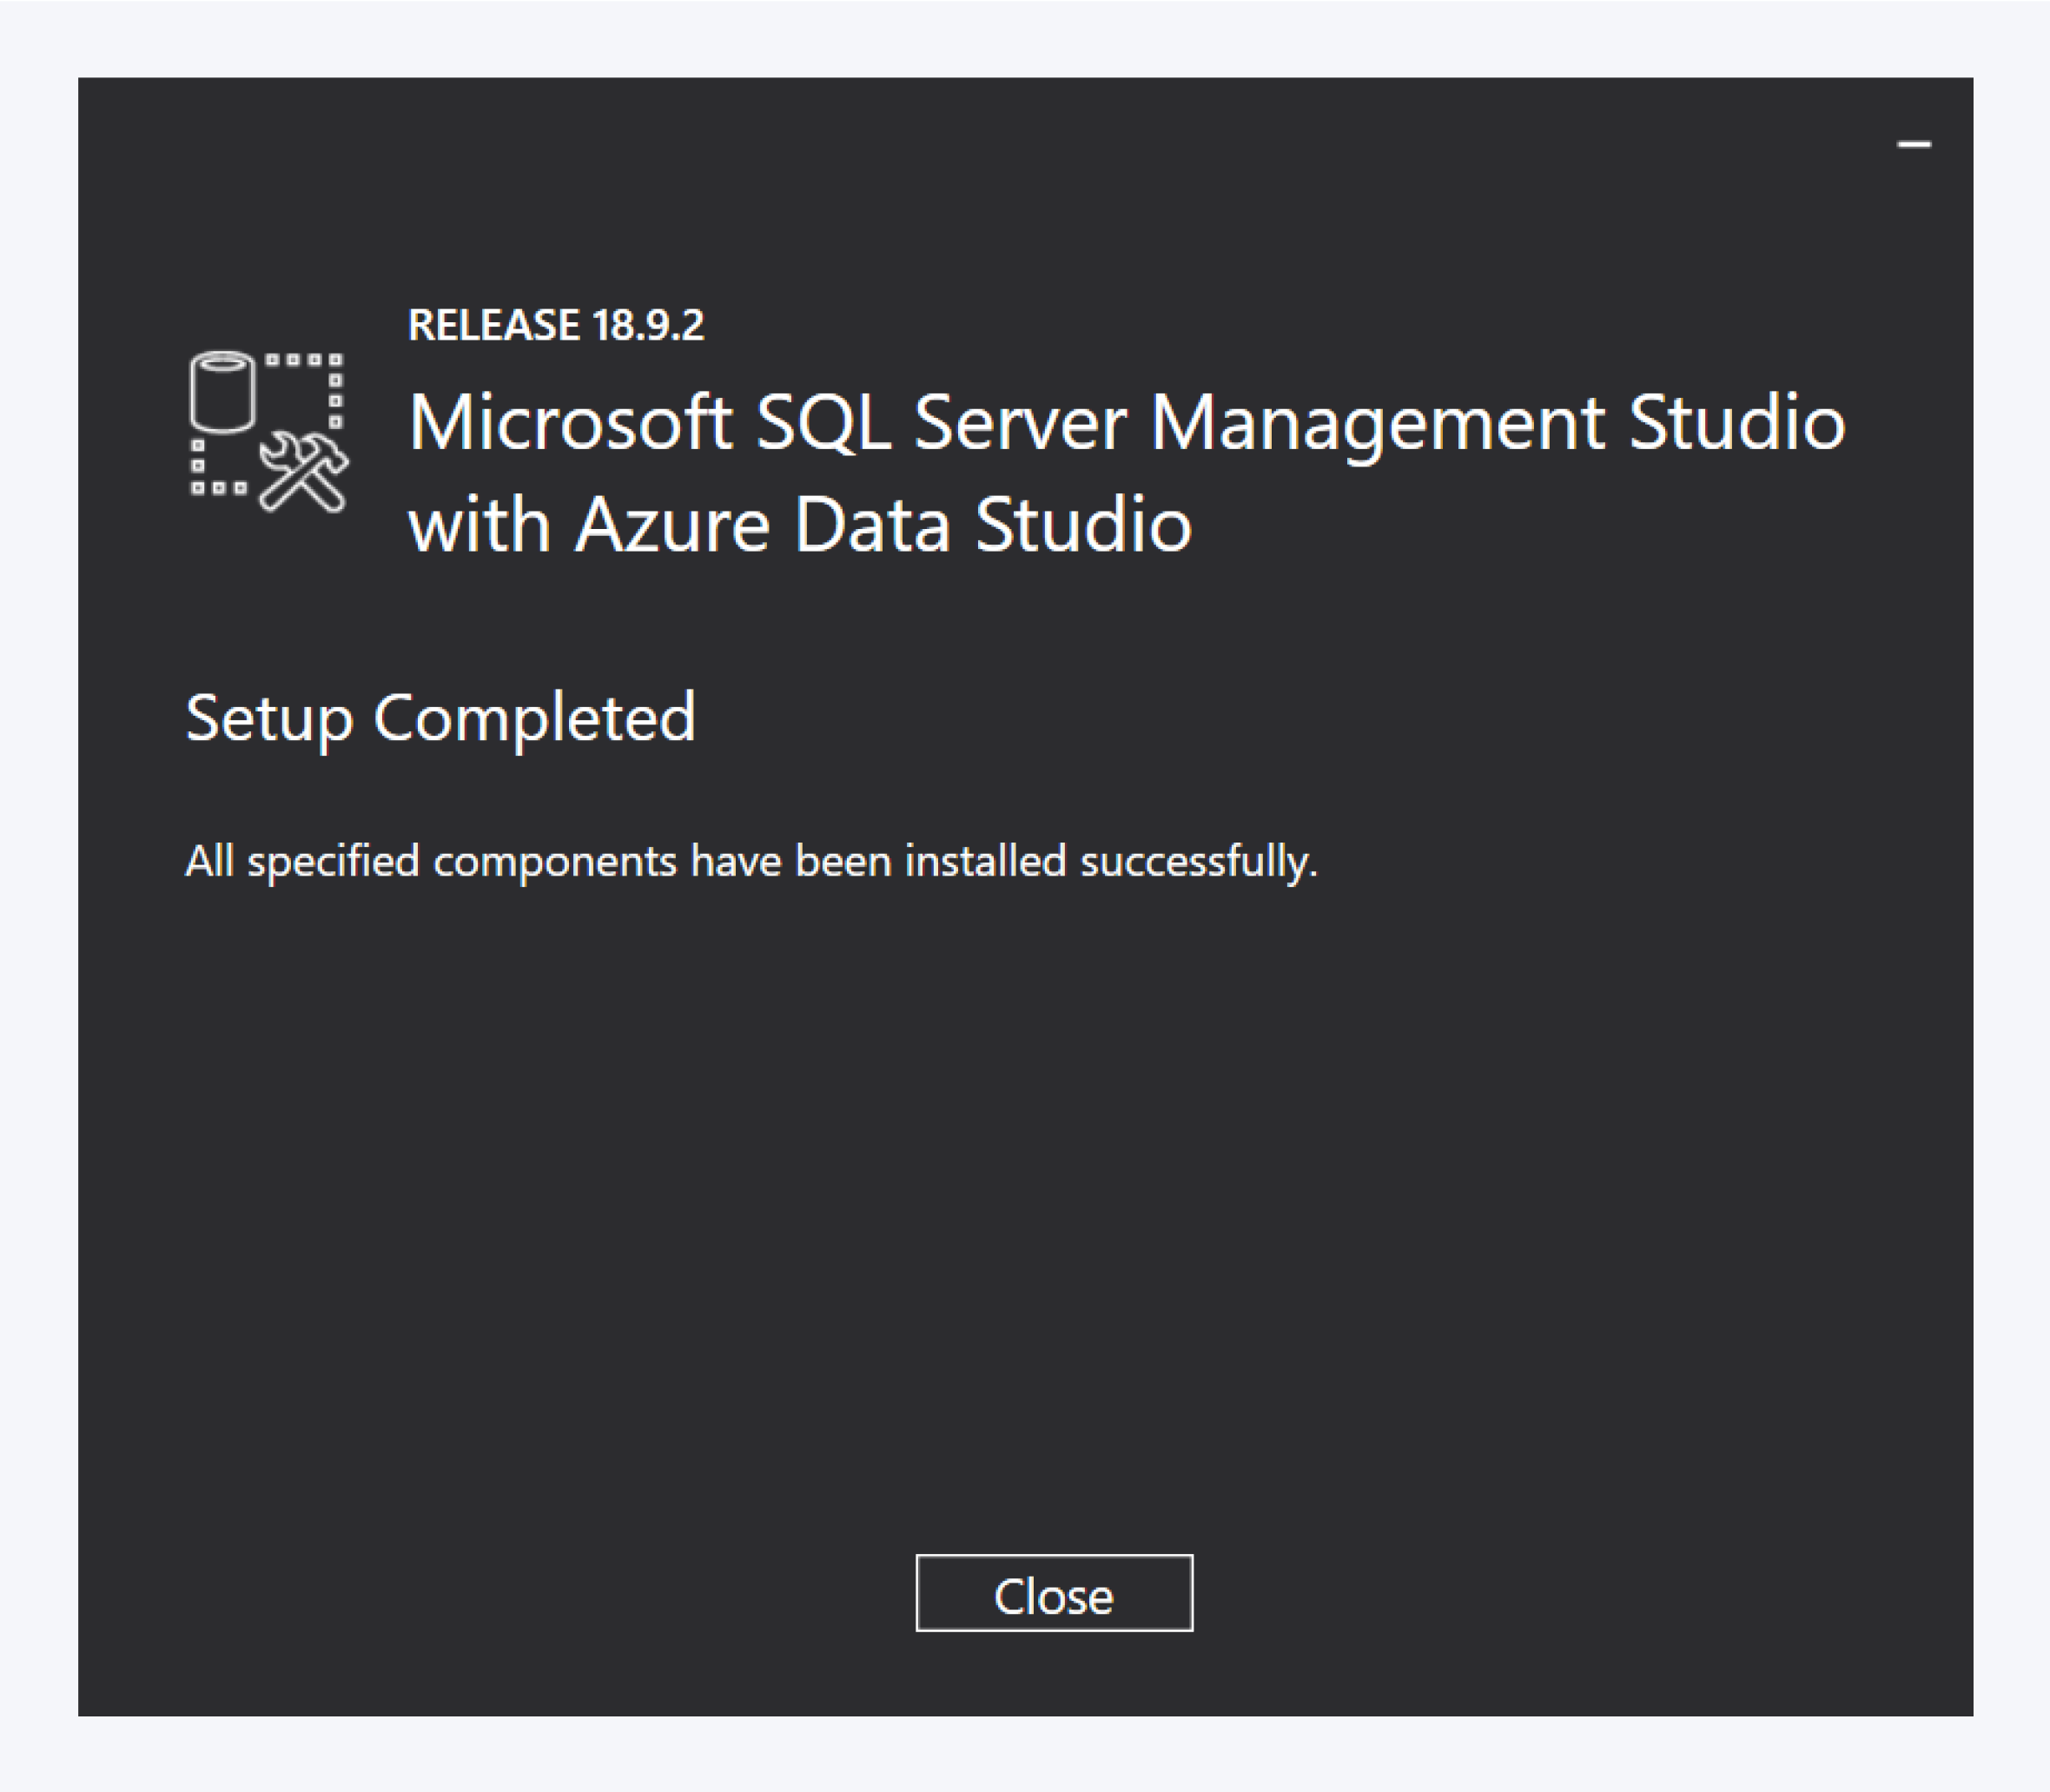
Once the installation is complete, you can close the wizard by clicking on Close.
Install ODBC driver
If you have installed Pathfinder on another PC (without installed SQL Server 2019), you should install the driver Microsoft® ODBC Driver for SQL Server® there.
In rare cases, when using Pathfinder, SQL Server error messages appear if the version of the ODBC does not match the SQL database version used.
If you want to check which version is on your computer, just follow the steps below:
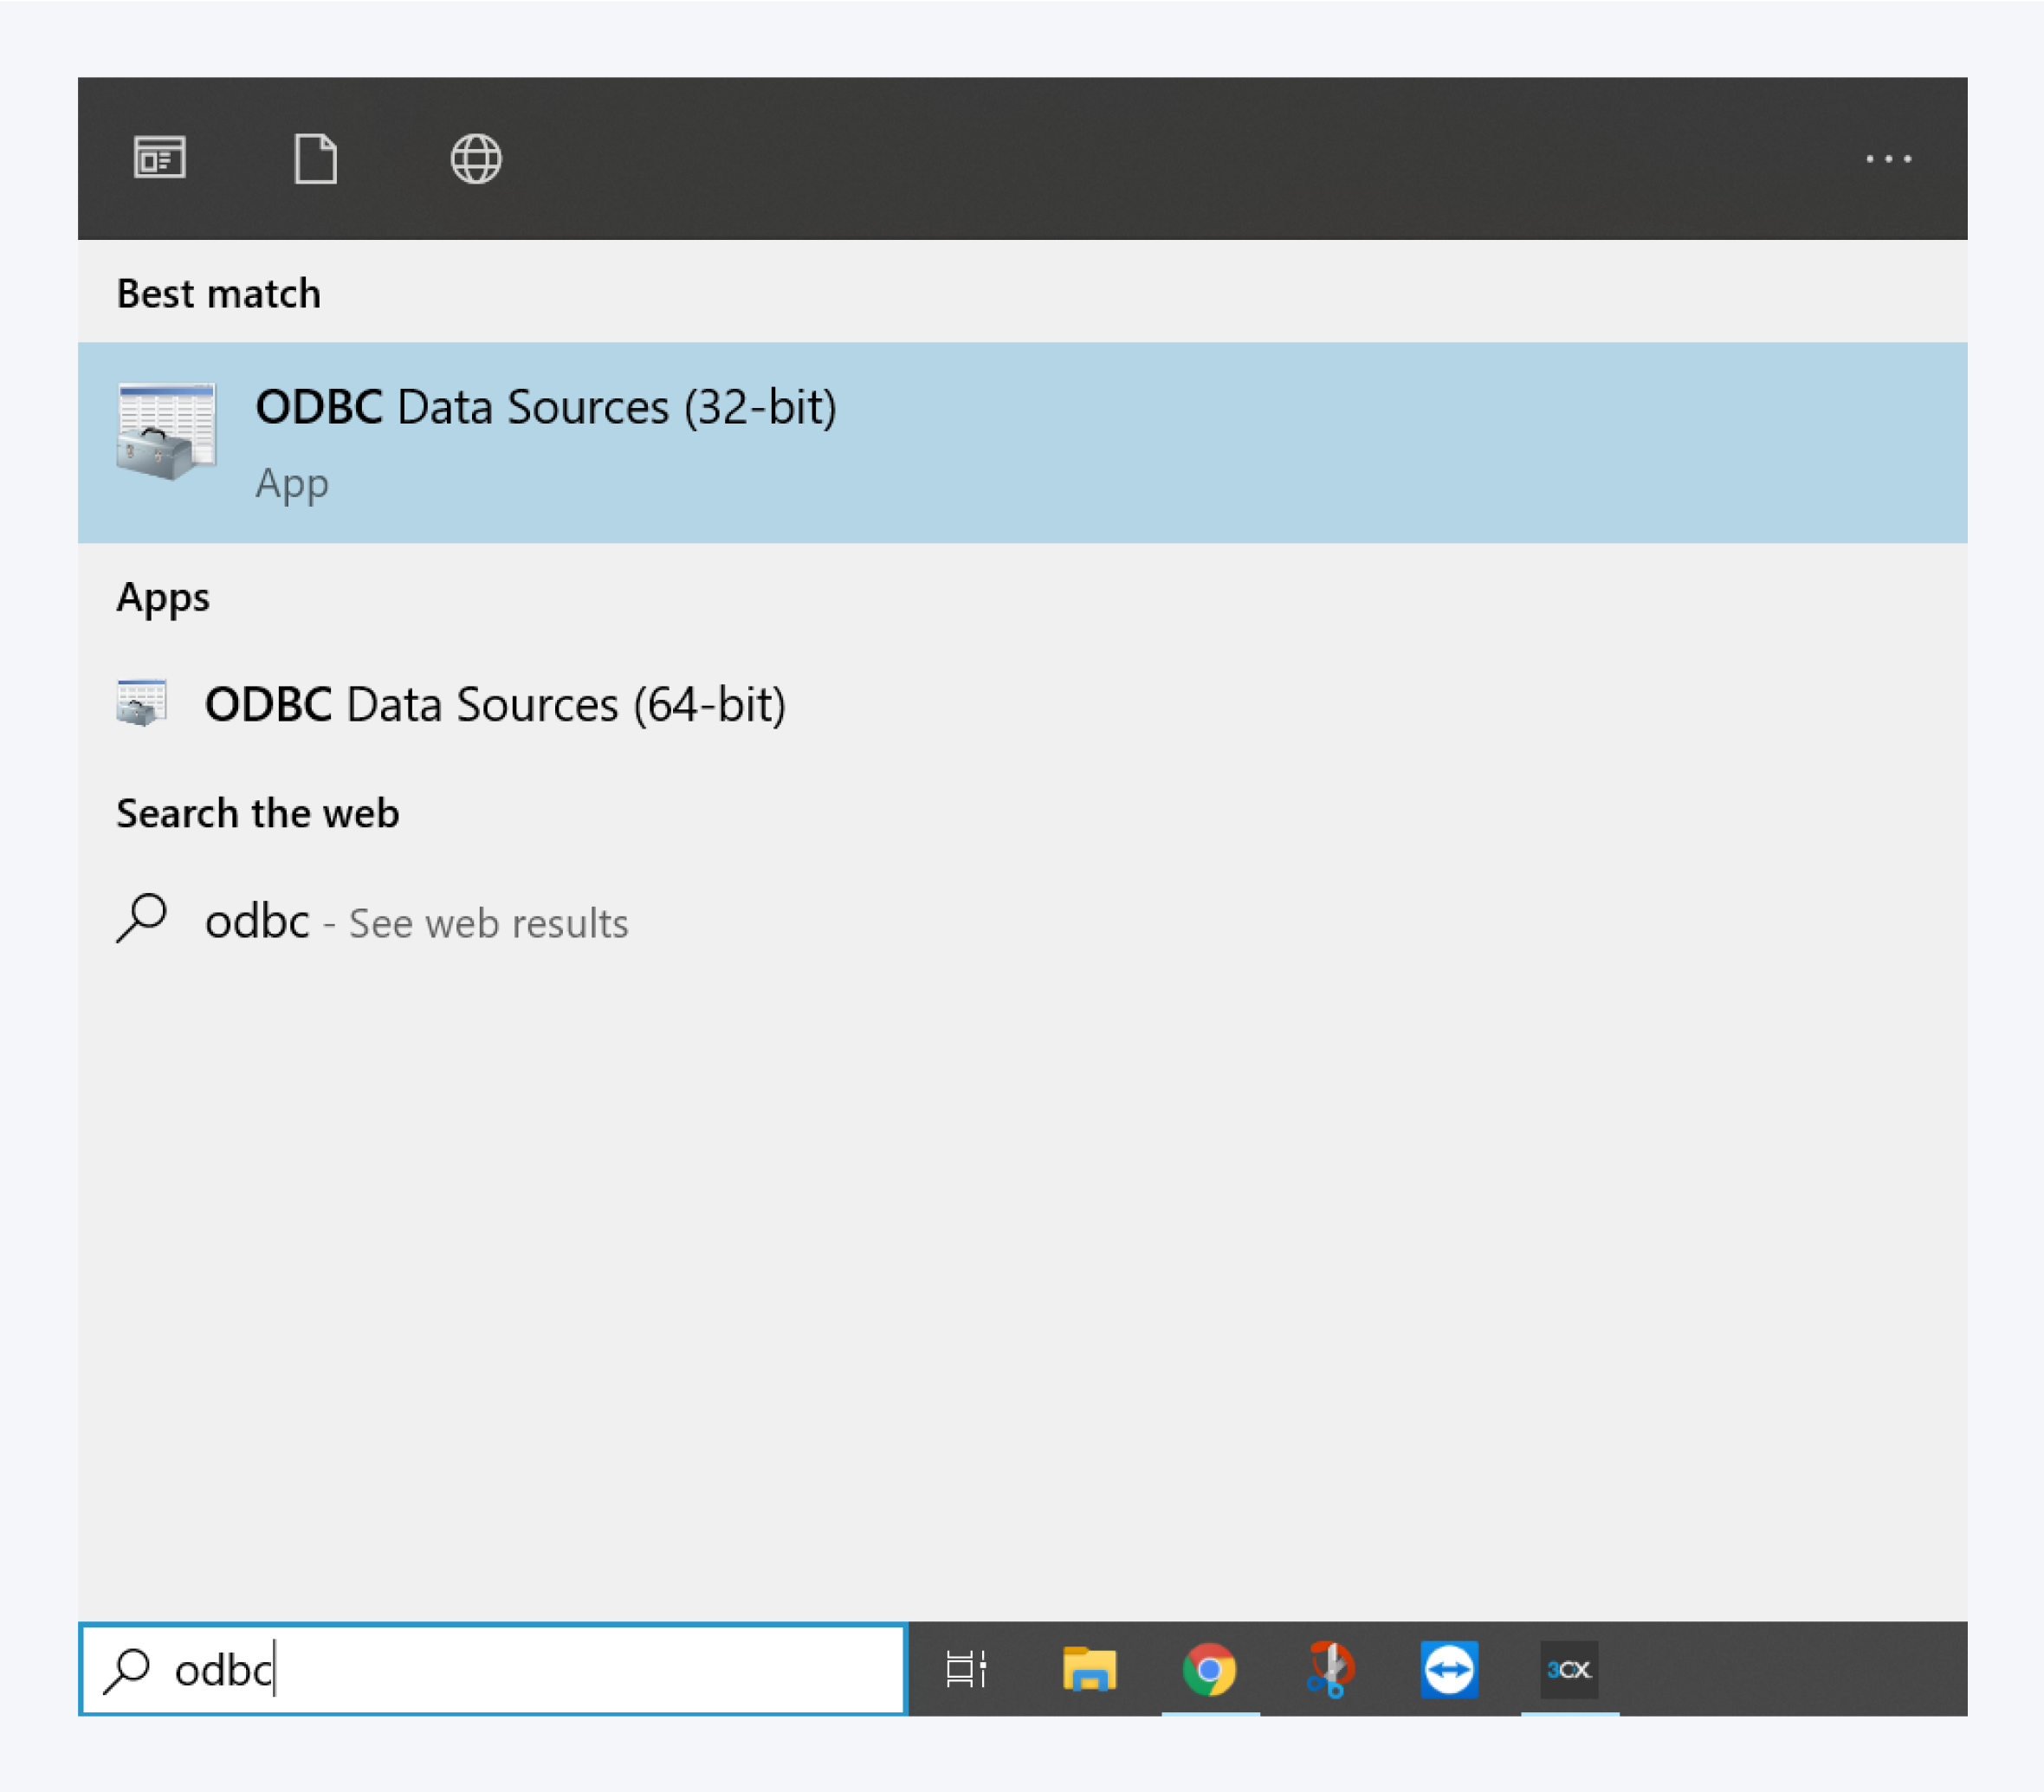
Press the Windows key and type in " ODBC ". Select the " ODBC data sources (32-bit) “
Alternatively, you can enter the following line in the address bar of File Explorer:
% windir% \ system32 \ odbcad32.exe
and press ENTER.
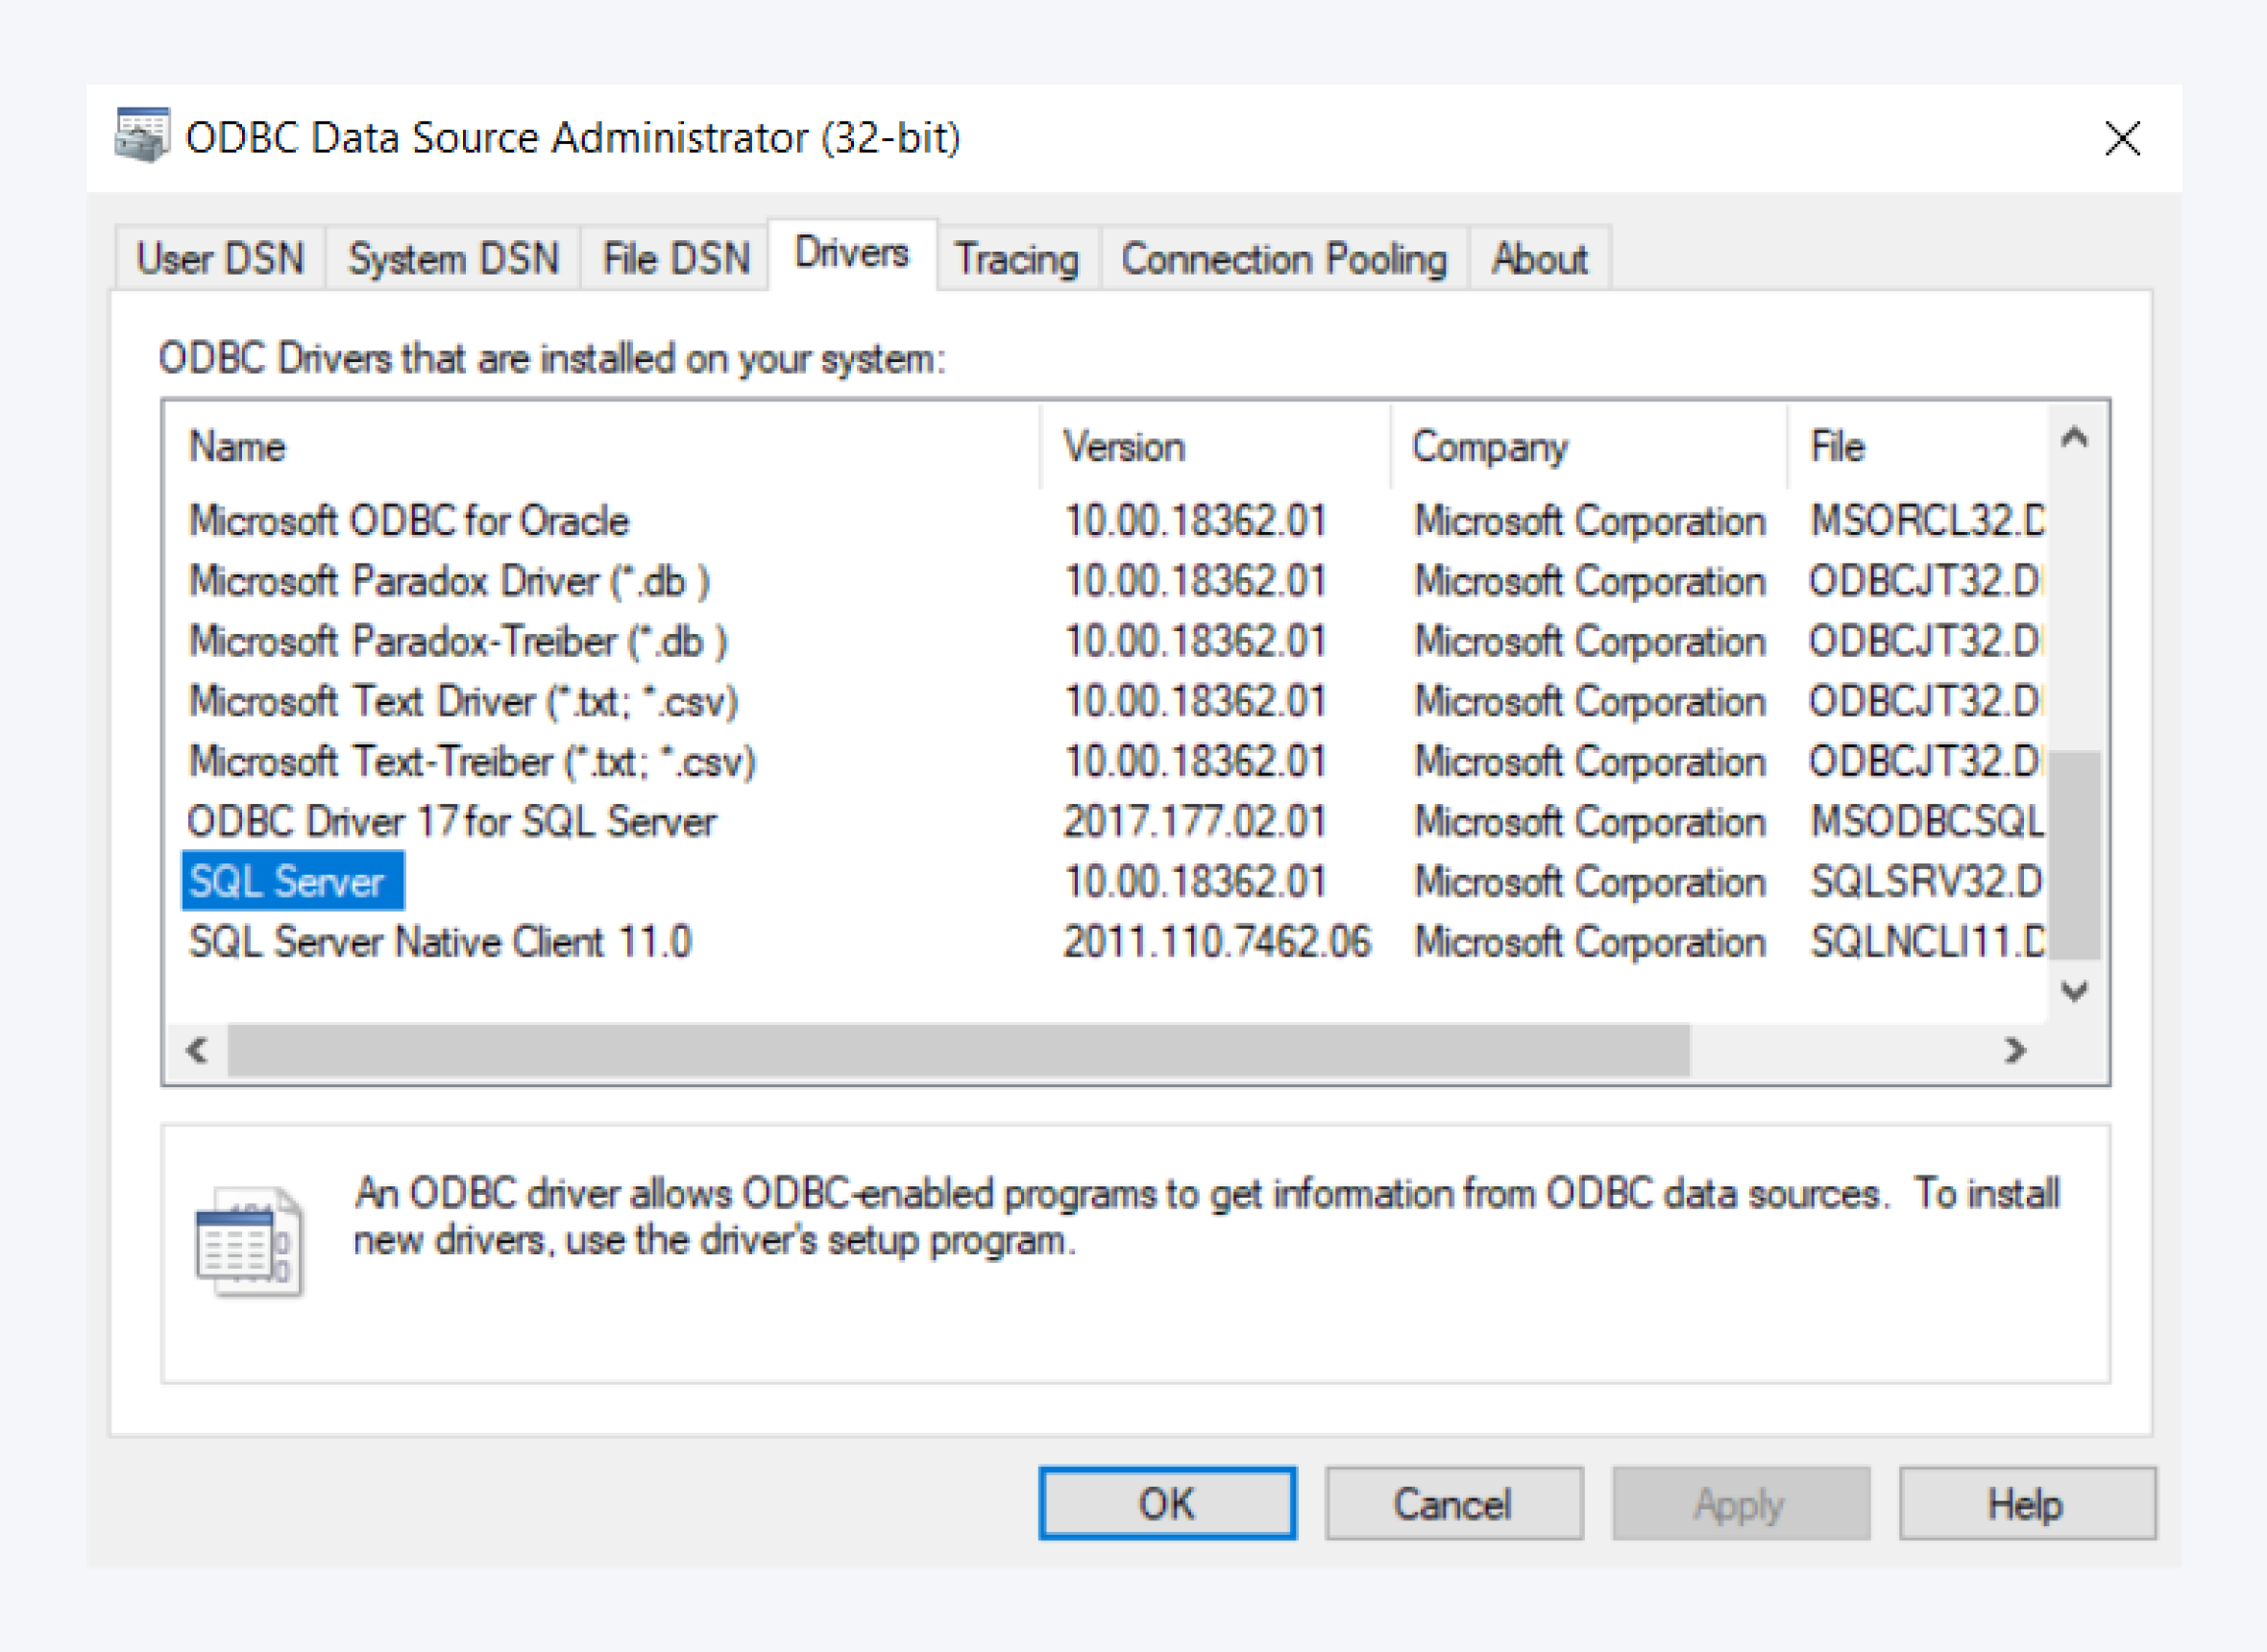
Navigate to the Drivers tab and check the version under the version column.
Configuration of SQL Server
SQL Server Configuration Manager
The TCP / IP ports must be activated for all protocols. Please check all nodes and their log areas.
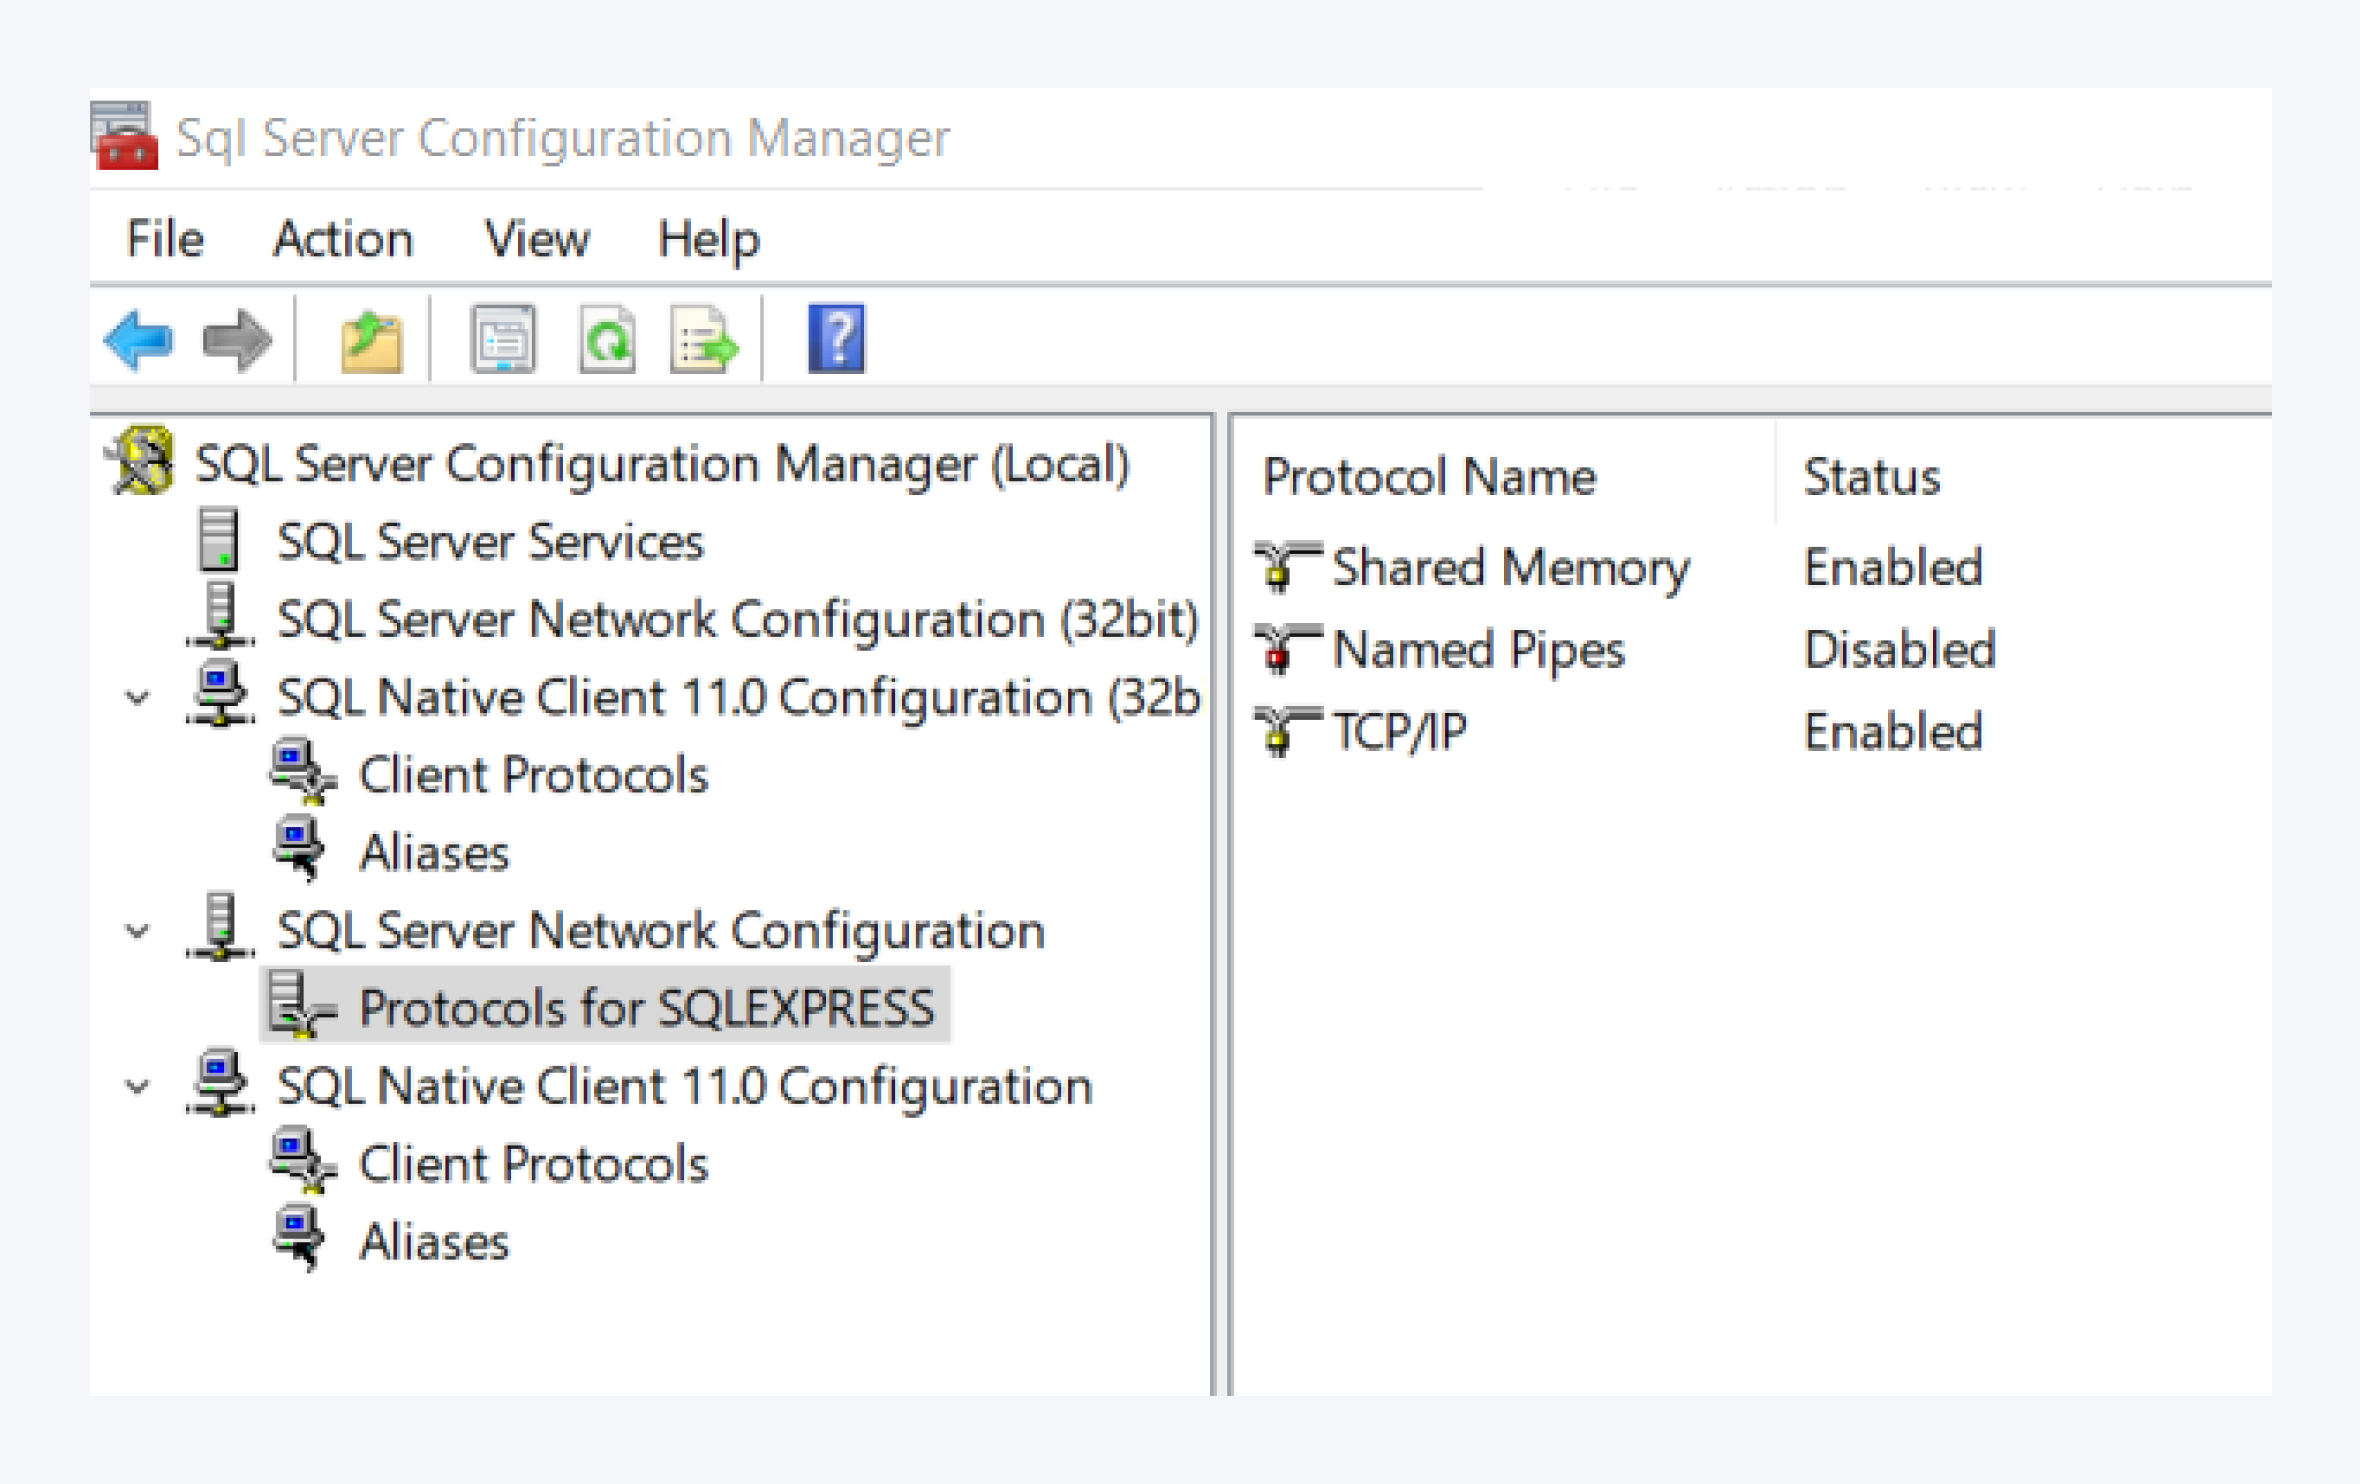
Open the SQL Server Configuration Manager.
Activate TCP / IP protocols of all nodes.
In particular, the " SQL Server Network Configuration " node and, below it, " Protocols for SQLEXPRESS " must be activated.
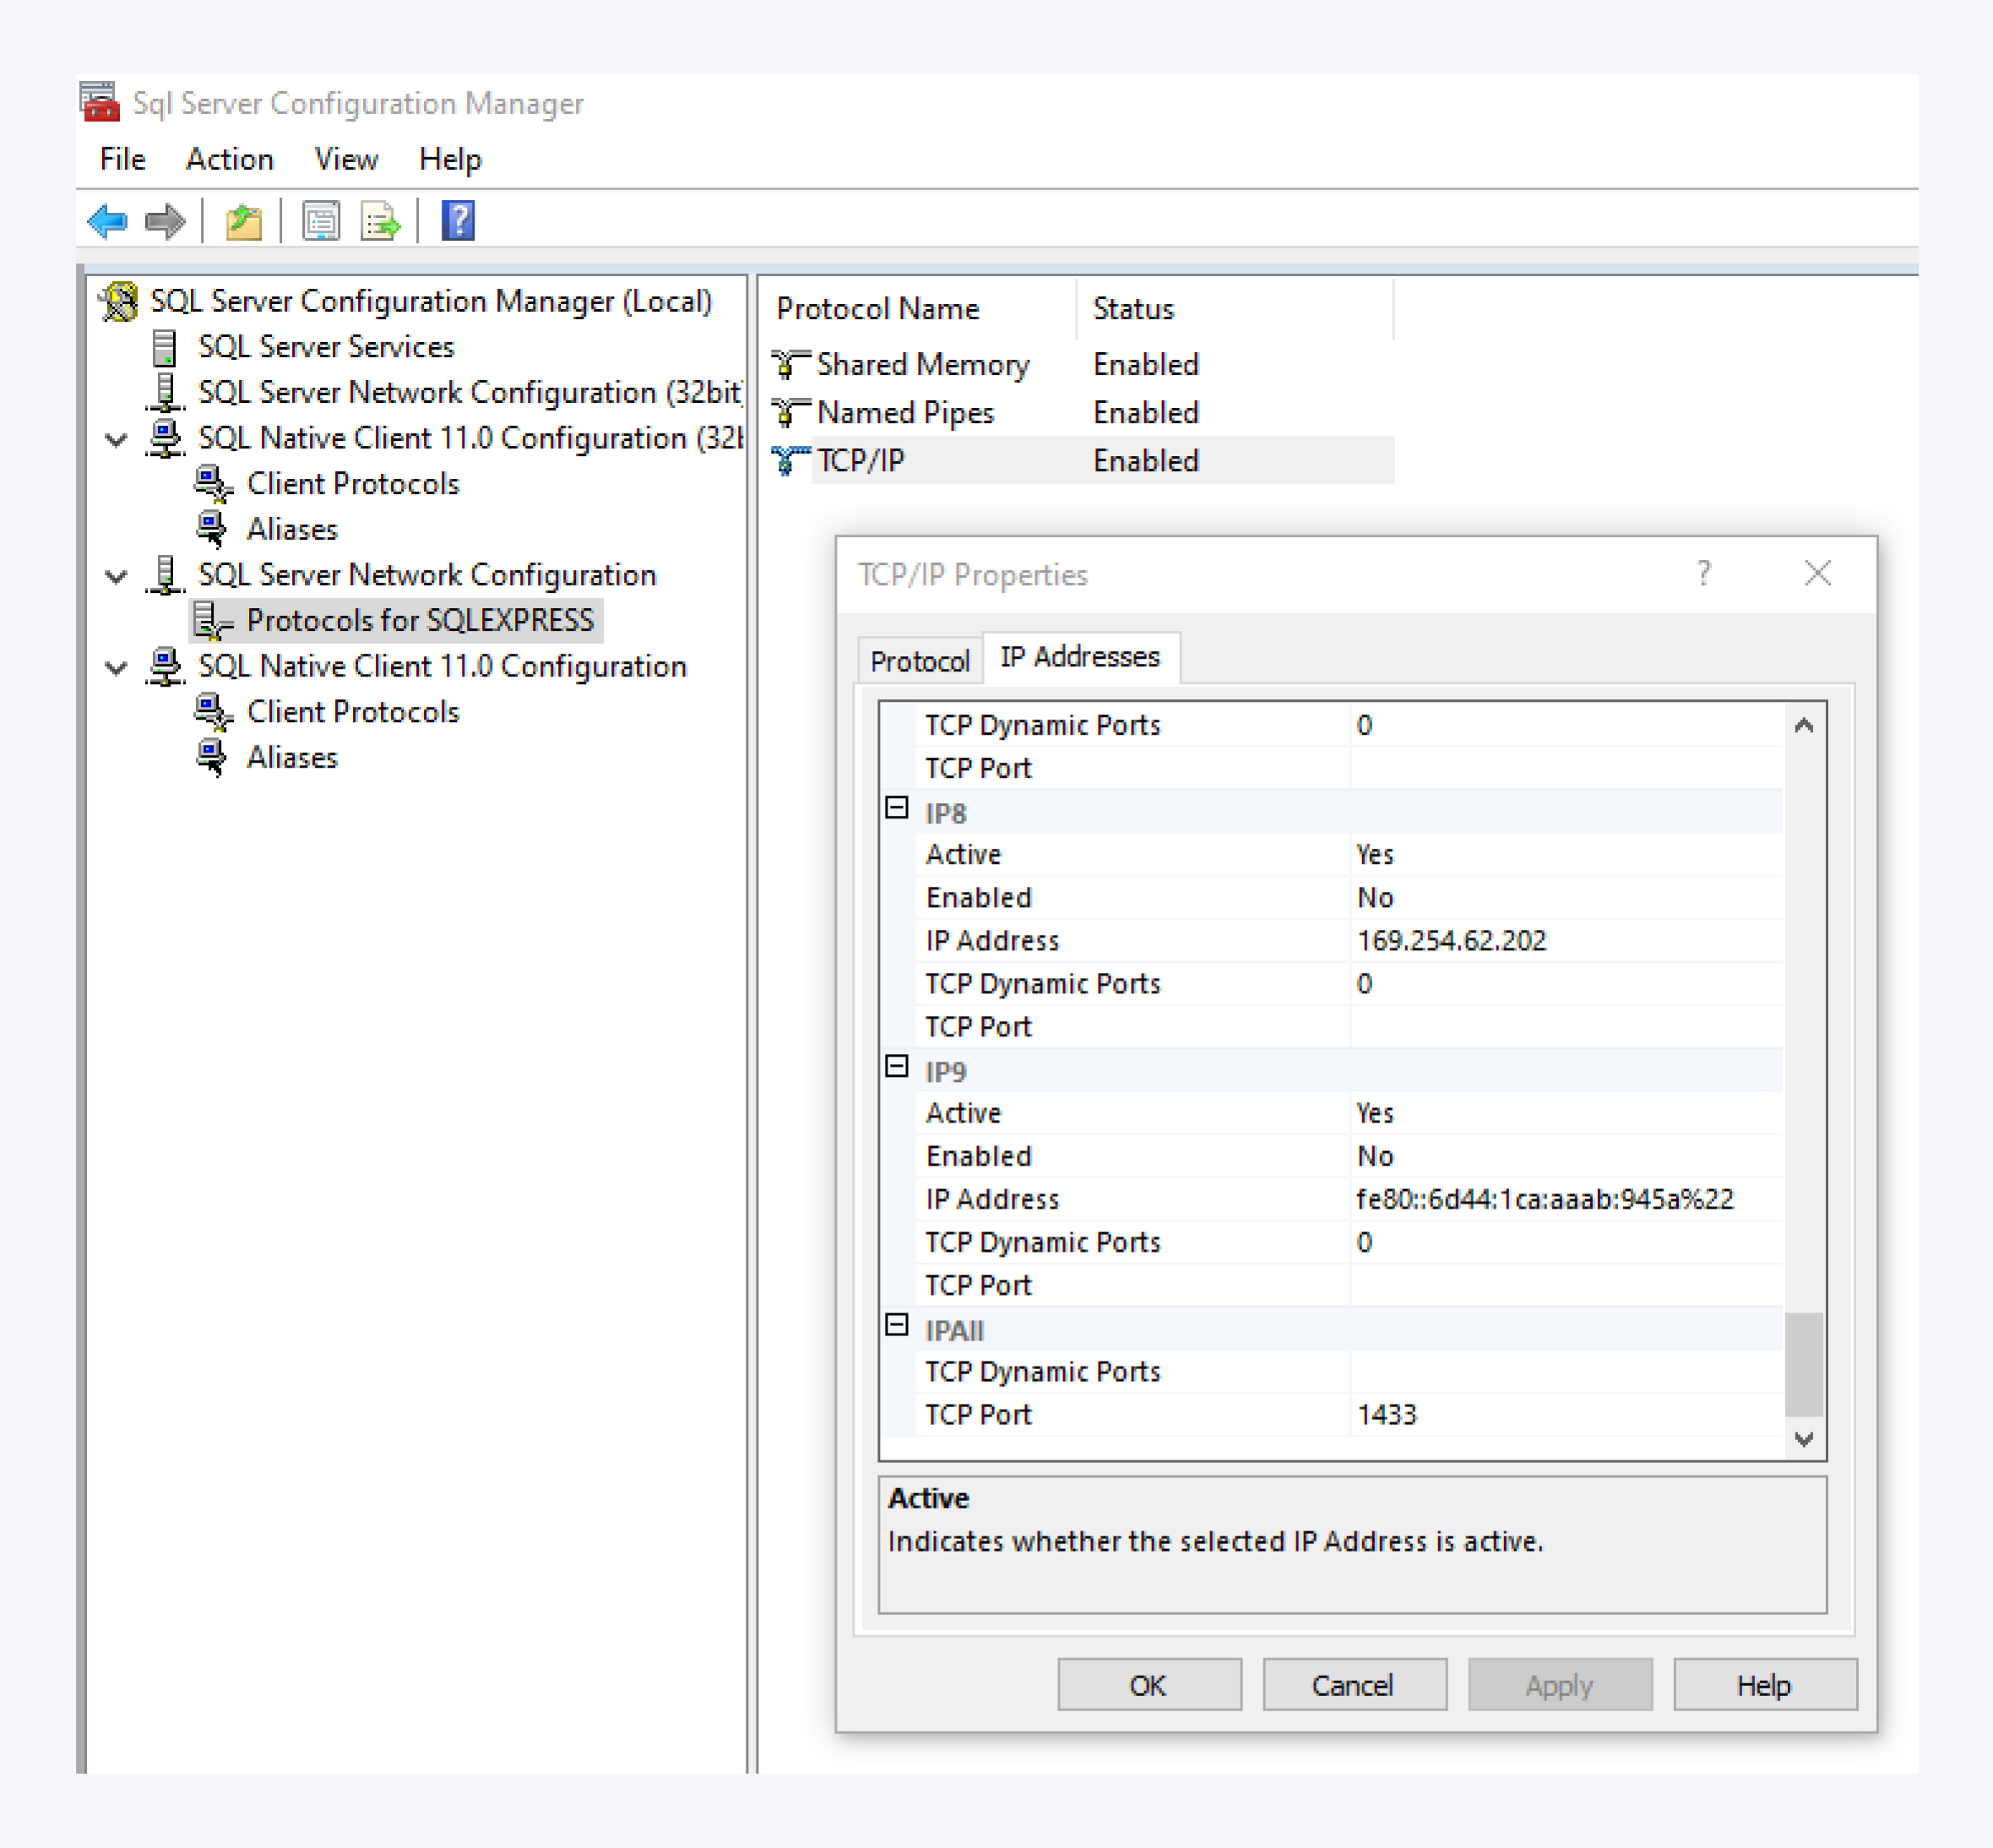
In the Protocols for SQLEXPRESS double click on TCP/IP from the protocol name list and go to the IP Addresses tab.
Scroll down all the way to the bottom and place 1433 as the TCP Port.
Please make sure to delete any information in the TCP Dynamic Ports.
Click on OK.
You have to restart the service before the changes can take effect.
The SQL Server Management Studio

Open the Microsoft SQL Server Management Studio.
Right click on your main branch to open the context menu and open properties.
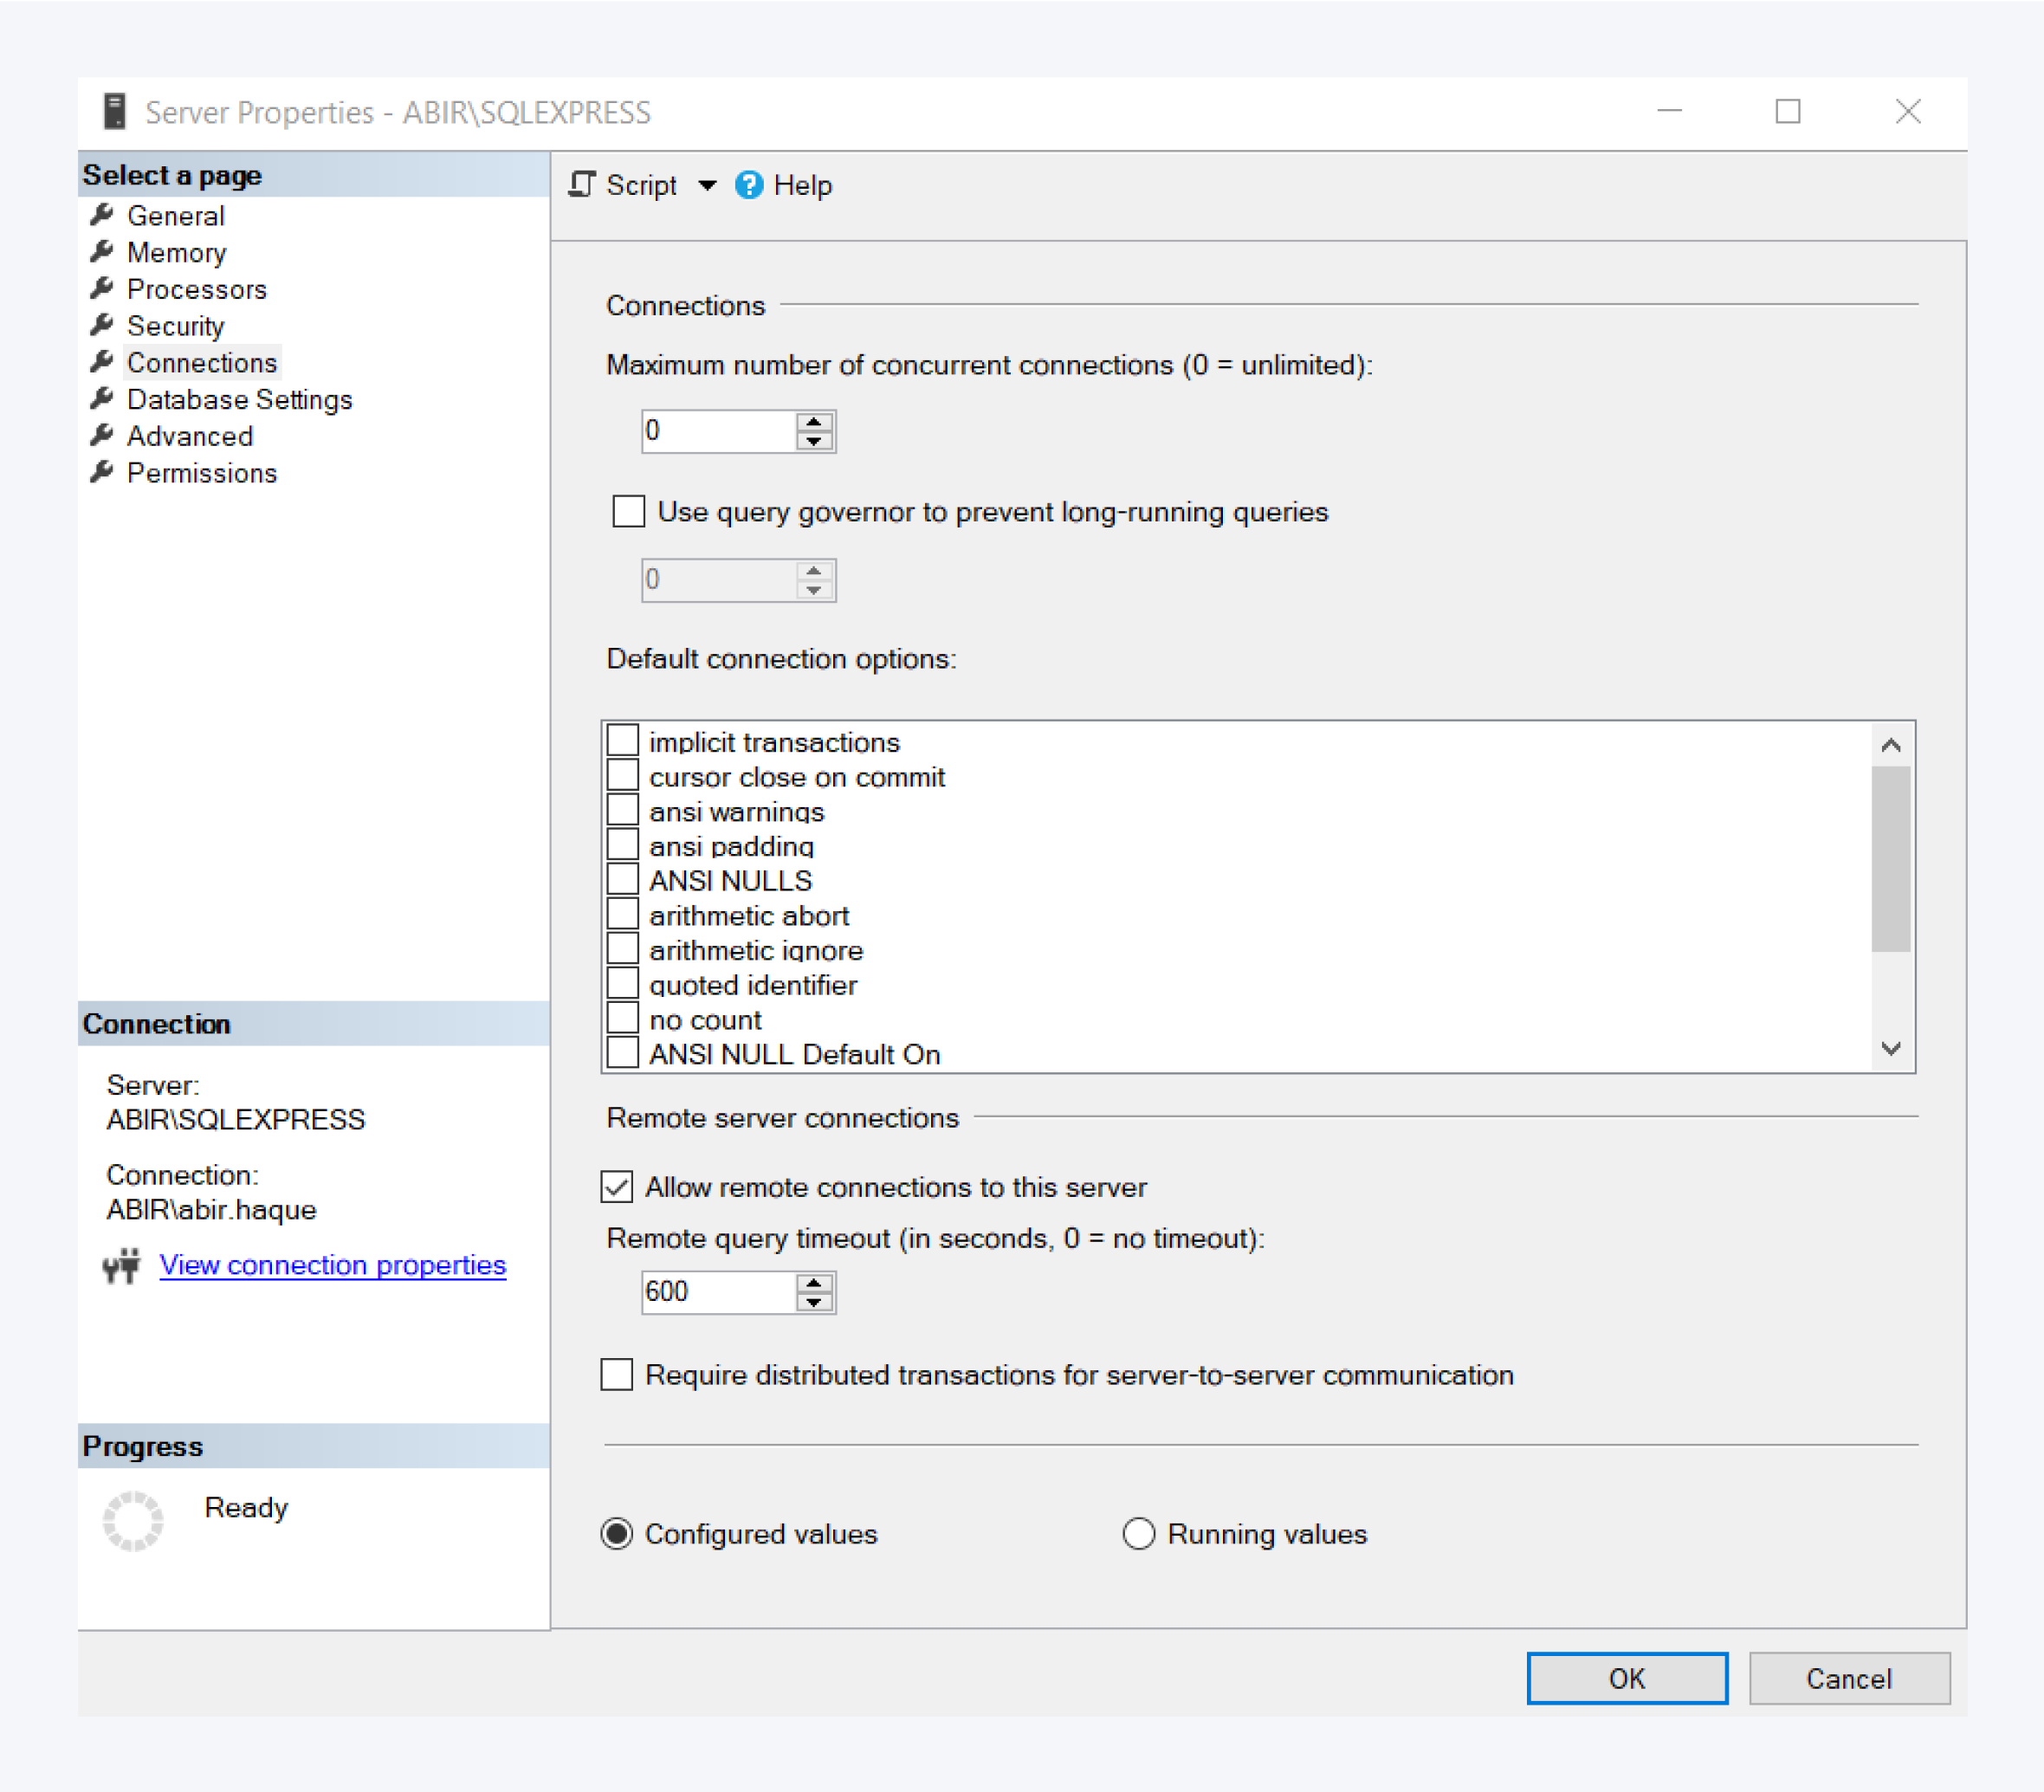
Go to the connections tab and click on check box to allow remote connections to the server.
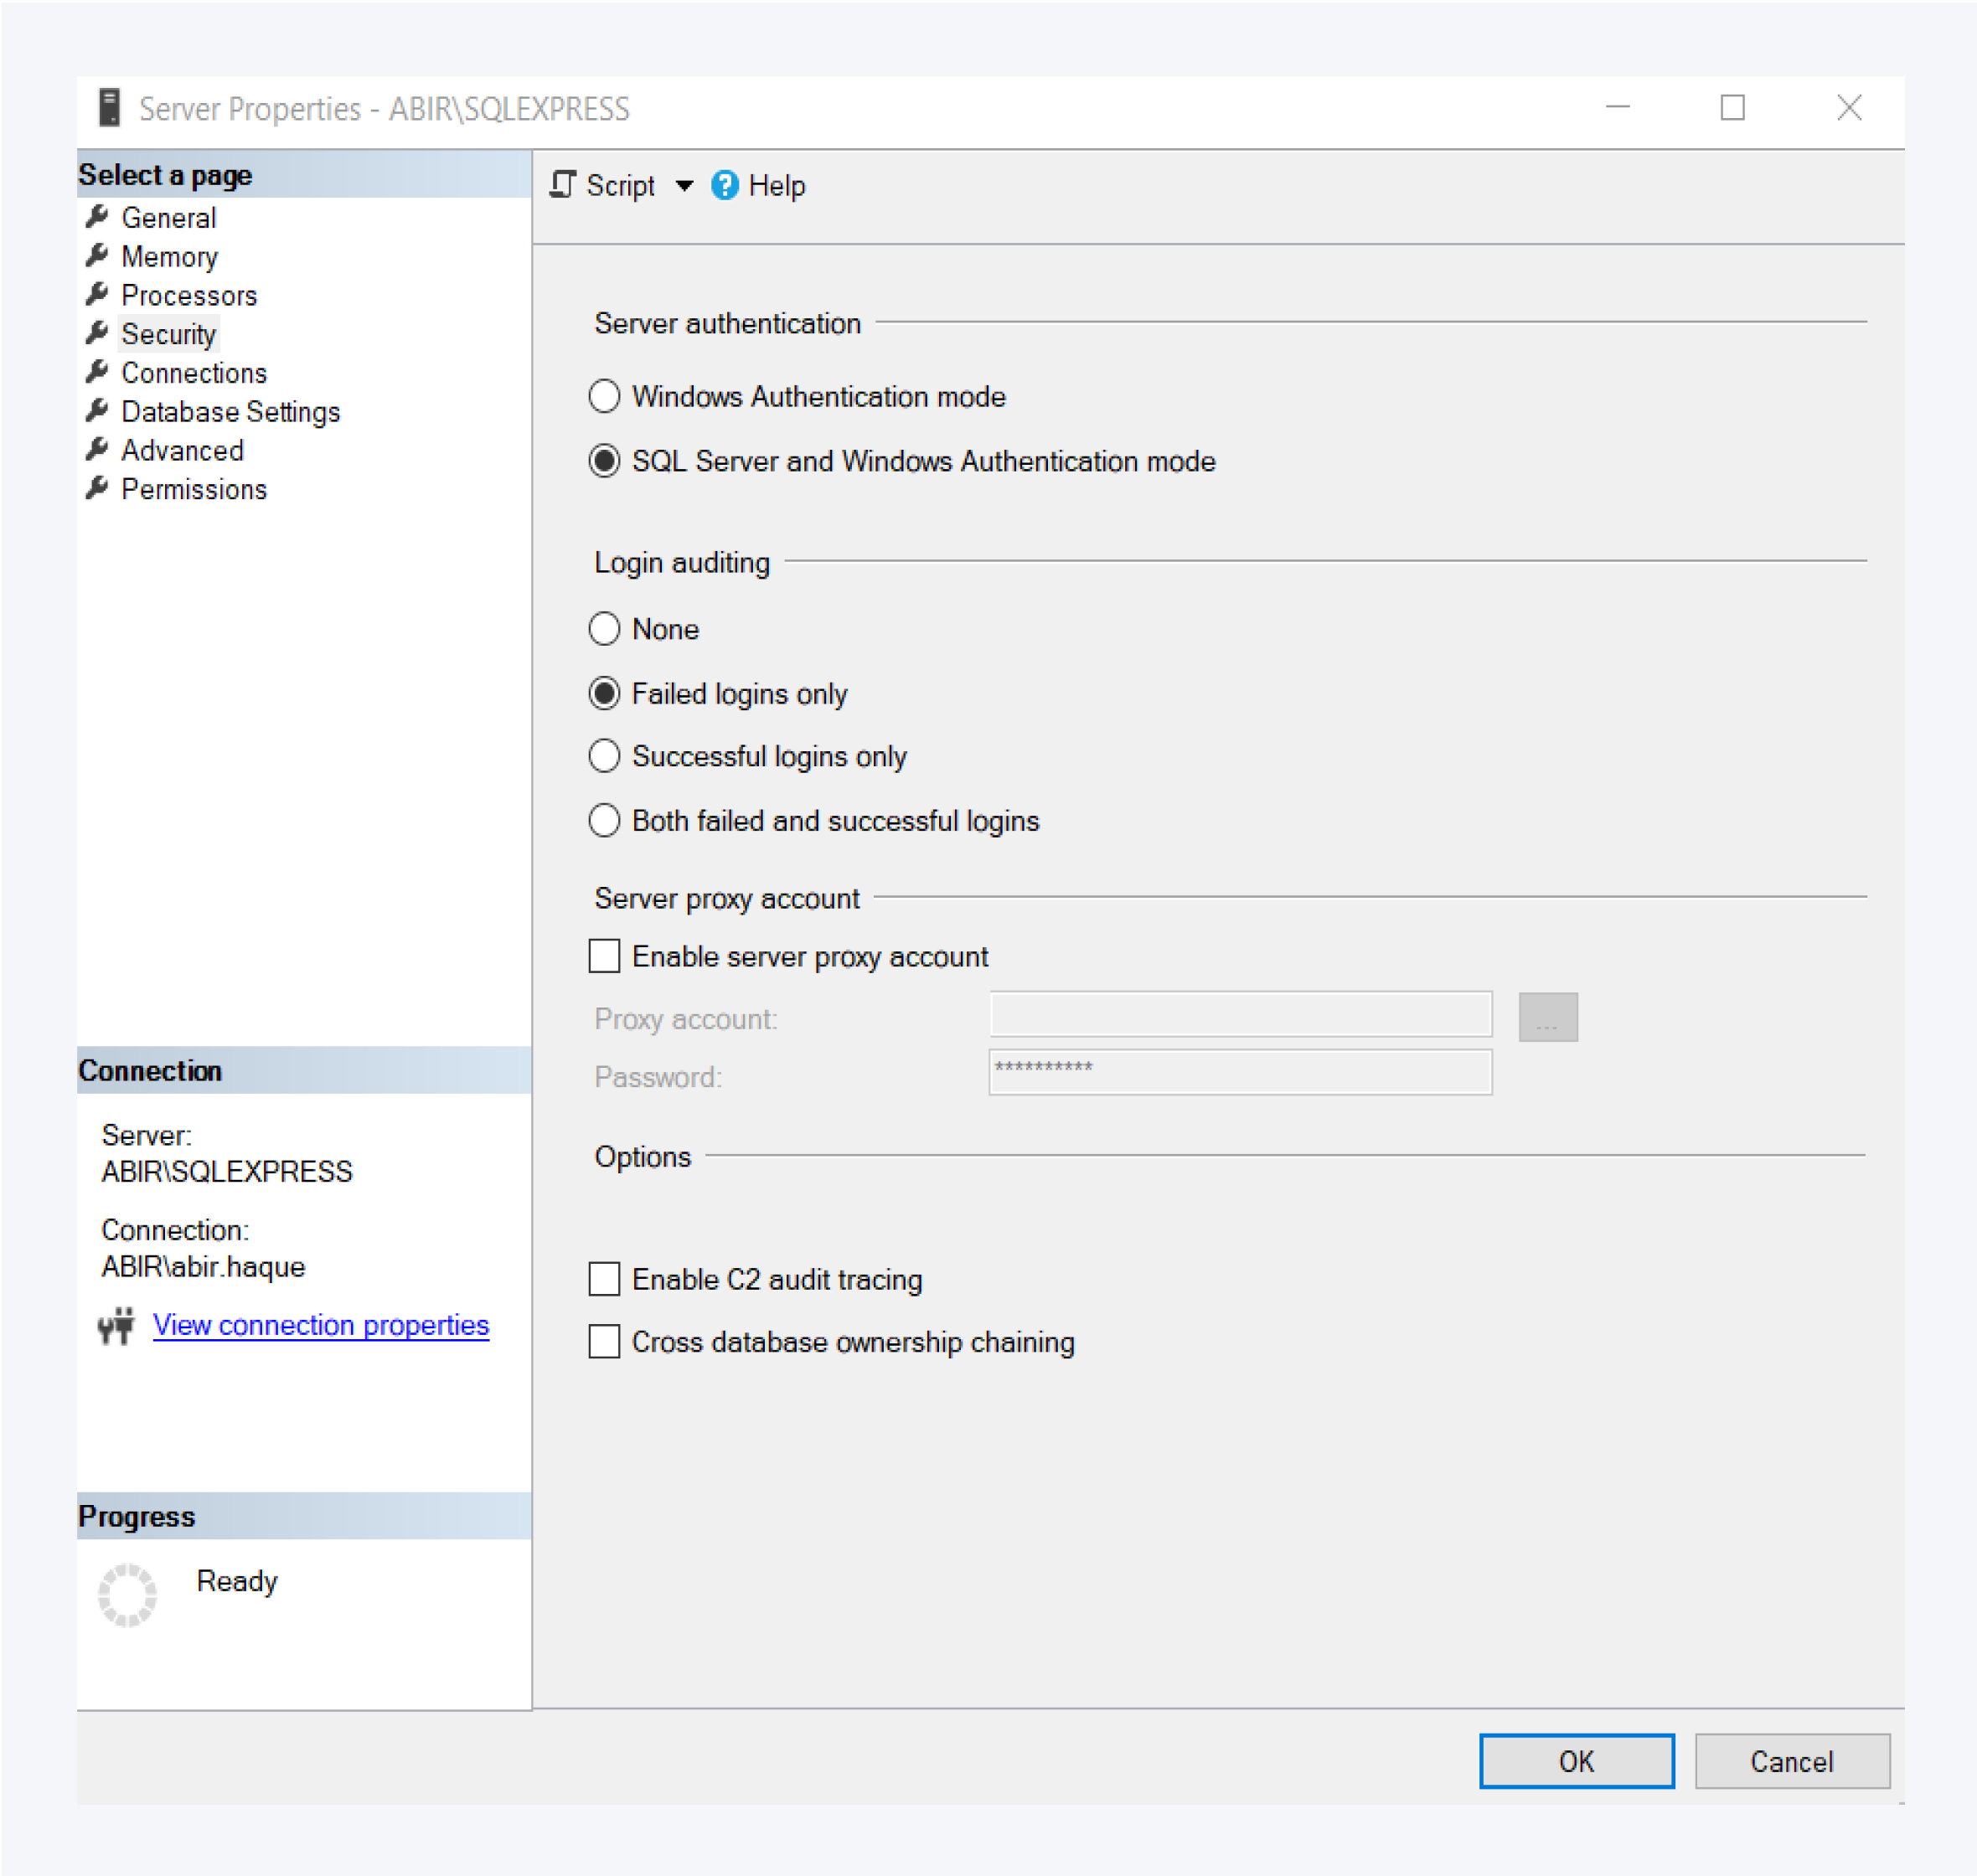
Finally go to the Security tab and under Server authentication select SQL Server and Windows Authentication mode.
Click on OK to save your configuration.
You will have to restart the application for the changes to take effect.
Database
Create a database for Pathfinder
Please create an empty database in the SQL instance on which the Pathfinder database can then be created.
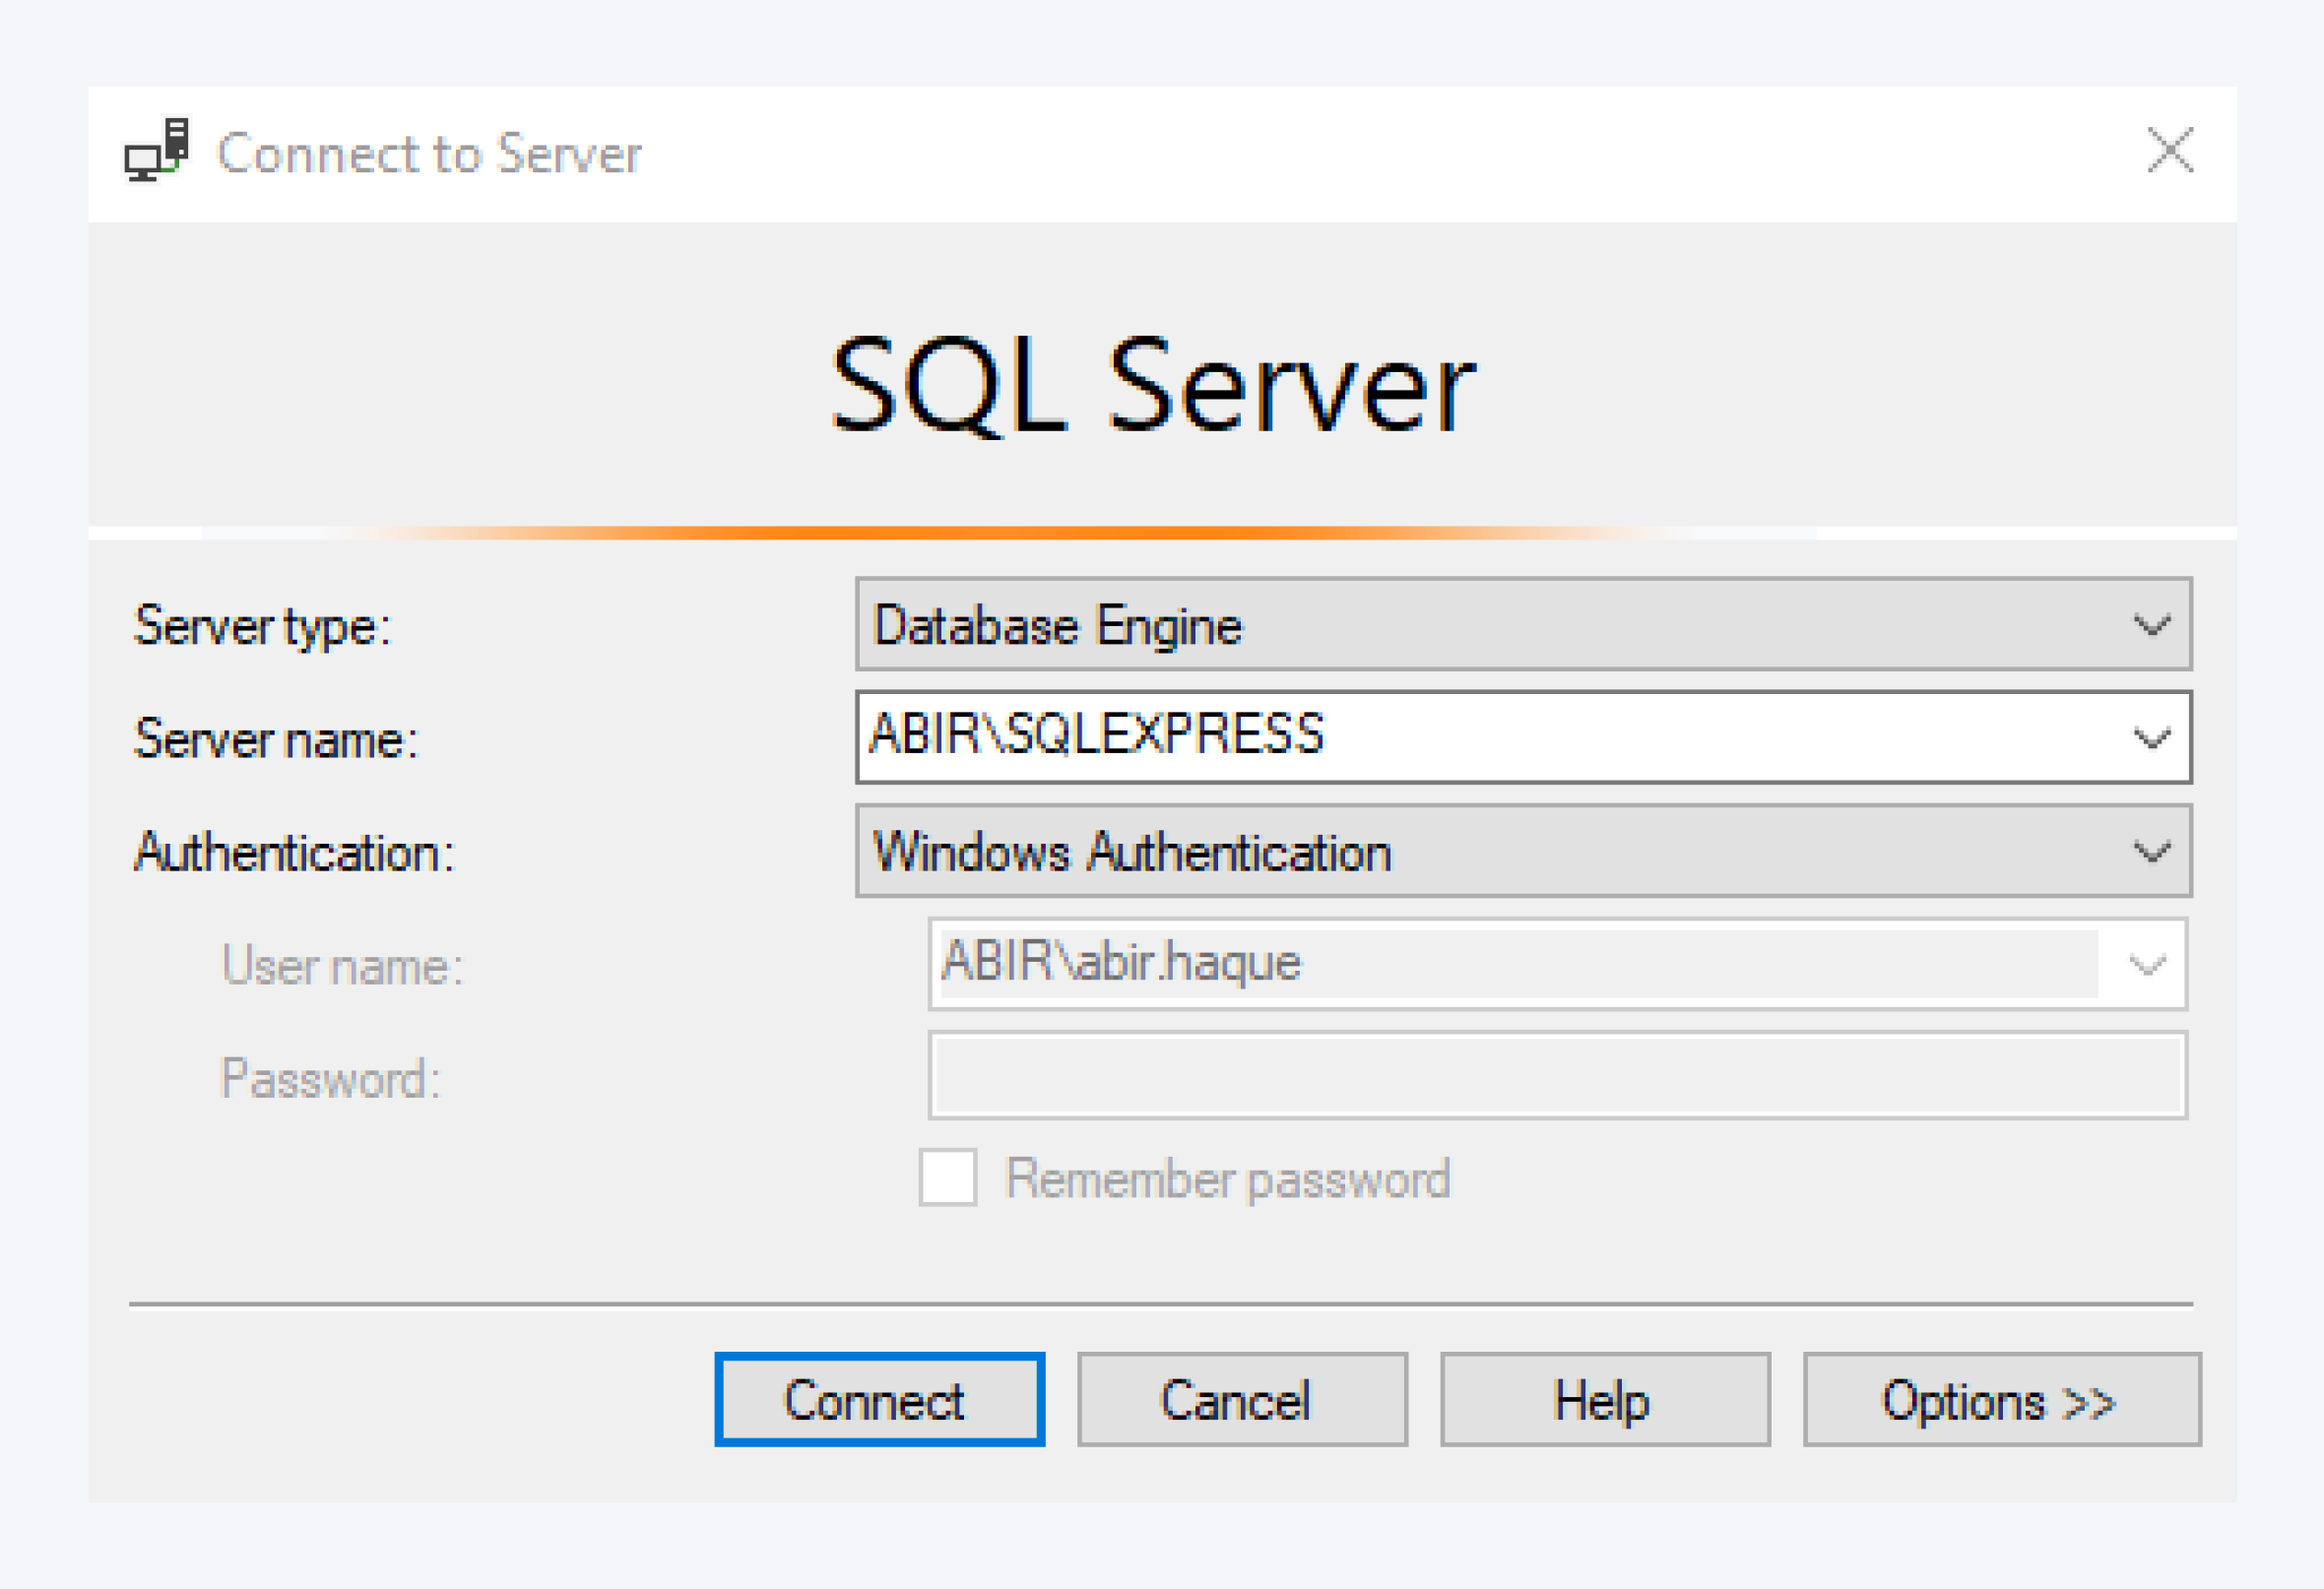
Open Microsoft SQL Server Management Studio.
In the login screen, click on Connect. If the installation was carried out with a user other than the logged-in user, the authorization to administer the database may be missing.
Right click on the Databases folder, to bring up the context menu, and select New Database…
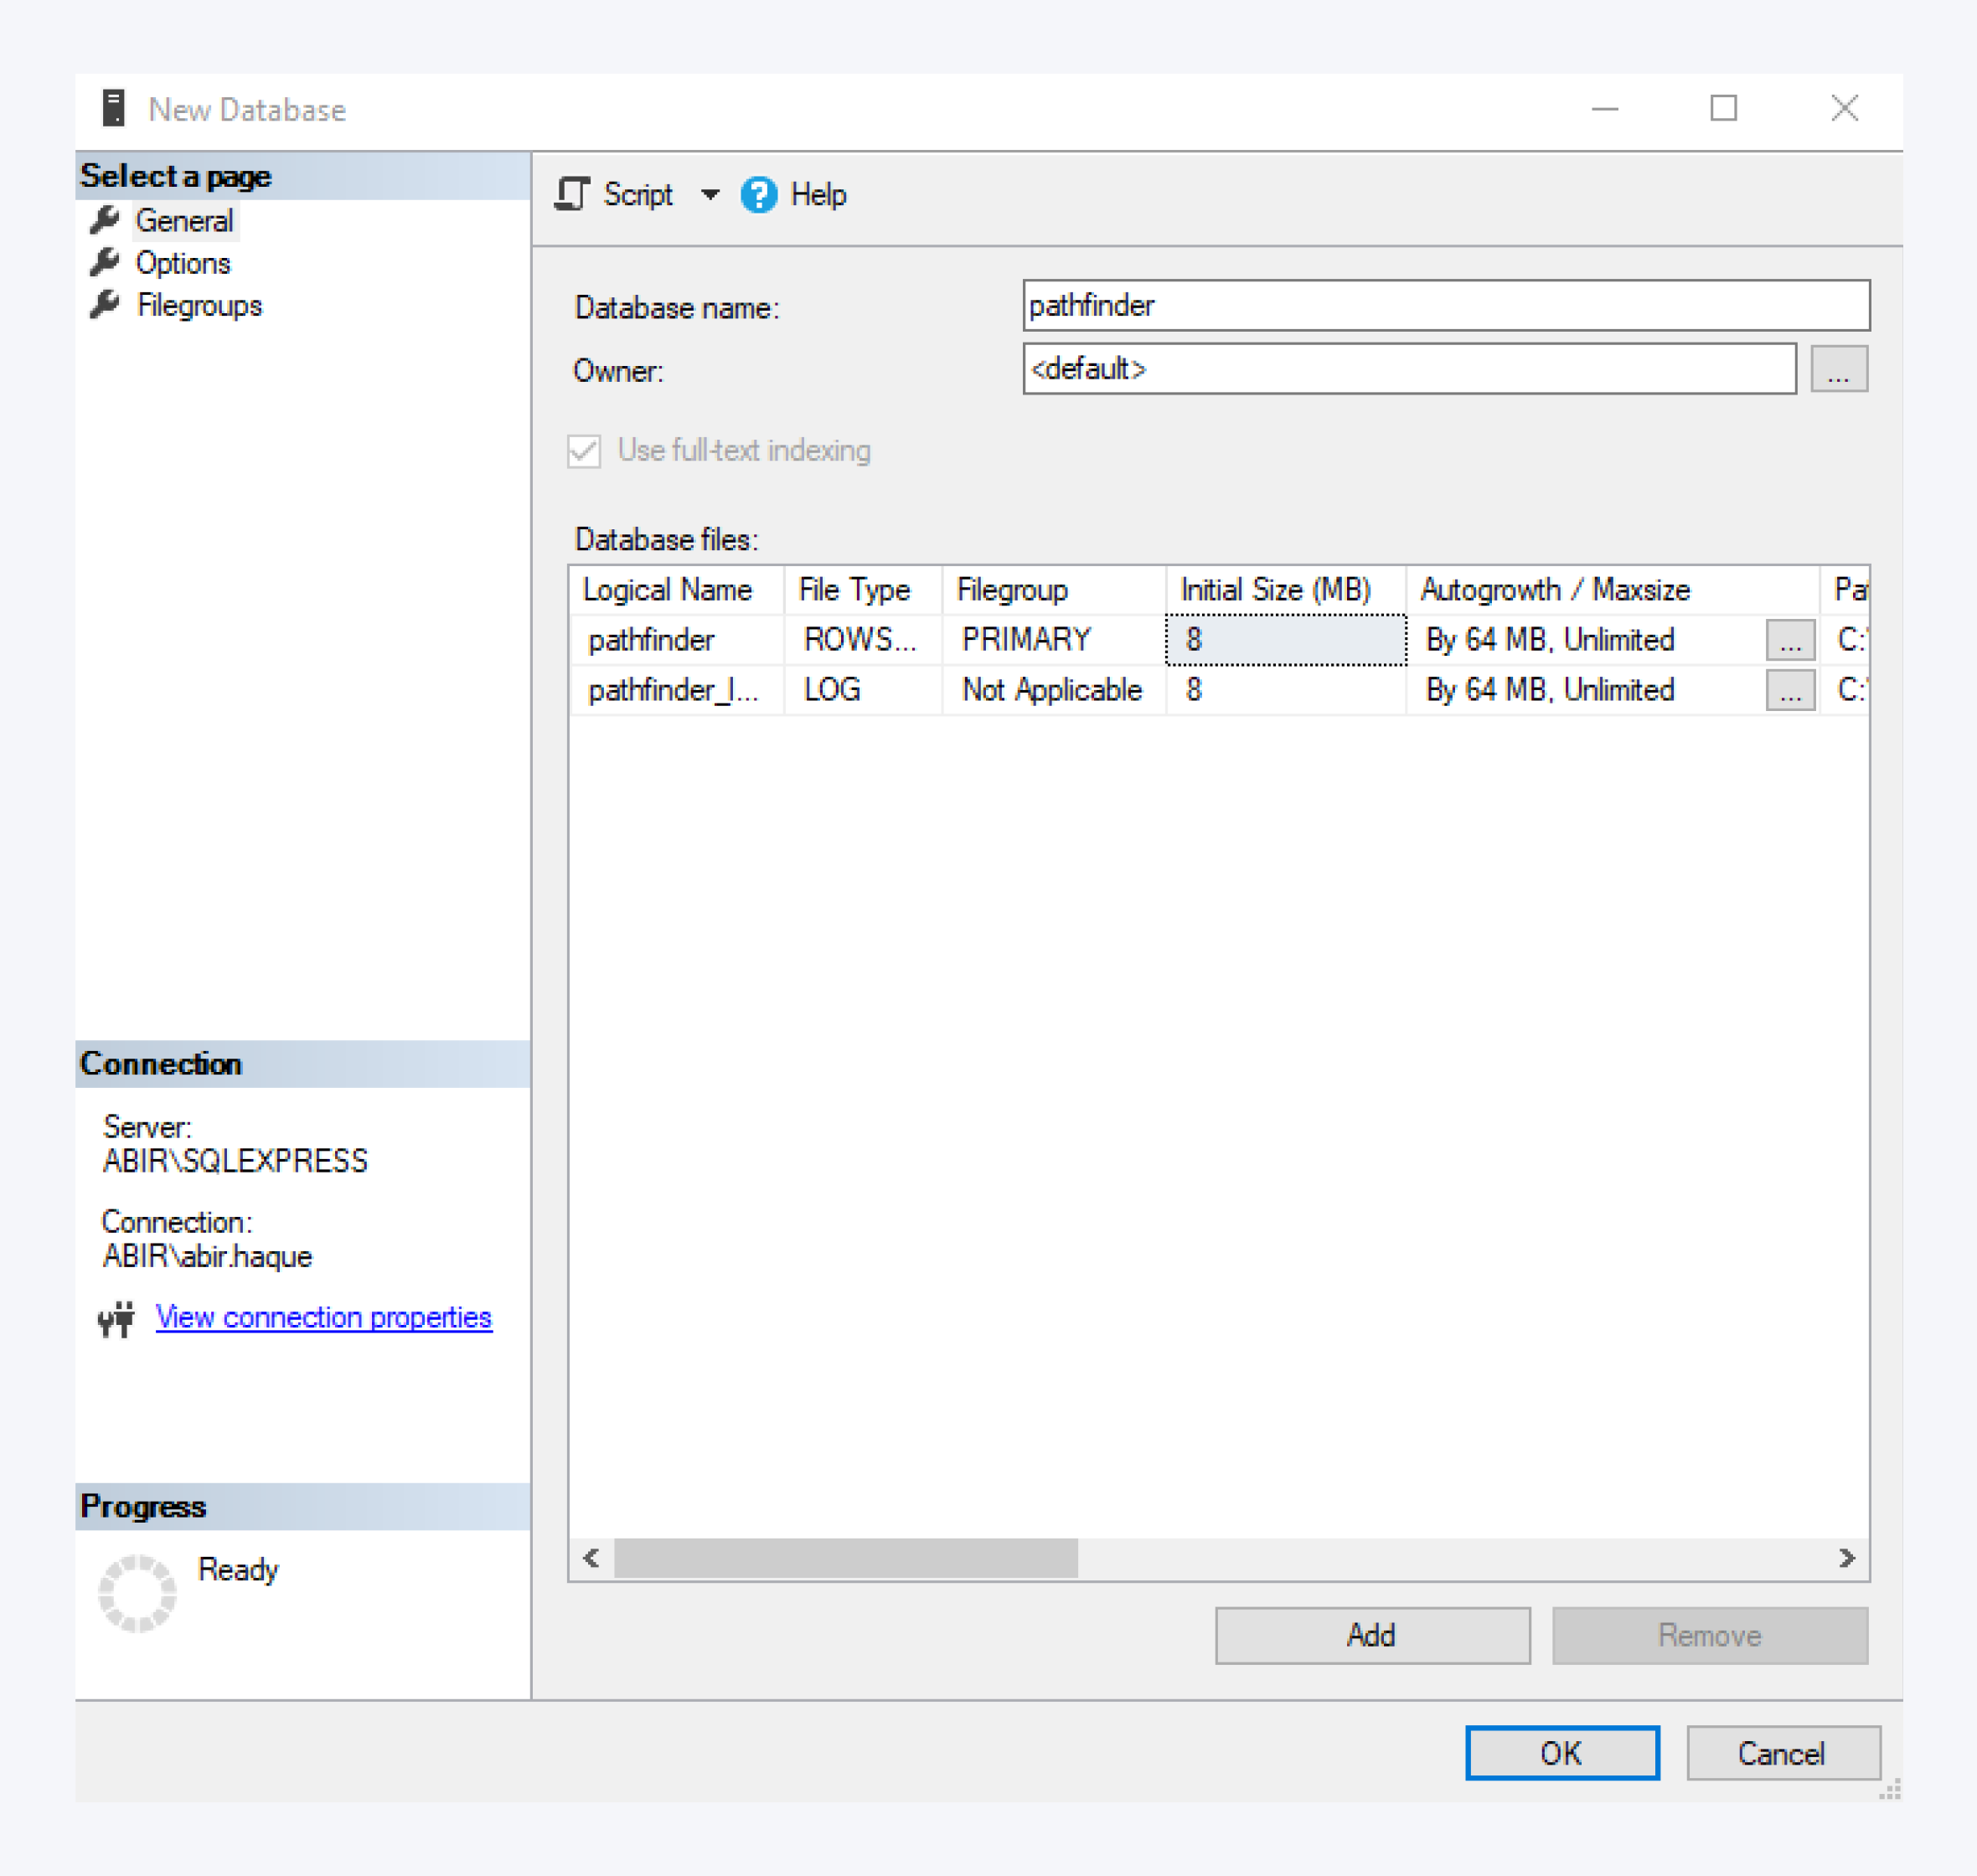
Create a suitable name for the database. Here, the database name is Pathfinder but you can use any name you want.
Leave all other values as default.
Click on OK to complete creating your blank database.
Create a new user in the database
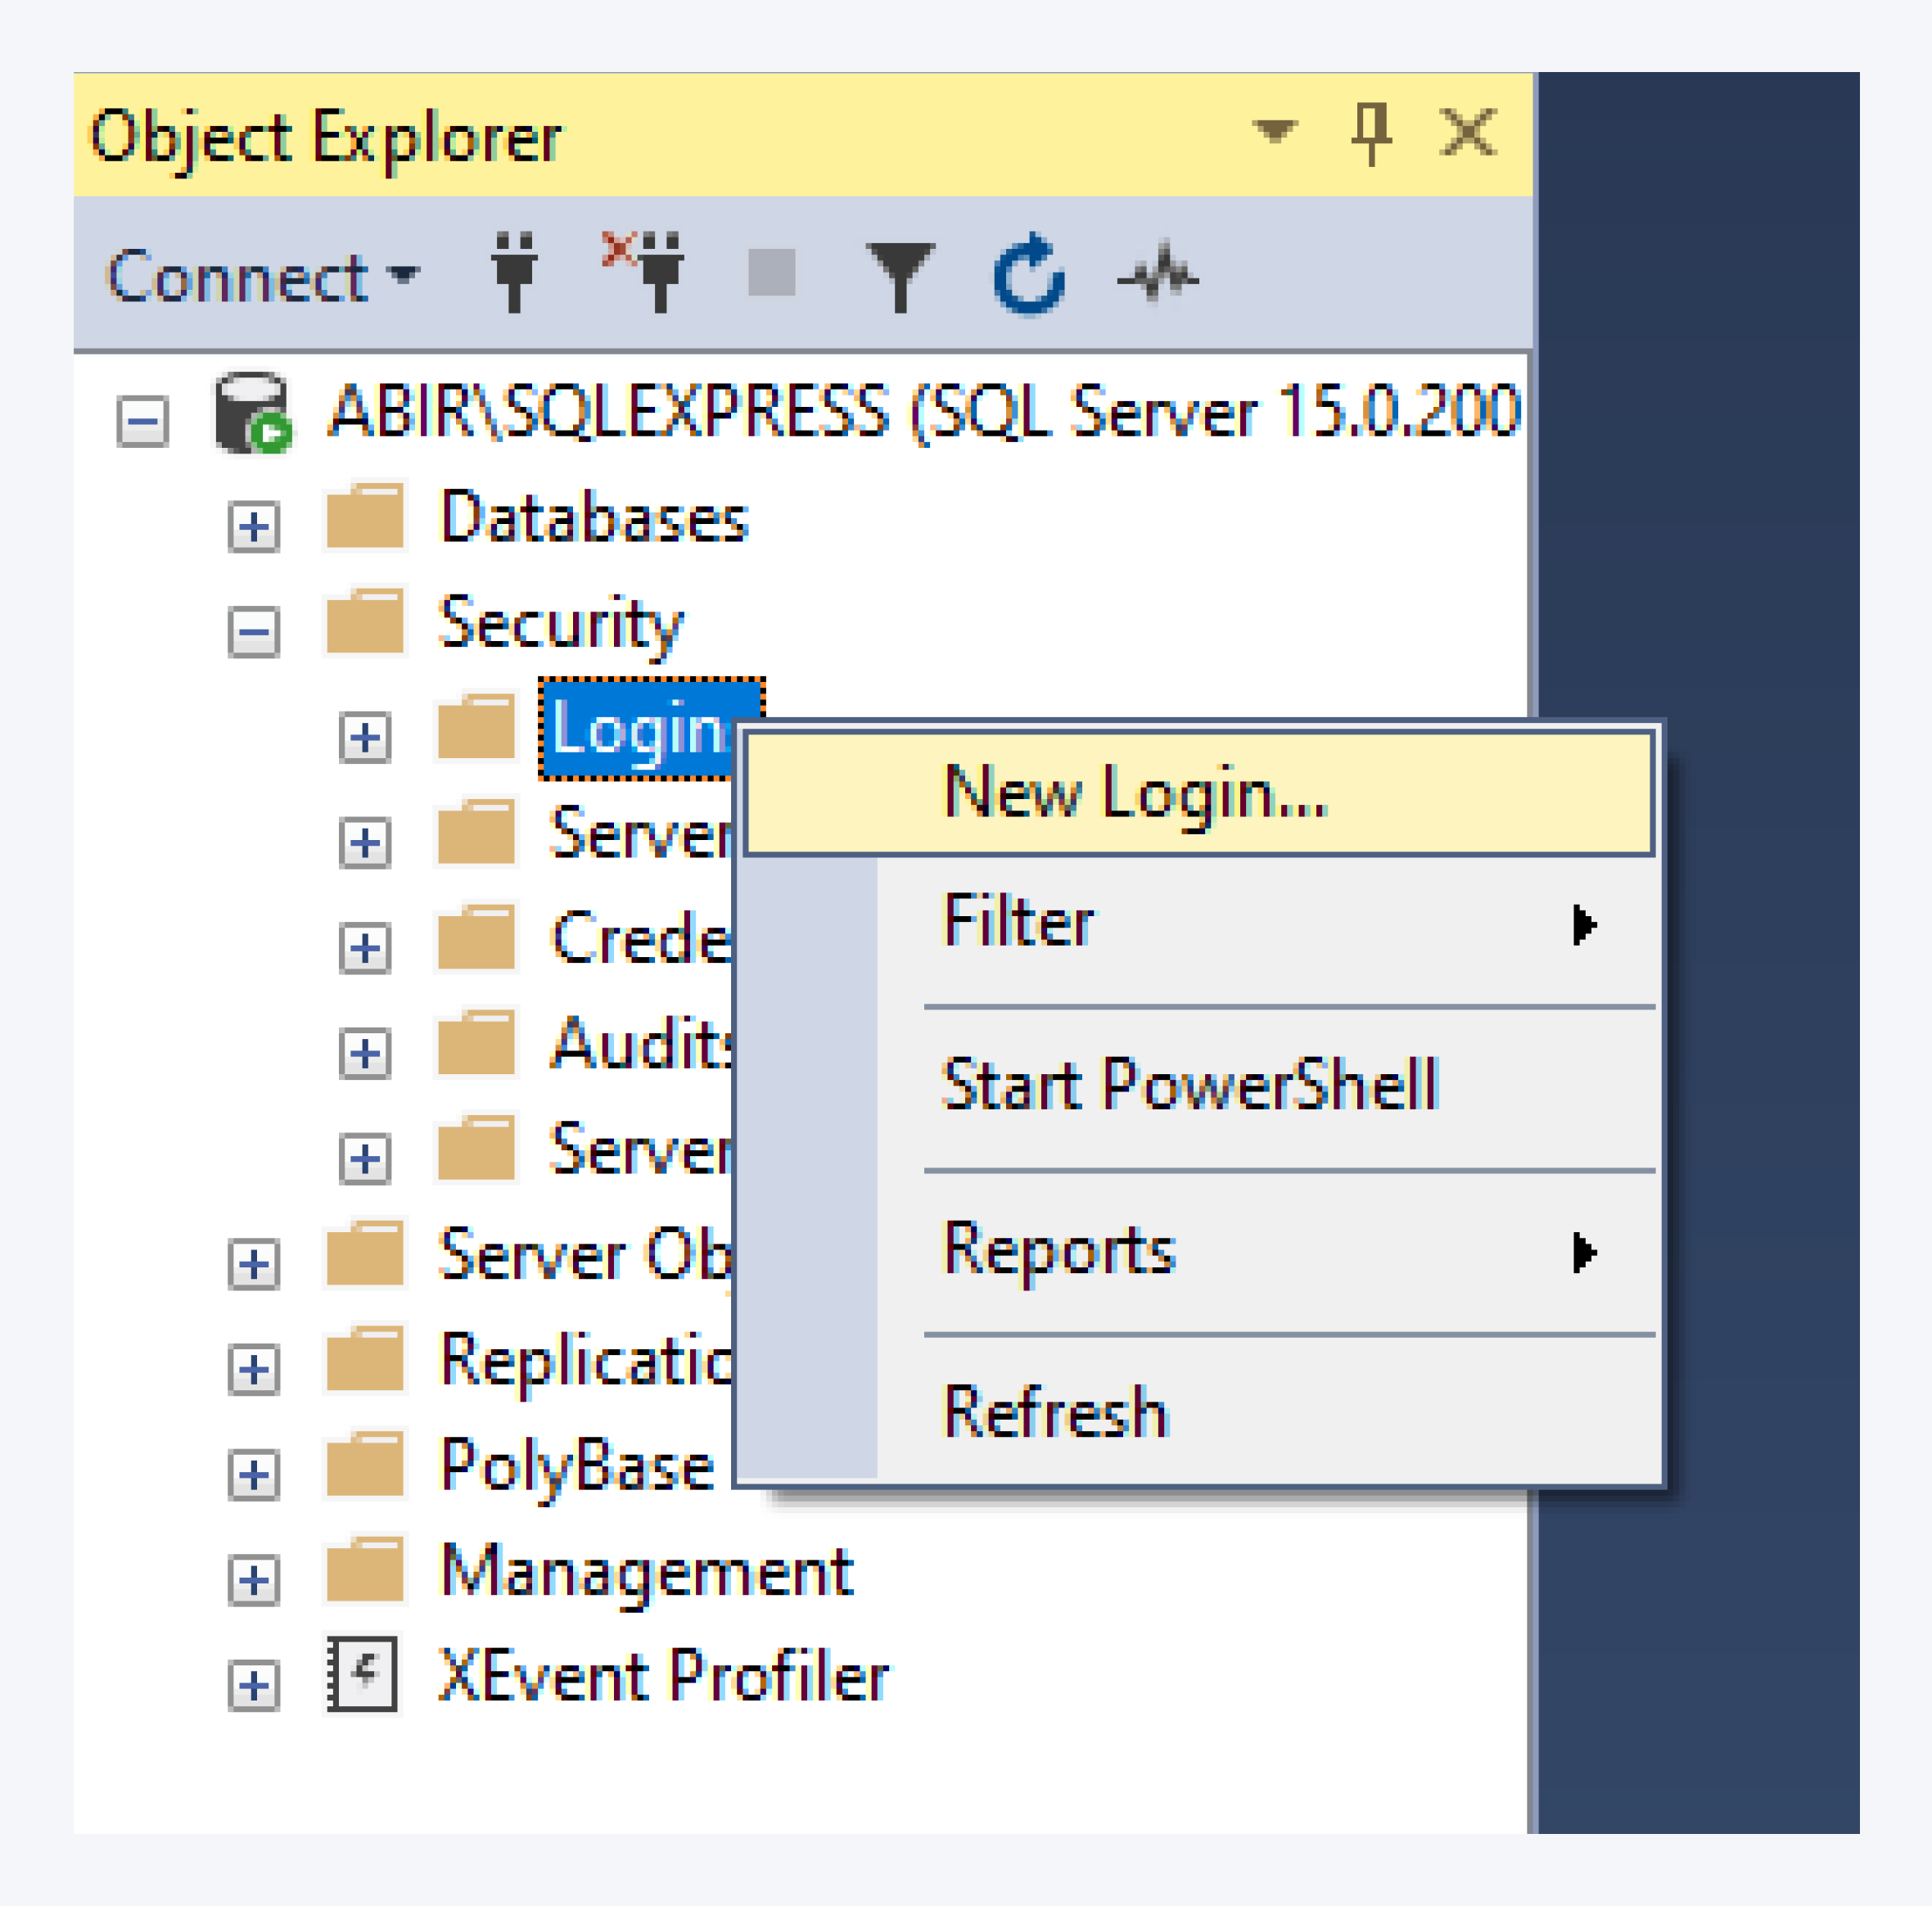
Click on Security folder to expand and right-click on Logins. Select new login to create a new user and password for the database.
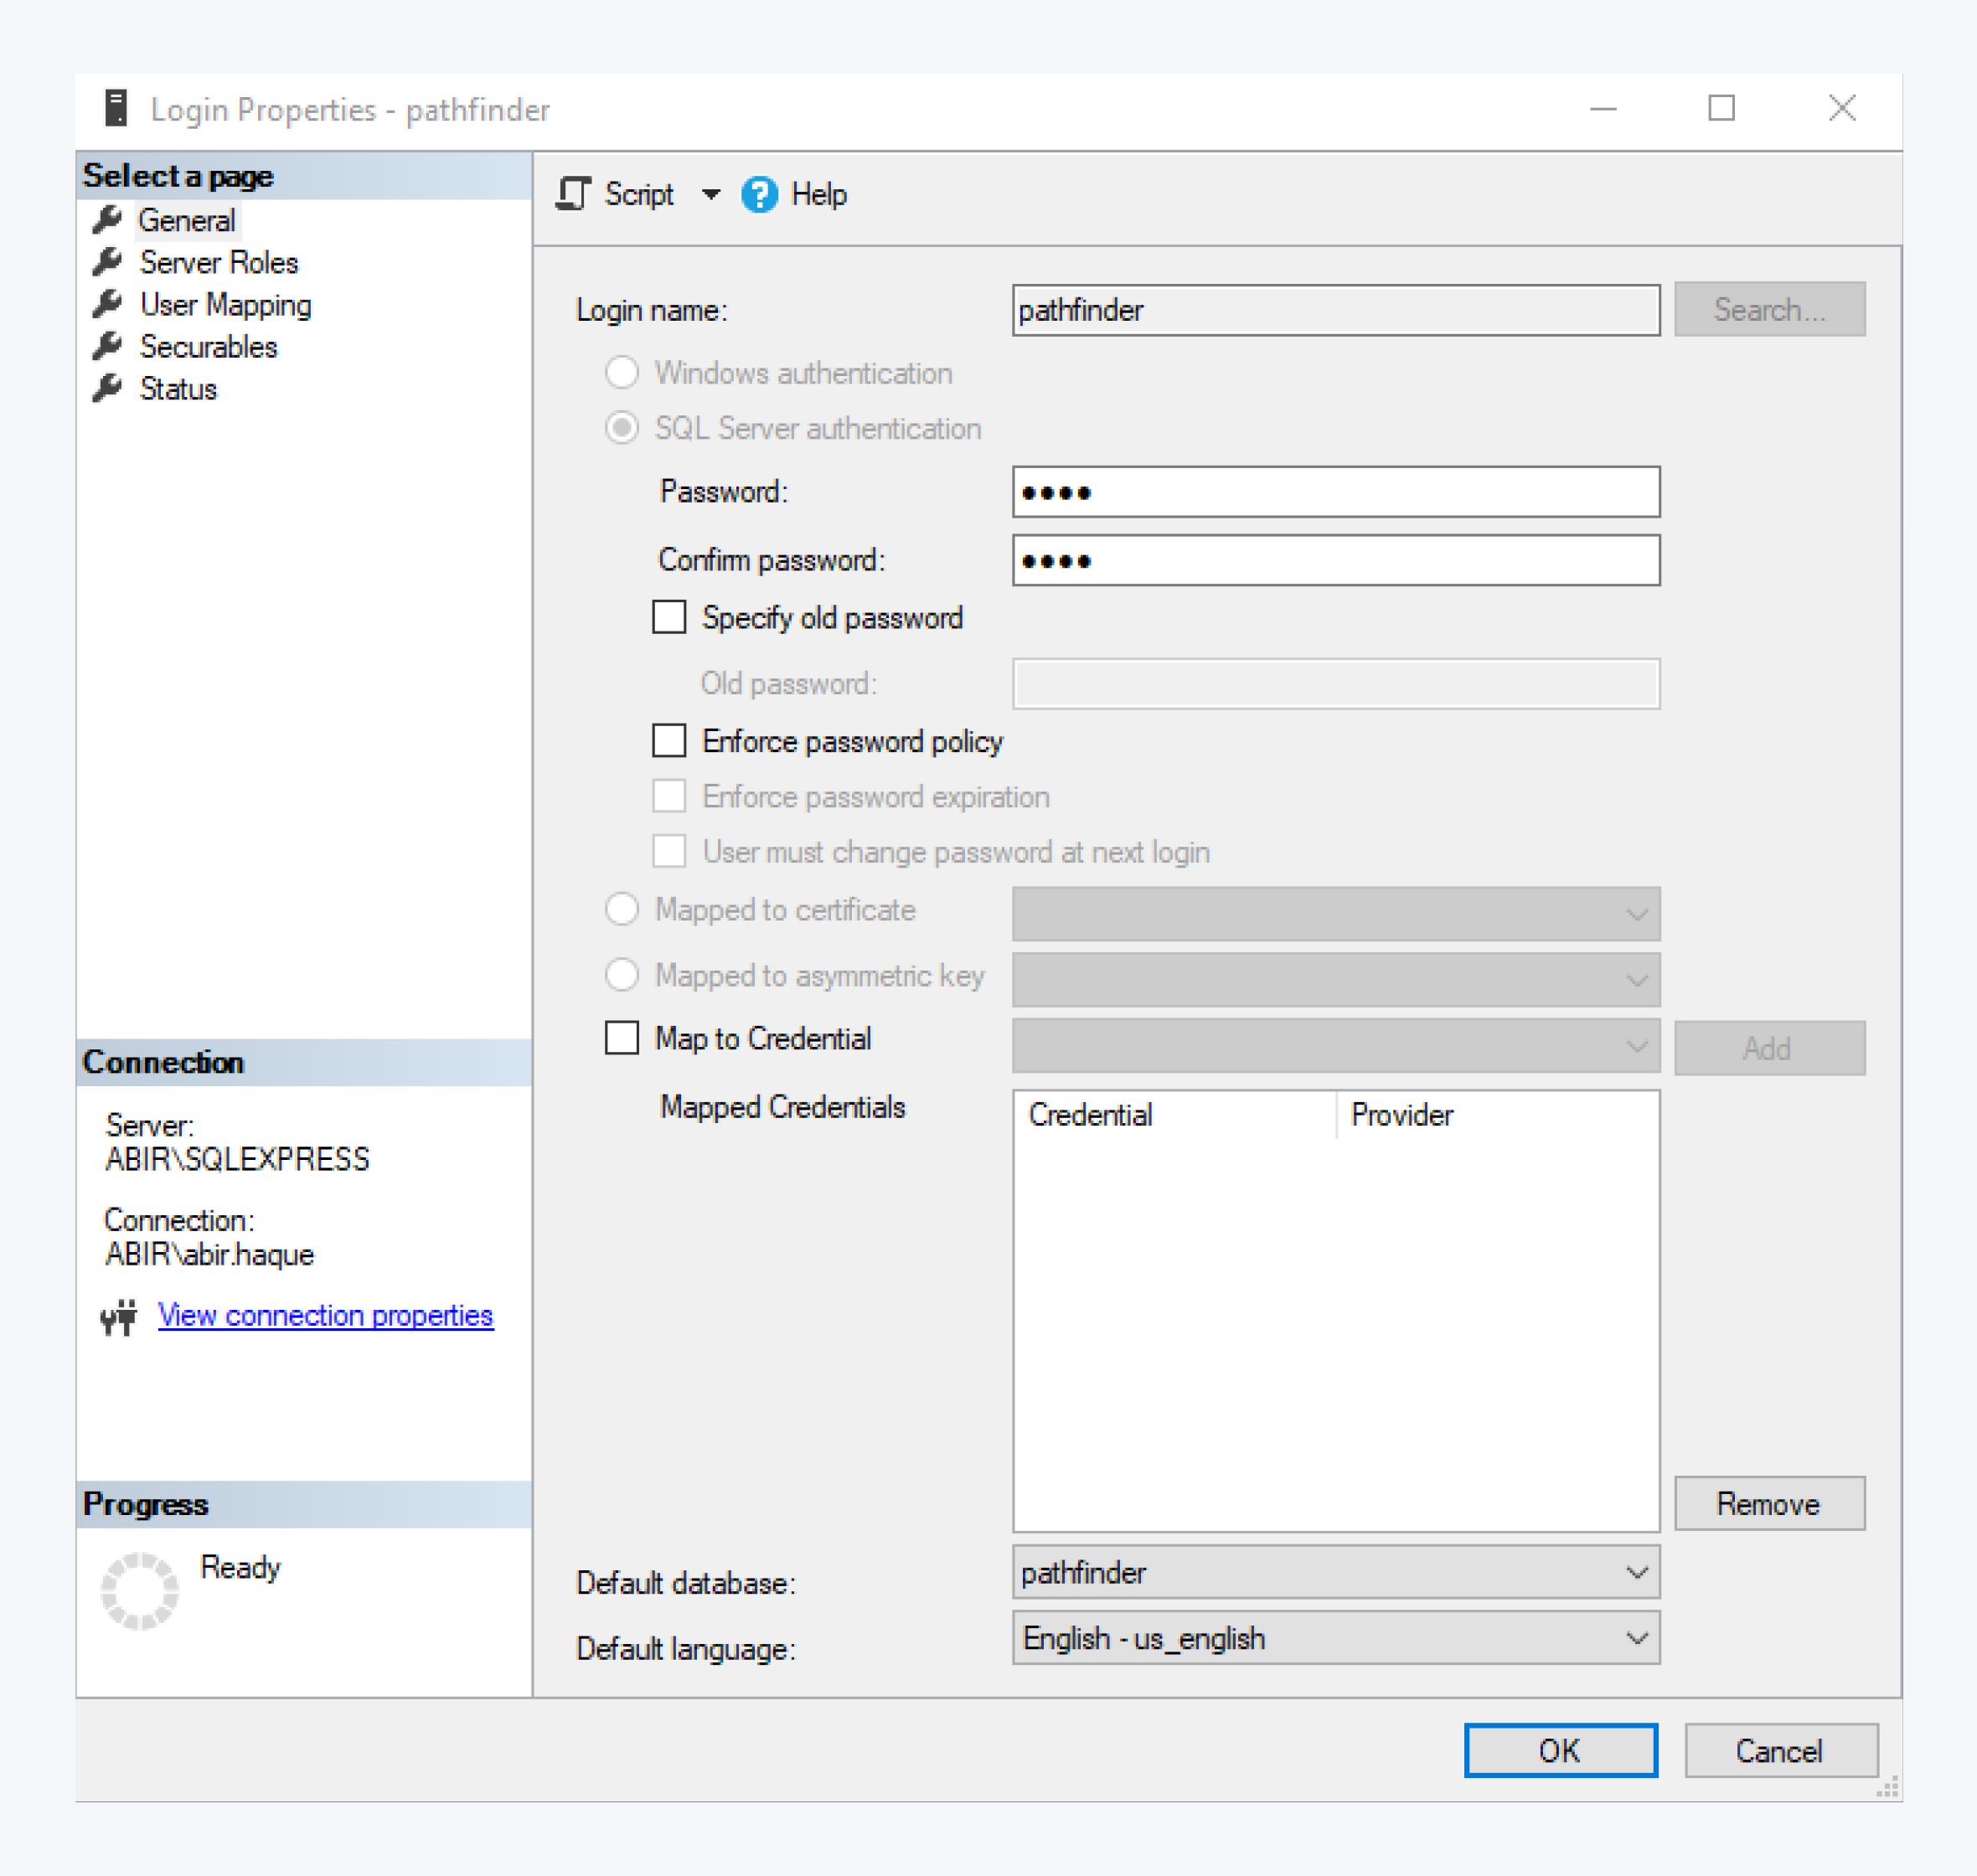
Assign a suitable login name for the user. Here, the name pathfinder is used.
Select SQL Server authentication and assign a password for the user.
Please uncheck the Enforce password policy box.
Select the default database. Here, the name pathfinder is used.
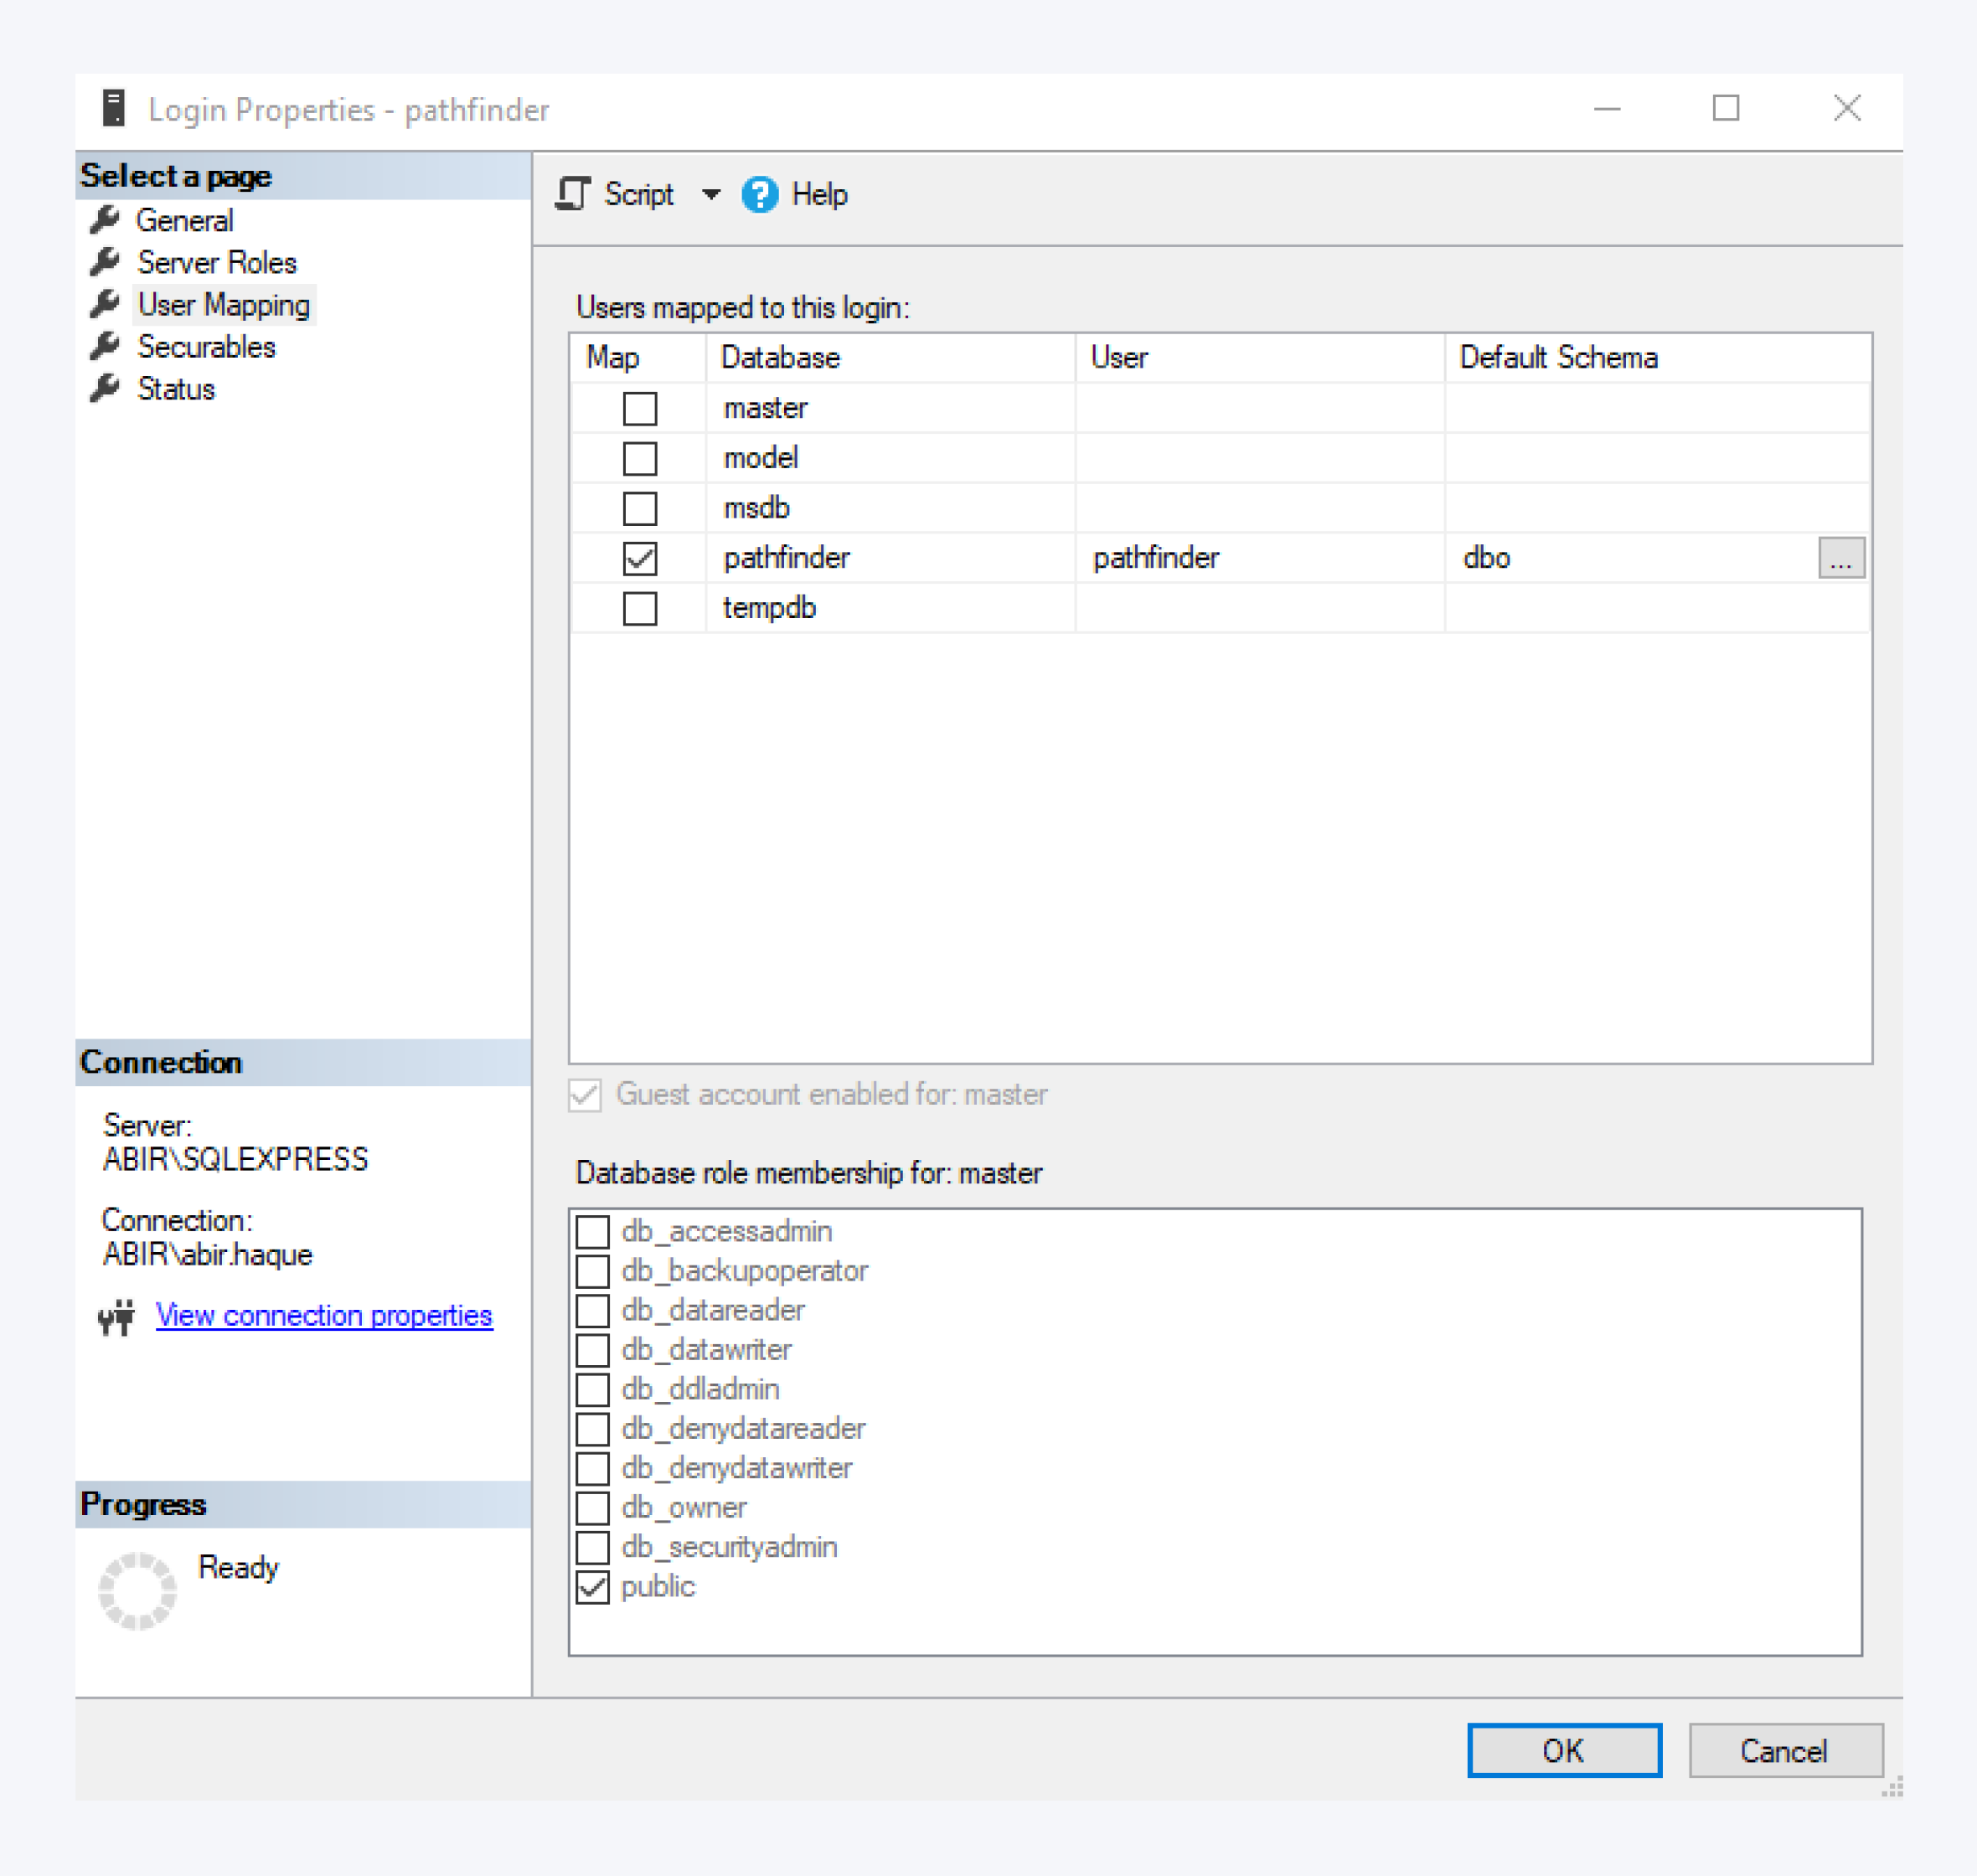
Next, go to the User Mapping tab and select the database from the Users mapped to this login table.
Check the db_owner box from the list for that database and user.
Click on OK to complete creating the user and password for the database.
Configure database connection in Pathfinder
Now we will connect Pathfinder to the newly created database using the connection manager.
To open the Pathfinder connection manager, please run Pathfinder while holding down the F8 key (hold).
Click on the add button in the lower left corner of the connection manager dialog window.
Select whether you want to use the existing Pathfinder database connection as a template or not.
To create a "fresh" database connection, select No.
If you select Yes, i.e. "Use the selected connection as a template", all connection data, including logins and passwords will be transferred to the new database connection.
If you are running the server on your local machine, the server’s name should be localhost.
Otherwise, the instance name must be specified. The instance name should be in this format: <ServerName>\SQLEXPRESS
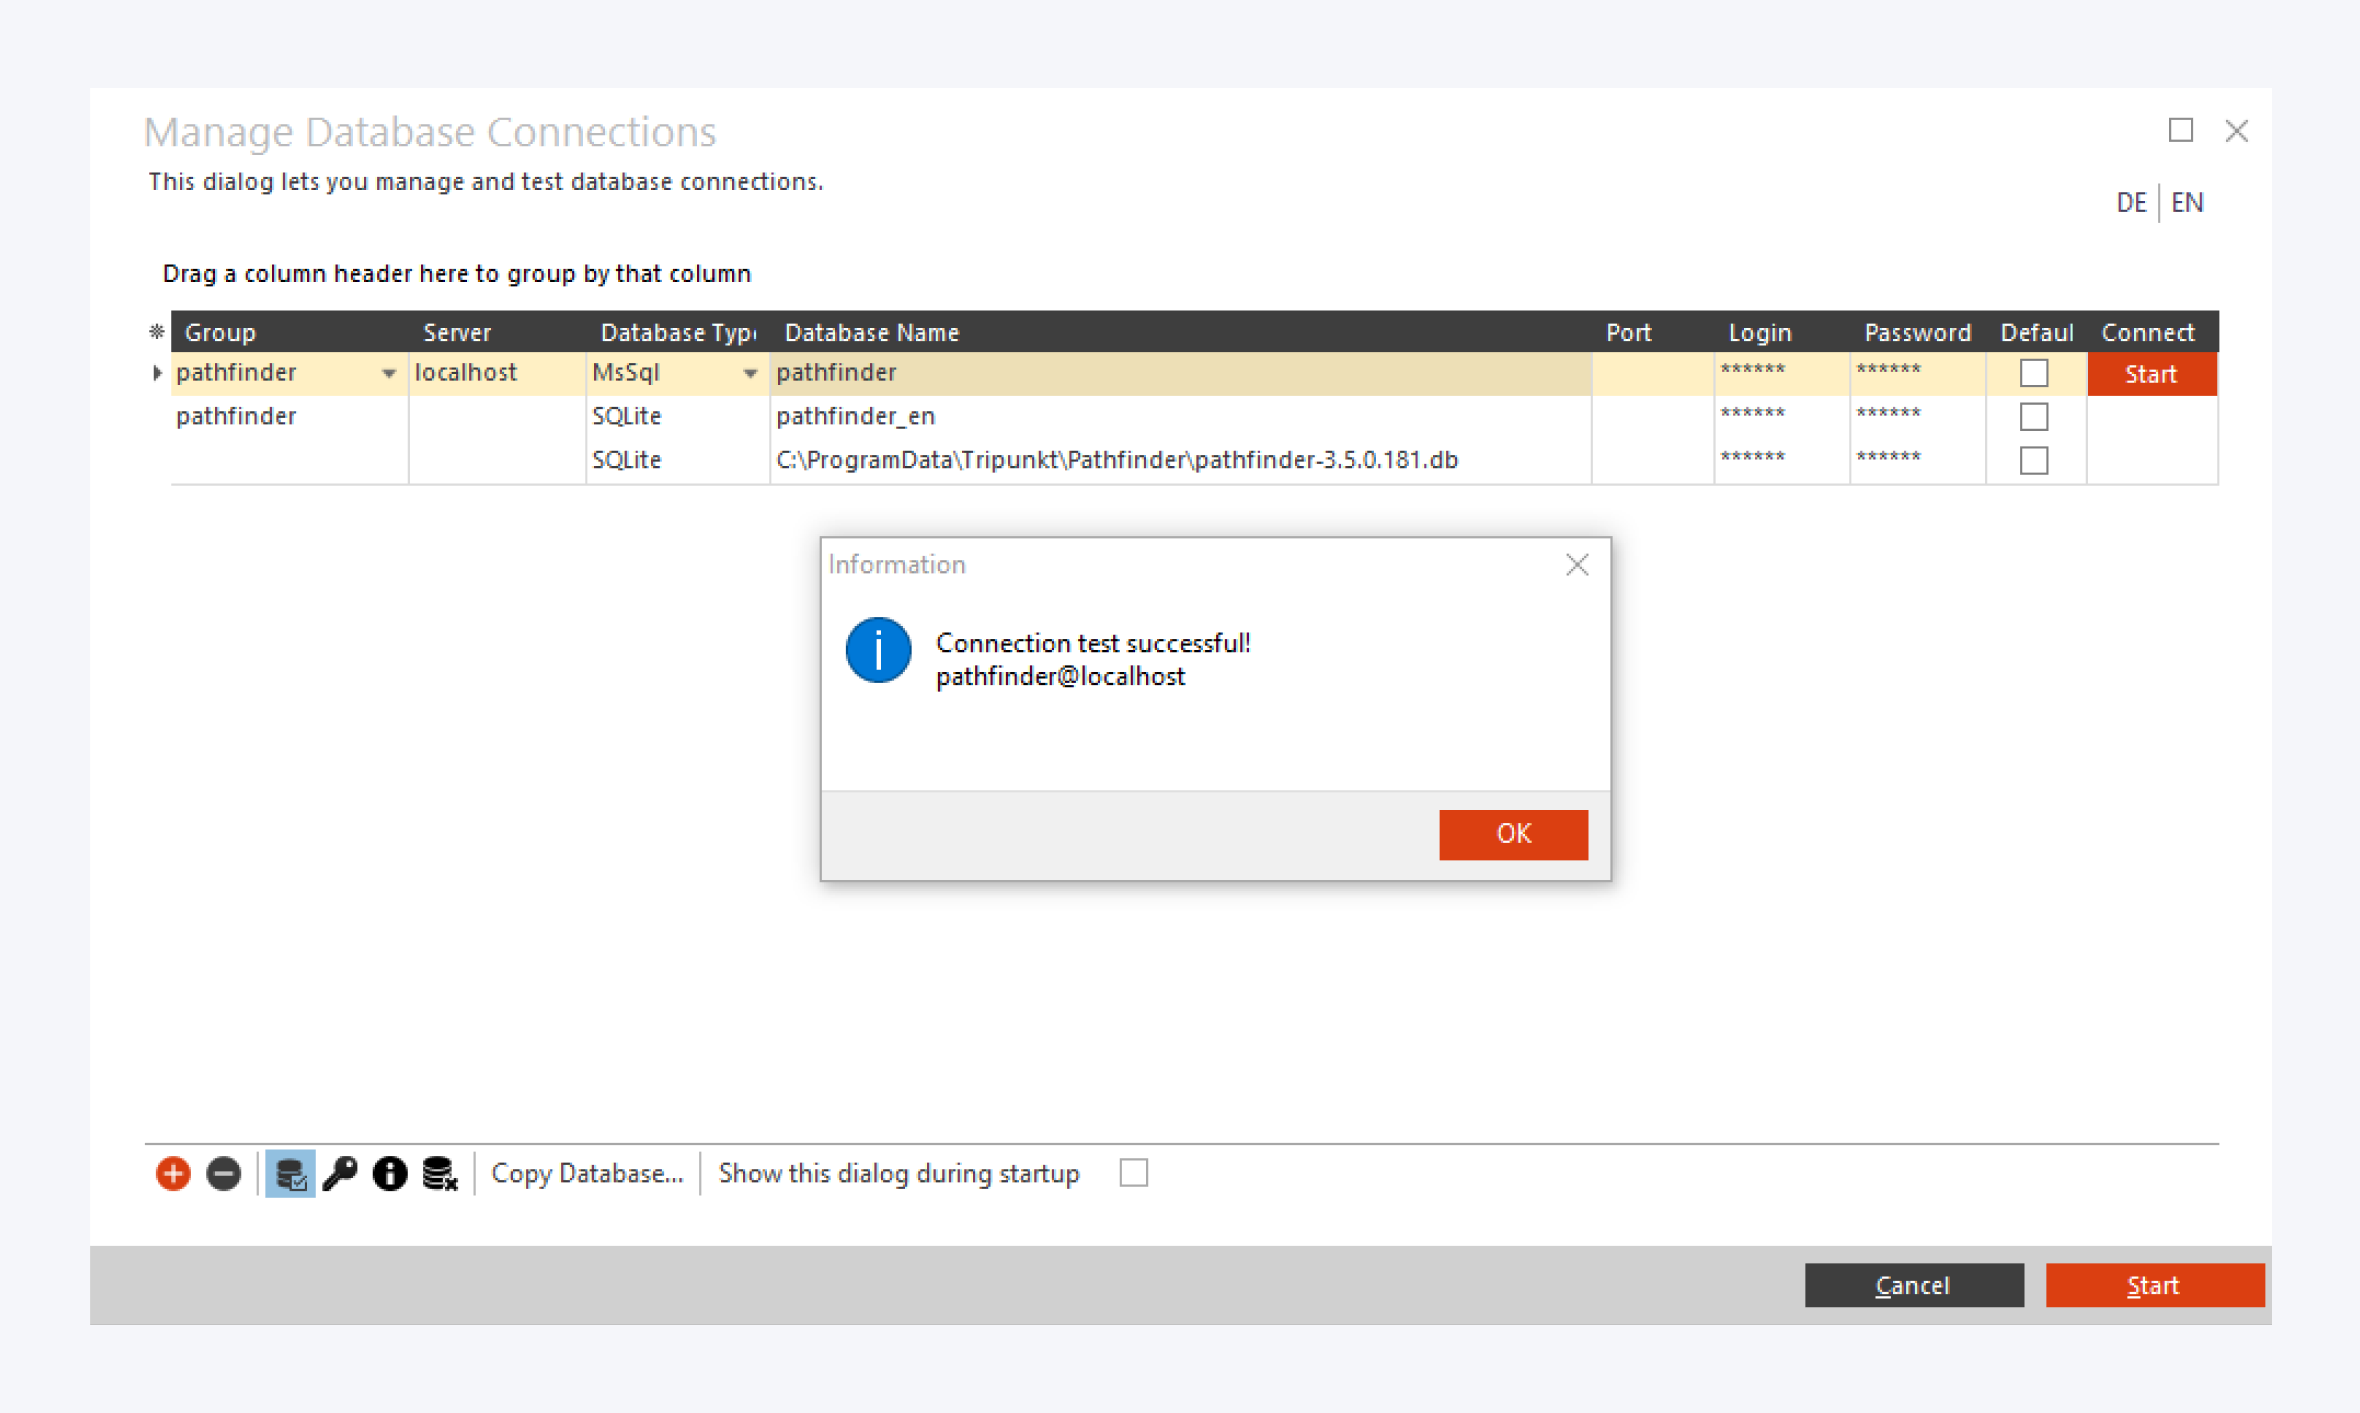
Select the database type as MSSql.
Fill in the database name, usernamee as login and password.
You can perform a connectivity test to check the setting for connection to the database.
You can edit the individual fields with F2 or double clicking.
Firewall settings
Pathfinder connects to the SQL Server via port 1433 (TCP).
If several instances are used or the SQL browser is active, port 1434 (UDP) must also be released.If a connection from a remote computer to the database is not possible, please check the firewall settings of both computers.
If necessary, switch off the firewall briefly for testing. (Please don't forget to switch it on again.)
Sometimes the server has to be restarted for the firewall rule to be active.