Manage Network Maps
This pages describes how to create and manage network maps.
You can access the network maps option from the sidebar or from the analysis and reports section.
The network maps provides another method to view and organize your network infrastructure.
Create Network Maps
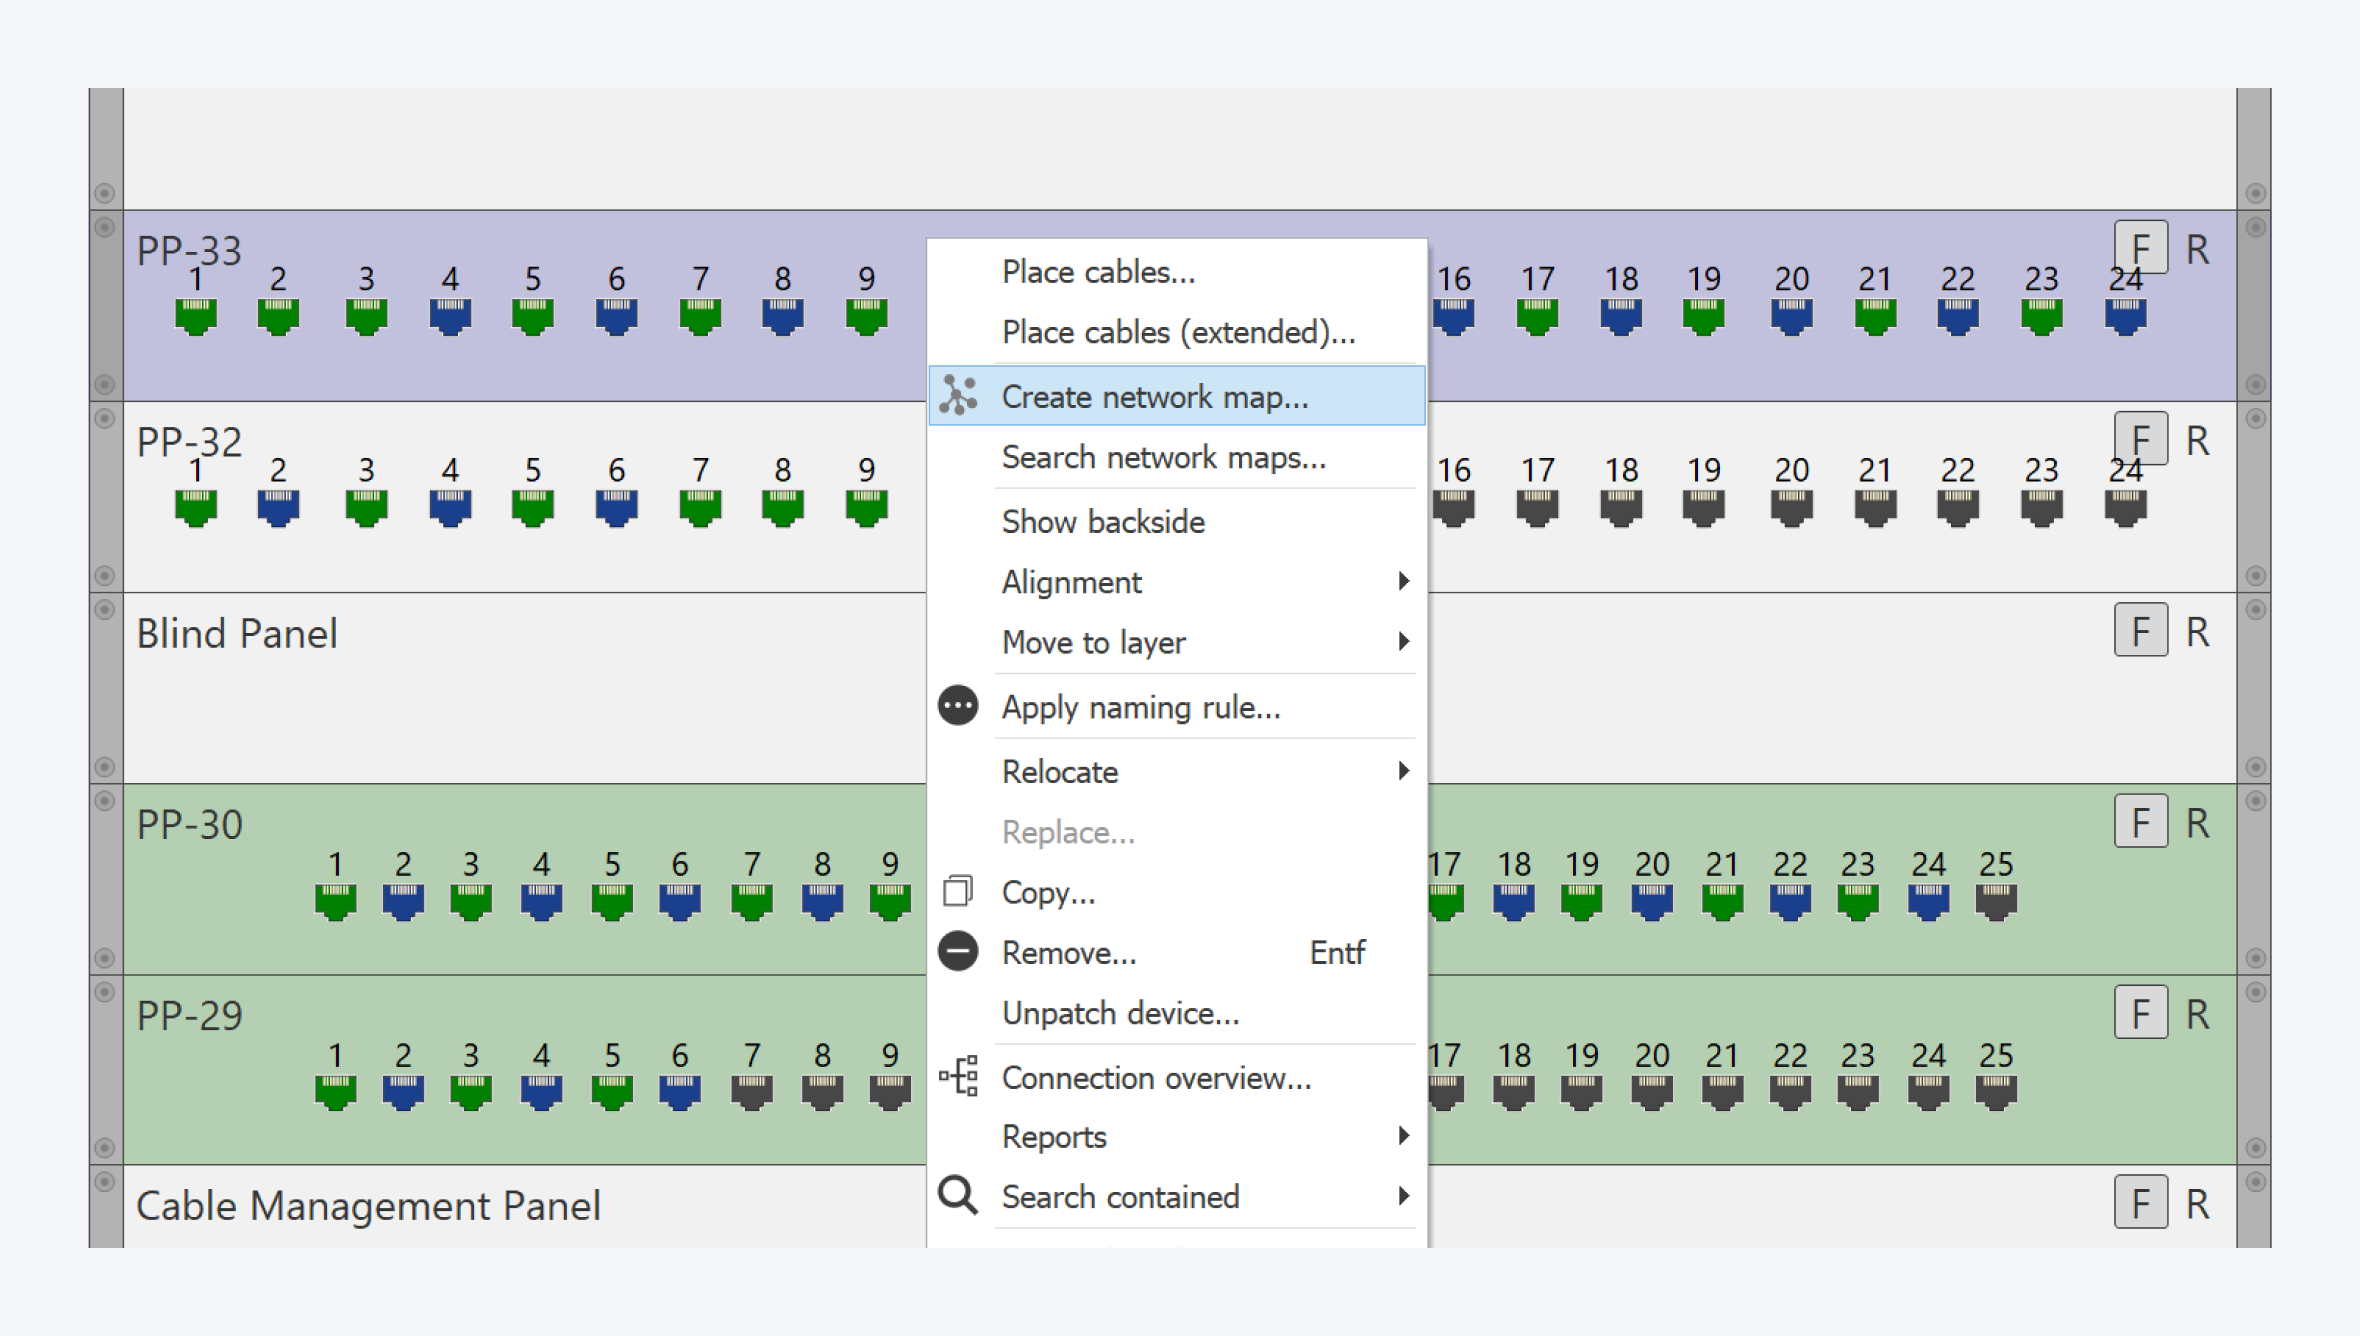
From Front View

You can create a network map from your already created network infrastructure.
Right click on the component from your component instances and select Create network map.
A new dialog window will open in the network map tab for you.
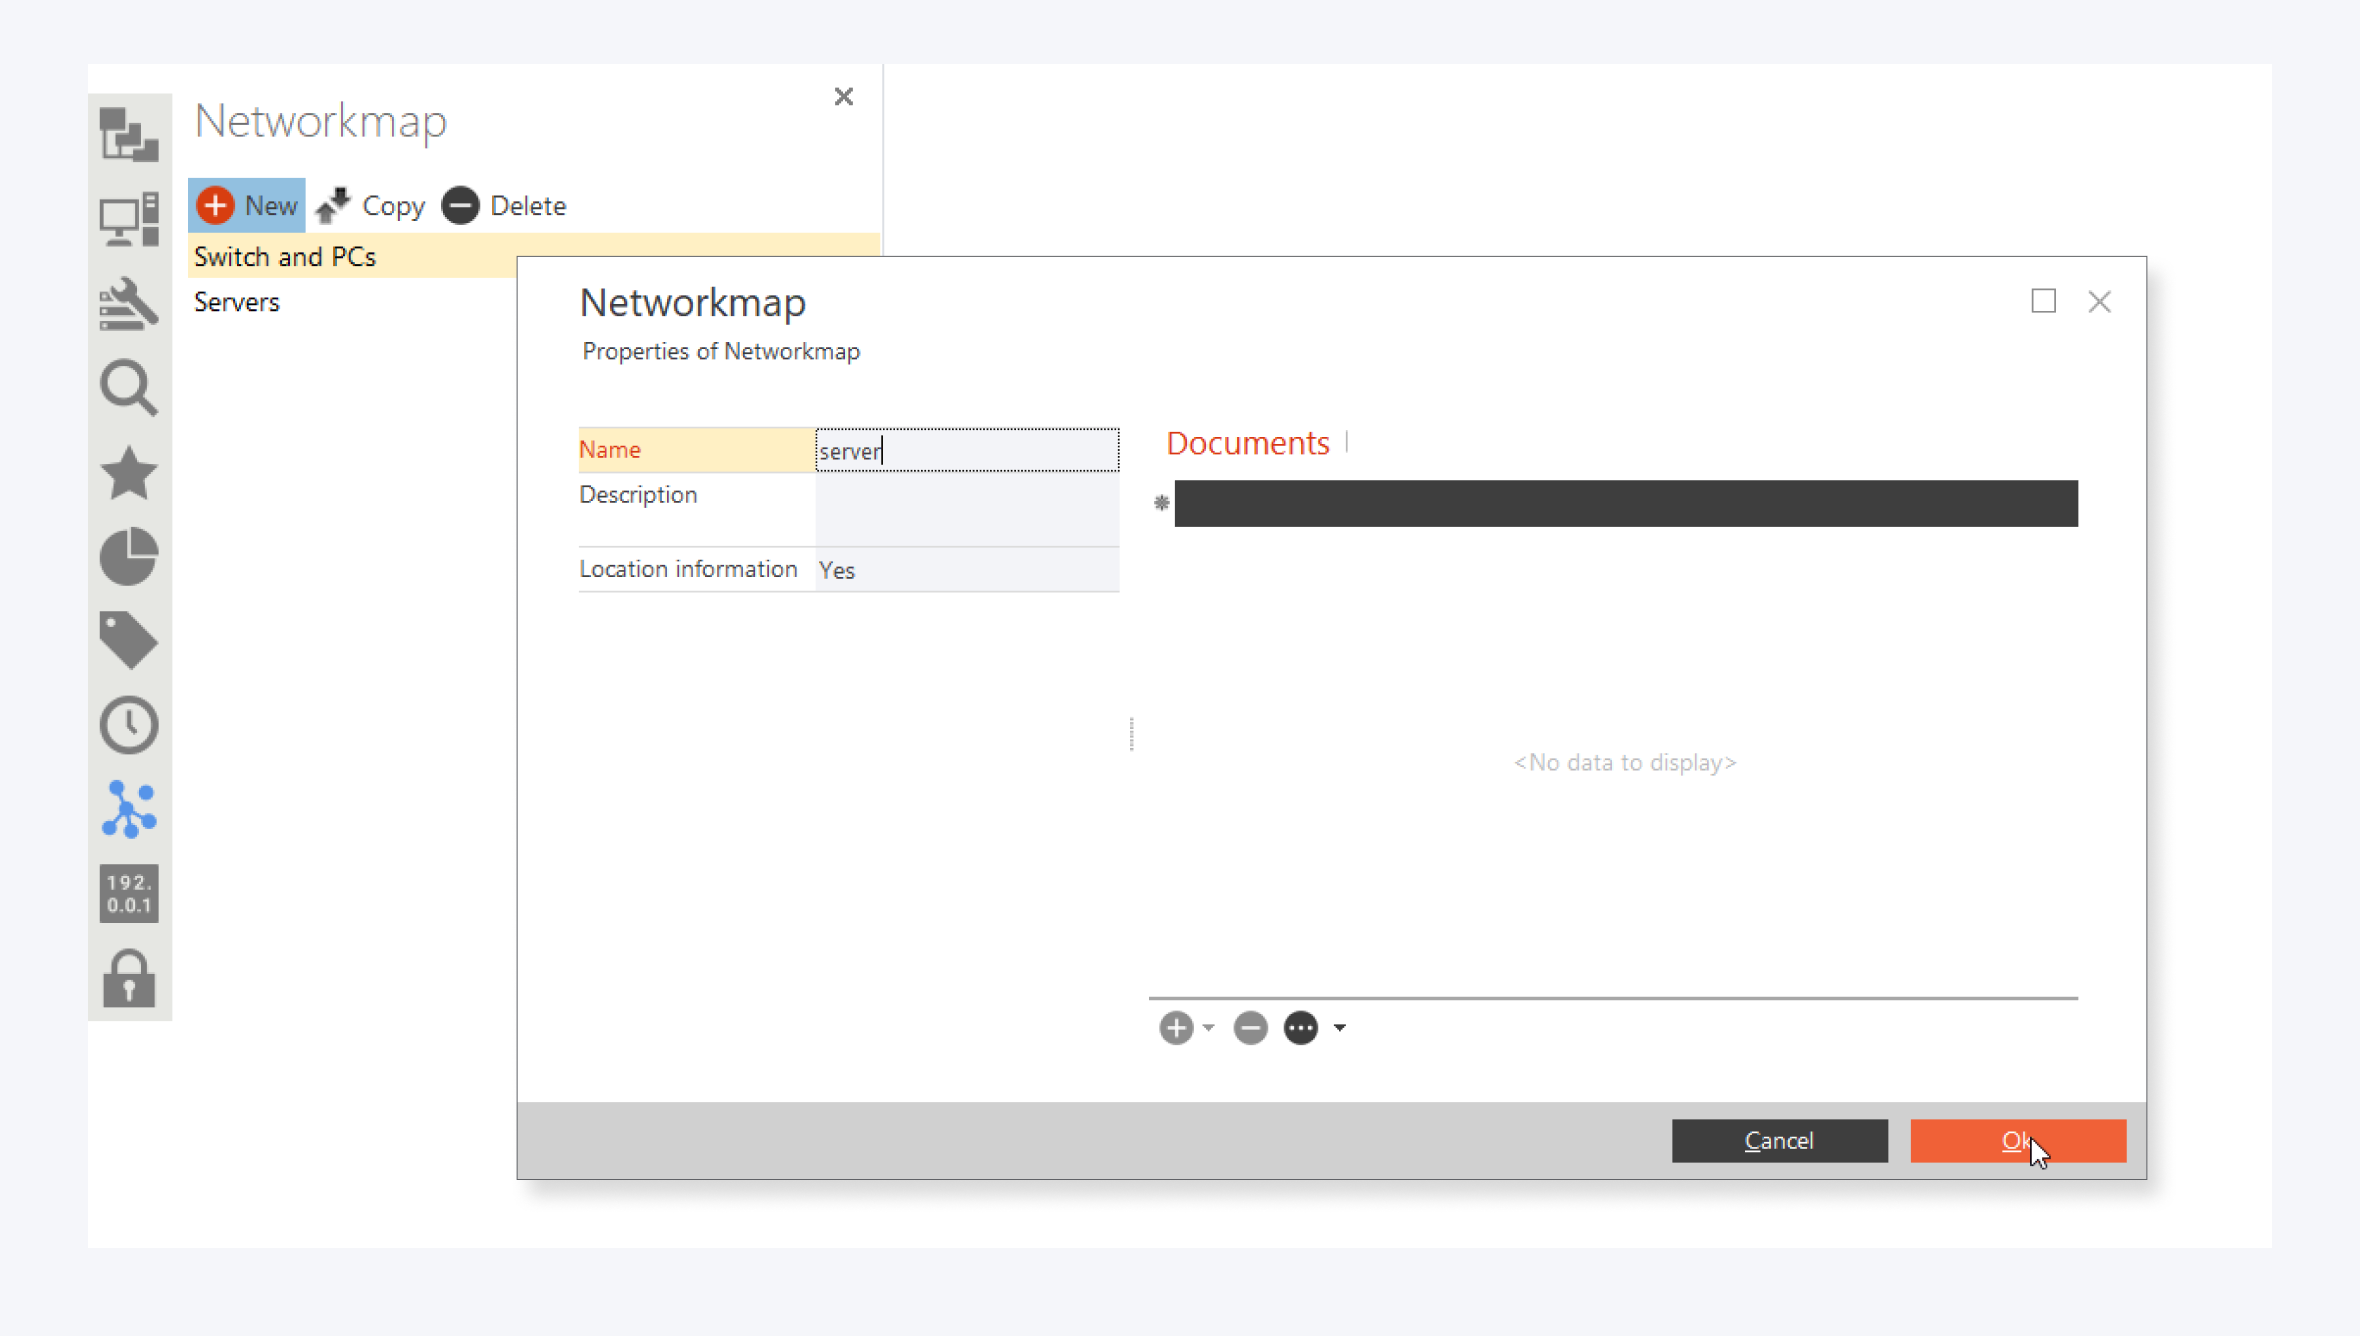
From the Sidebar

In the network map dialog window, assign a name for your network and optionally add a description.
You can also add documents to your network map once it has been created.
Click on OK to save your network map.
The component will now be visible in your network map.
Populating the Network Map

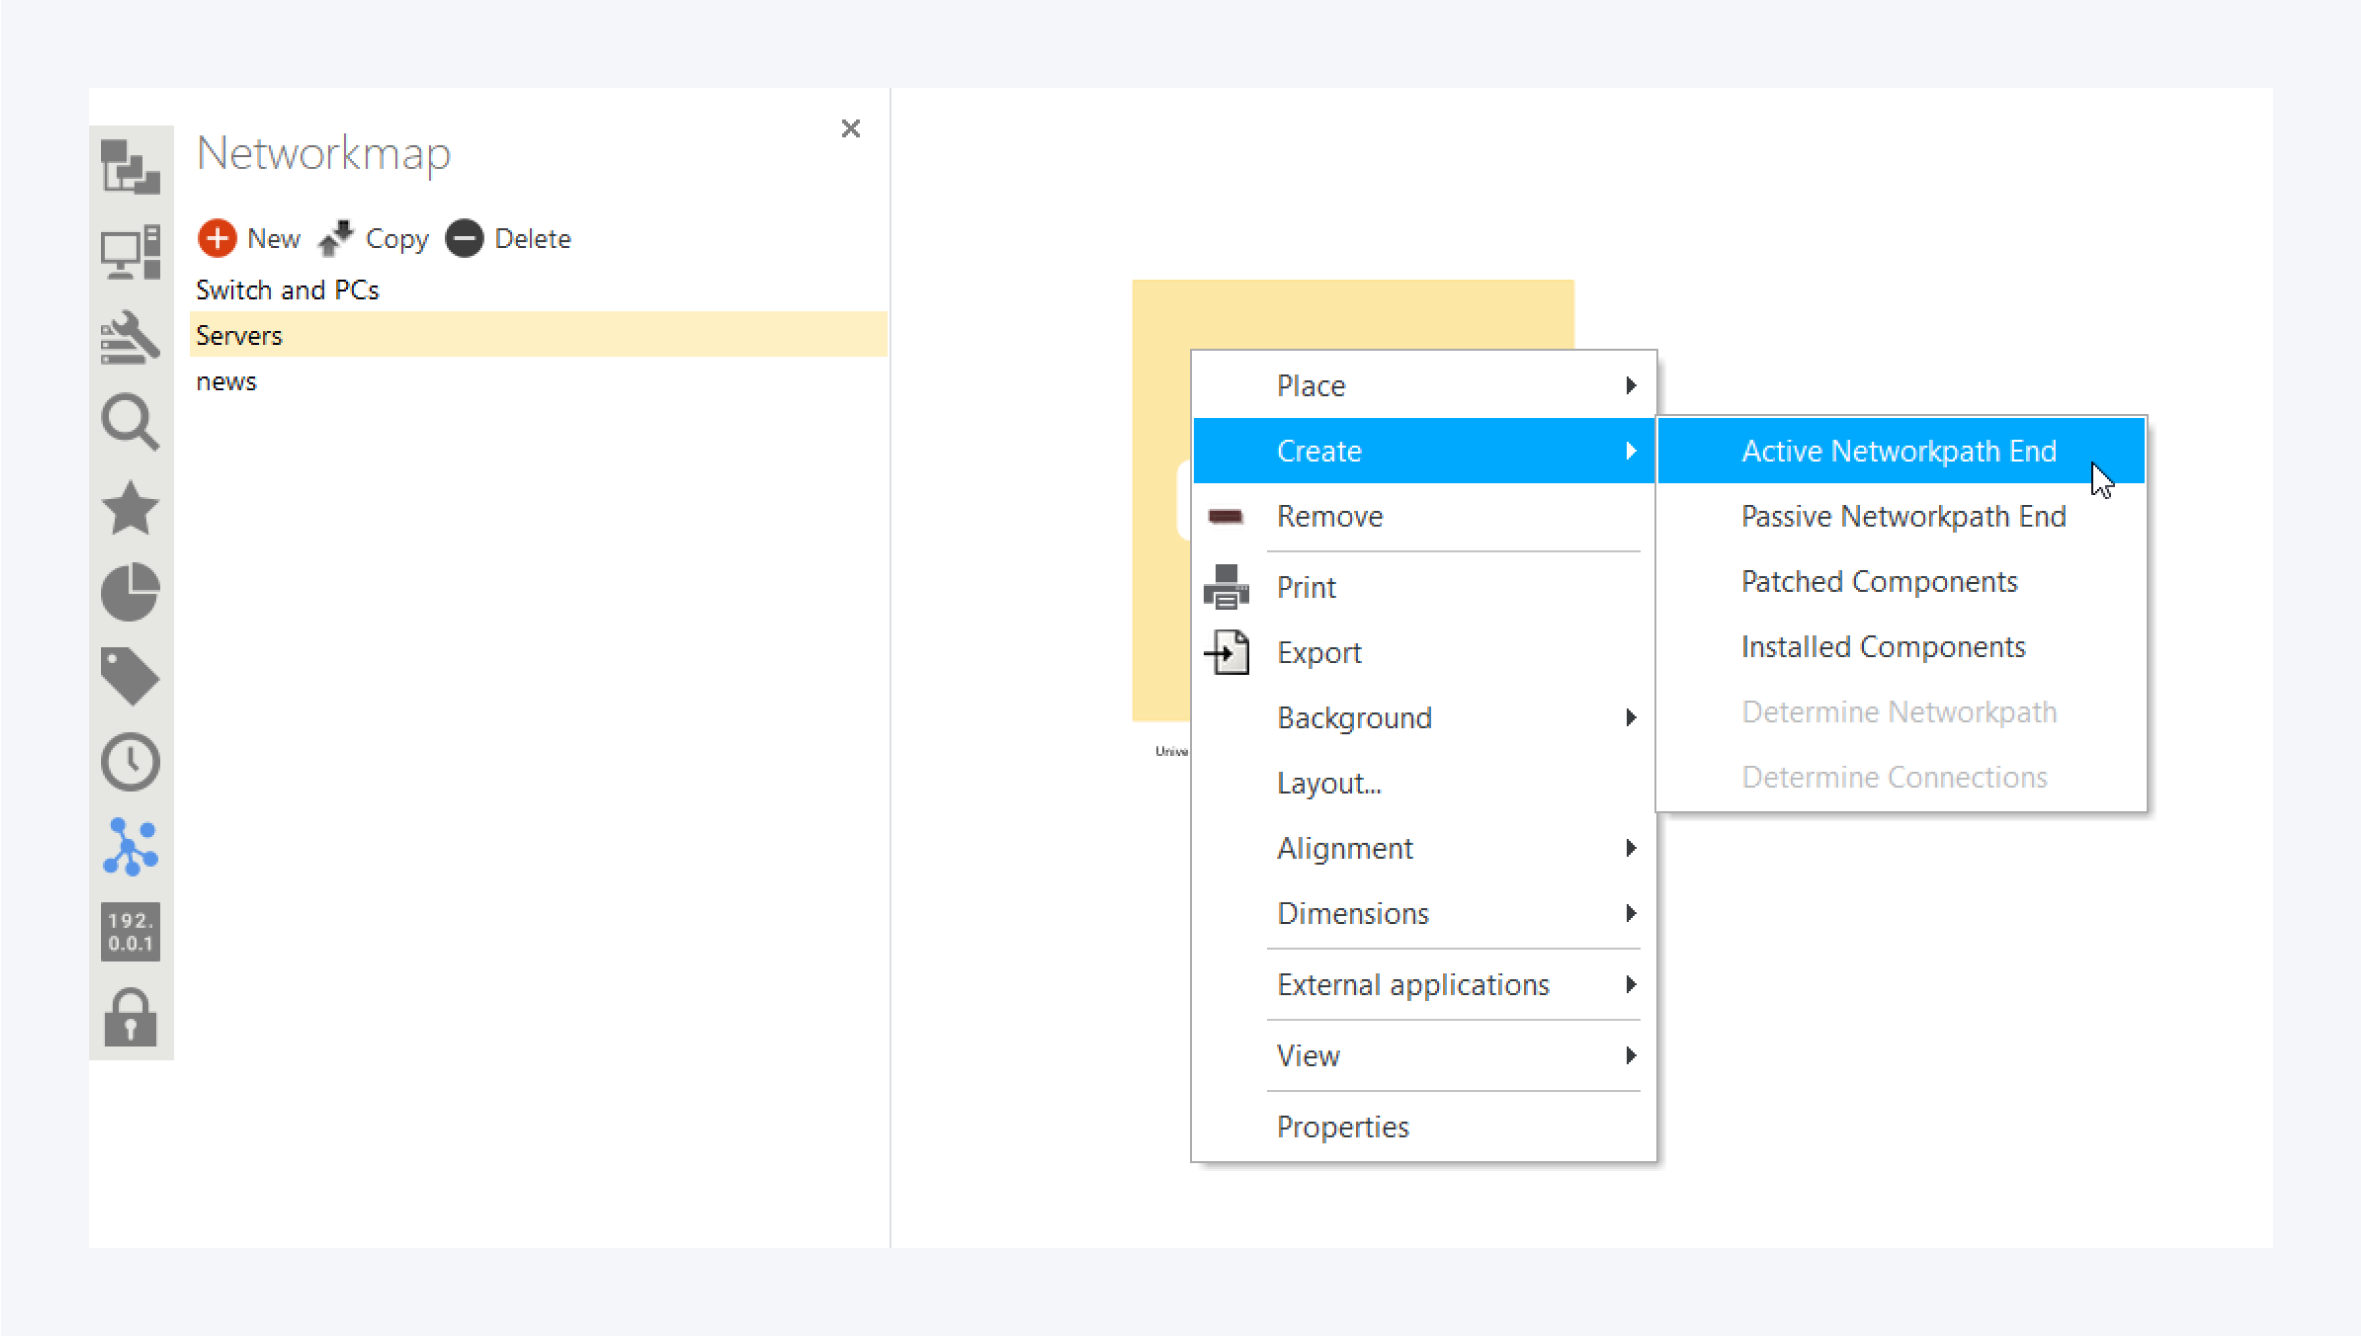
To create a network map of components connected to the main parent component, right-click on the parent component to open the context menu. Select Create and choose the type of network paths you want to create.
You can create active network paths, passive network paths, network paths for pathed components only and network paths for components with installation cables.
Network Map View

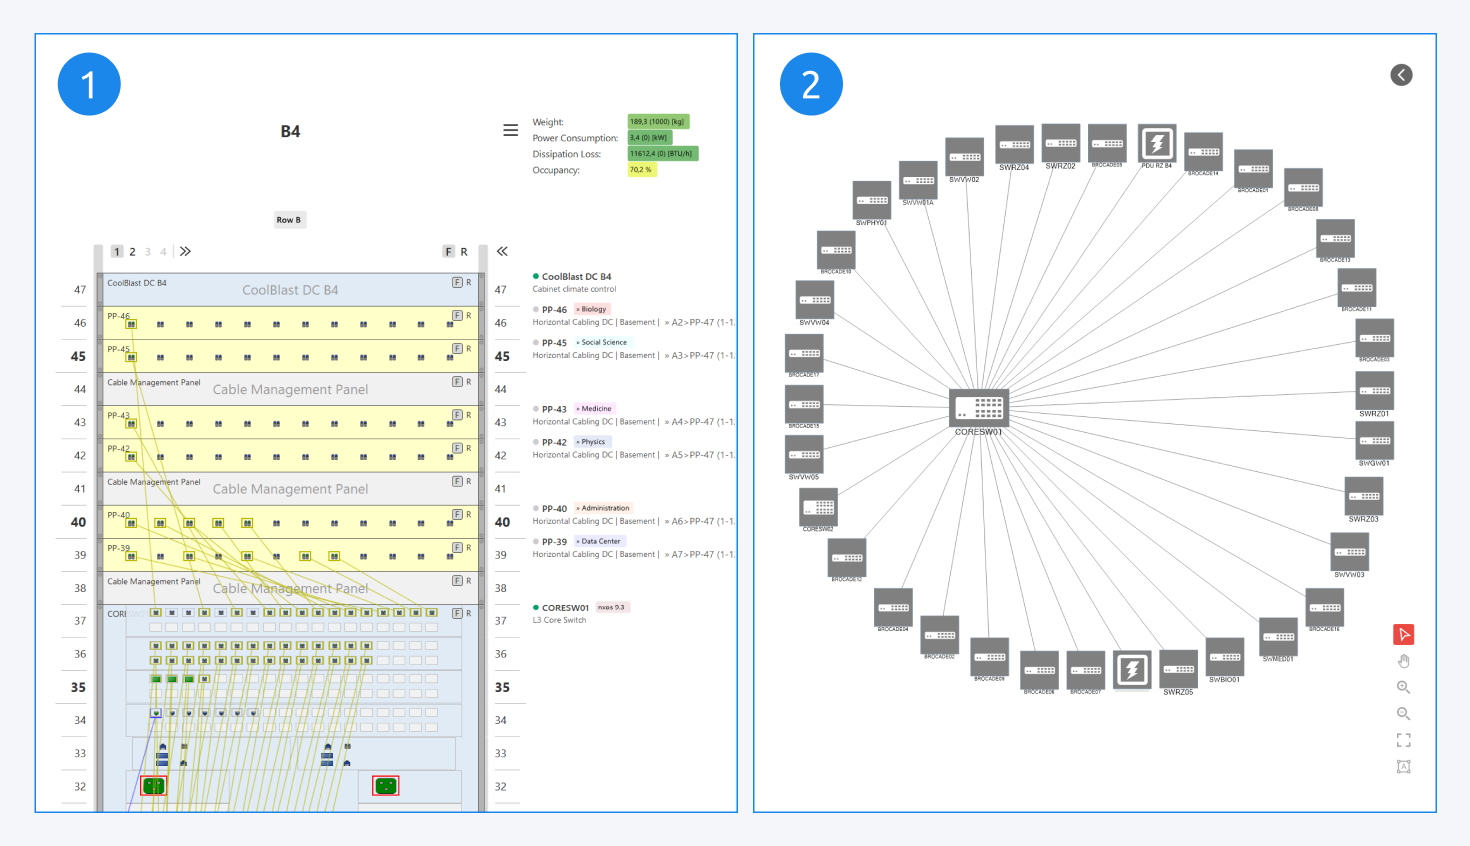
Once the network path ends are created the network map can be seen as a top-down view of the end components connected to the main parent component.
Here, an example of a switch connected to multiple servers, all contained in a rack, is shown (1).
The corresponding network map of this system can be seen here (2) as a direct point to point connection between parent and end point components. Use the design mode (F12) to adjust the layout or add waypoints to connections via right click.
All intermediate connections and components are not displayed but can be created manually and extended as desired.