Create Cable Trays
There are multiple ways to create cable trays in Pathfinder.
Select the Add Tray options from the tray management section or access the option in the context menus of the map or the top view of any infrastructure object from location to room.
Trays in Pathfinder are used to conveniently bundle cables between the same locations.
Create Tray
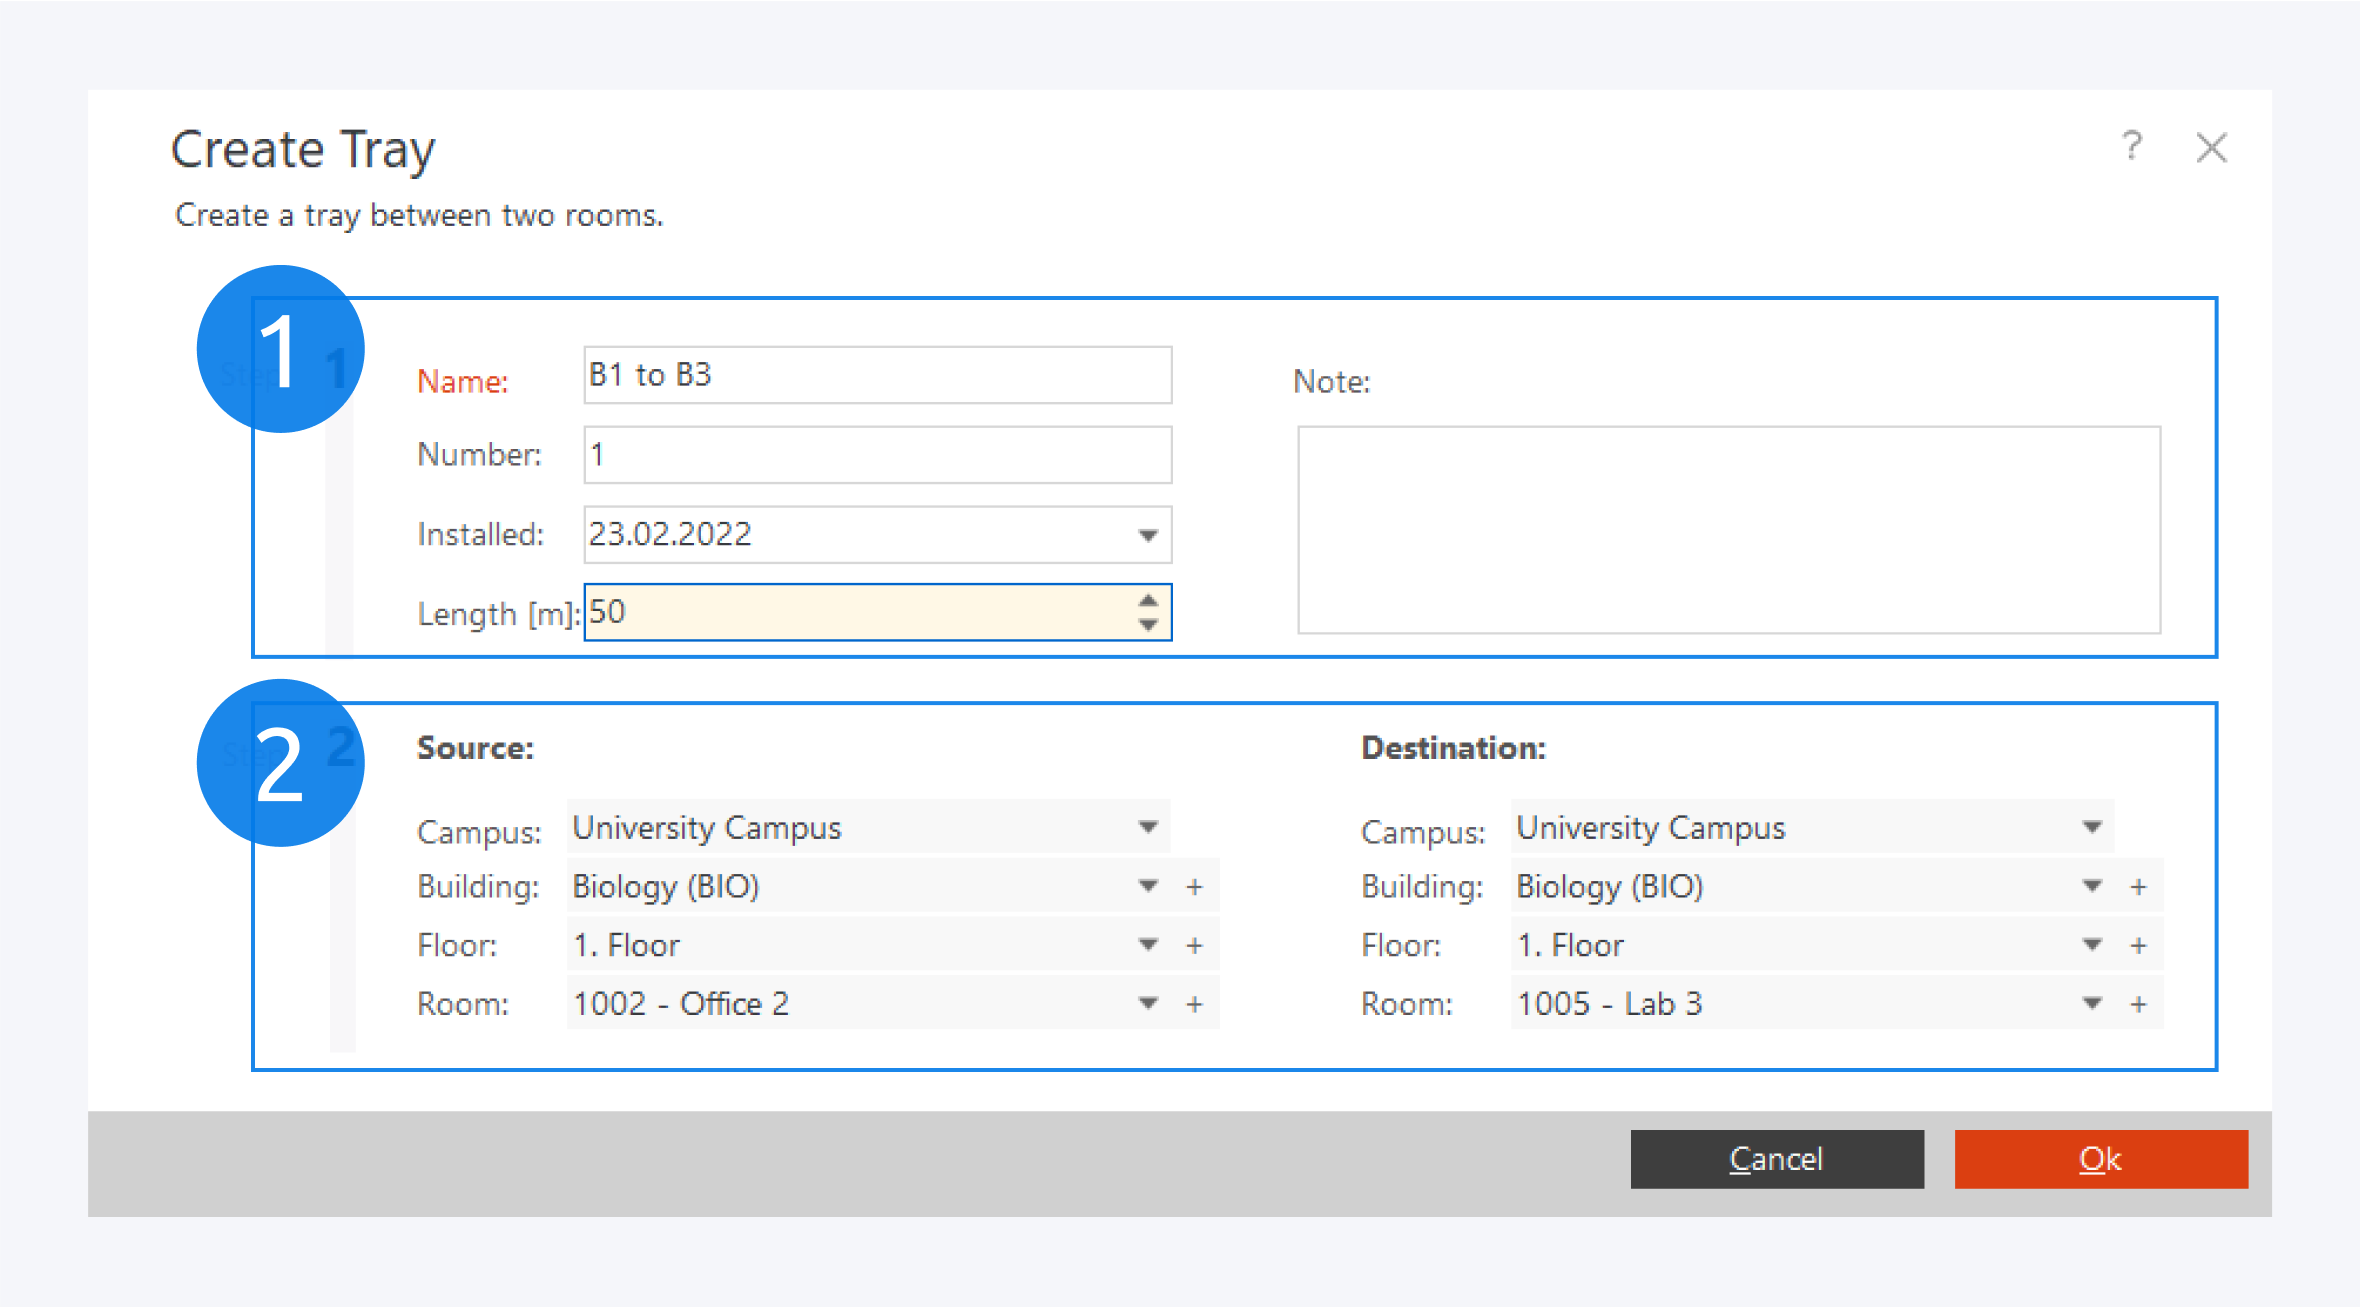
In the create tray window, you can fill out information about your tray such as a name, a number, the date of installation, the tray length and a short note (1).
Then specify the start and end points of the tray (2). A tray in Pathfinder is always placed between two rooms.
Click on OK to finish creating the tray.
Show Trays
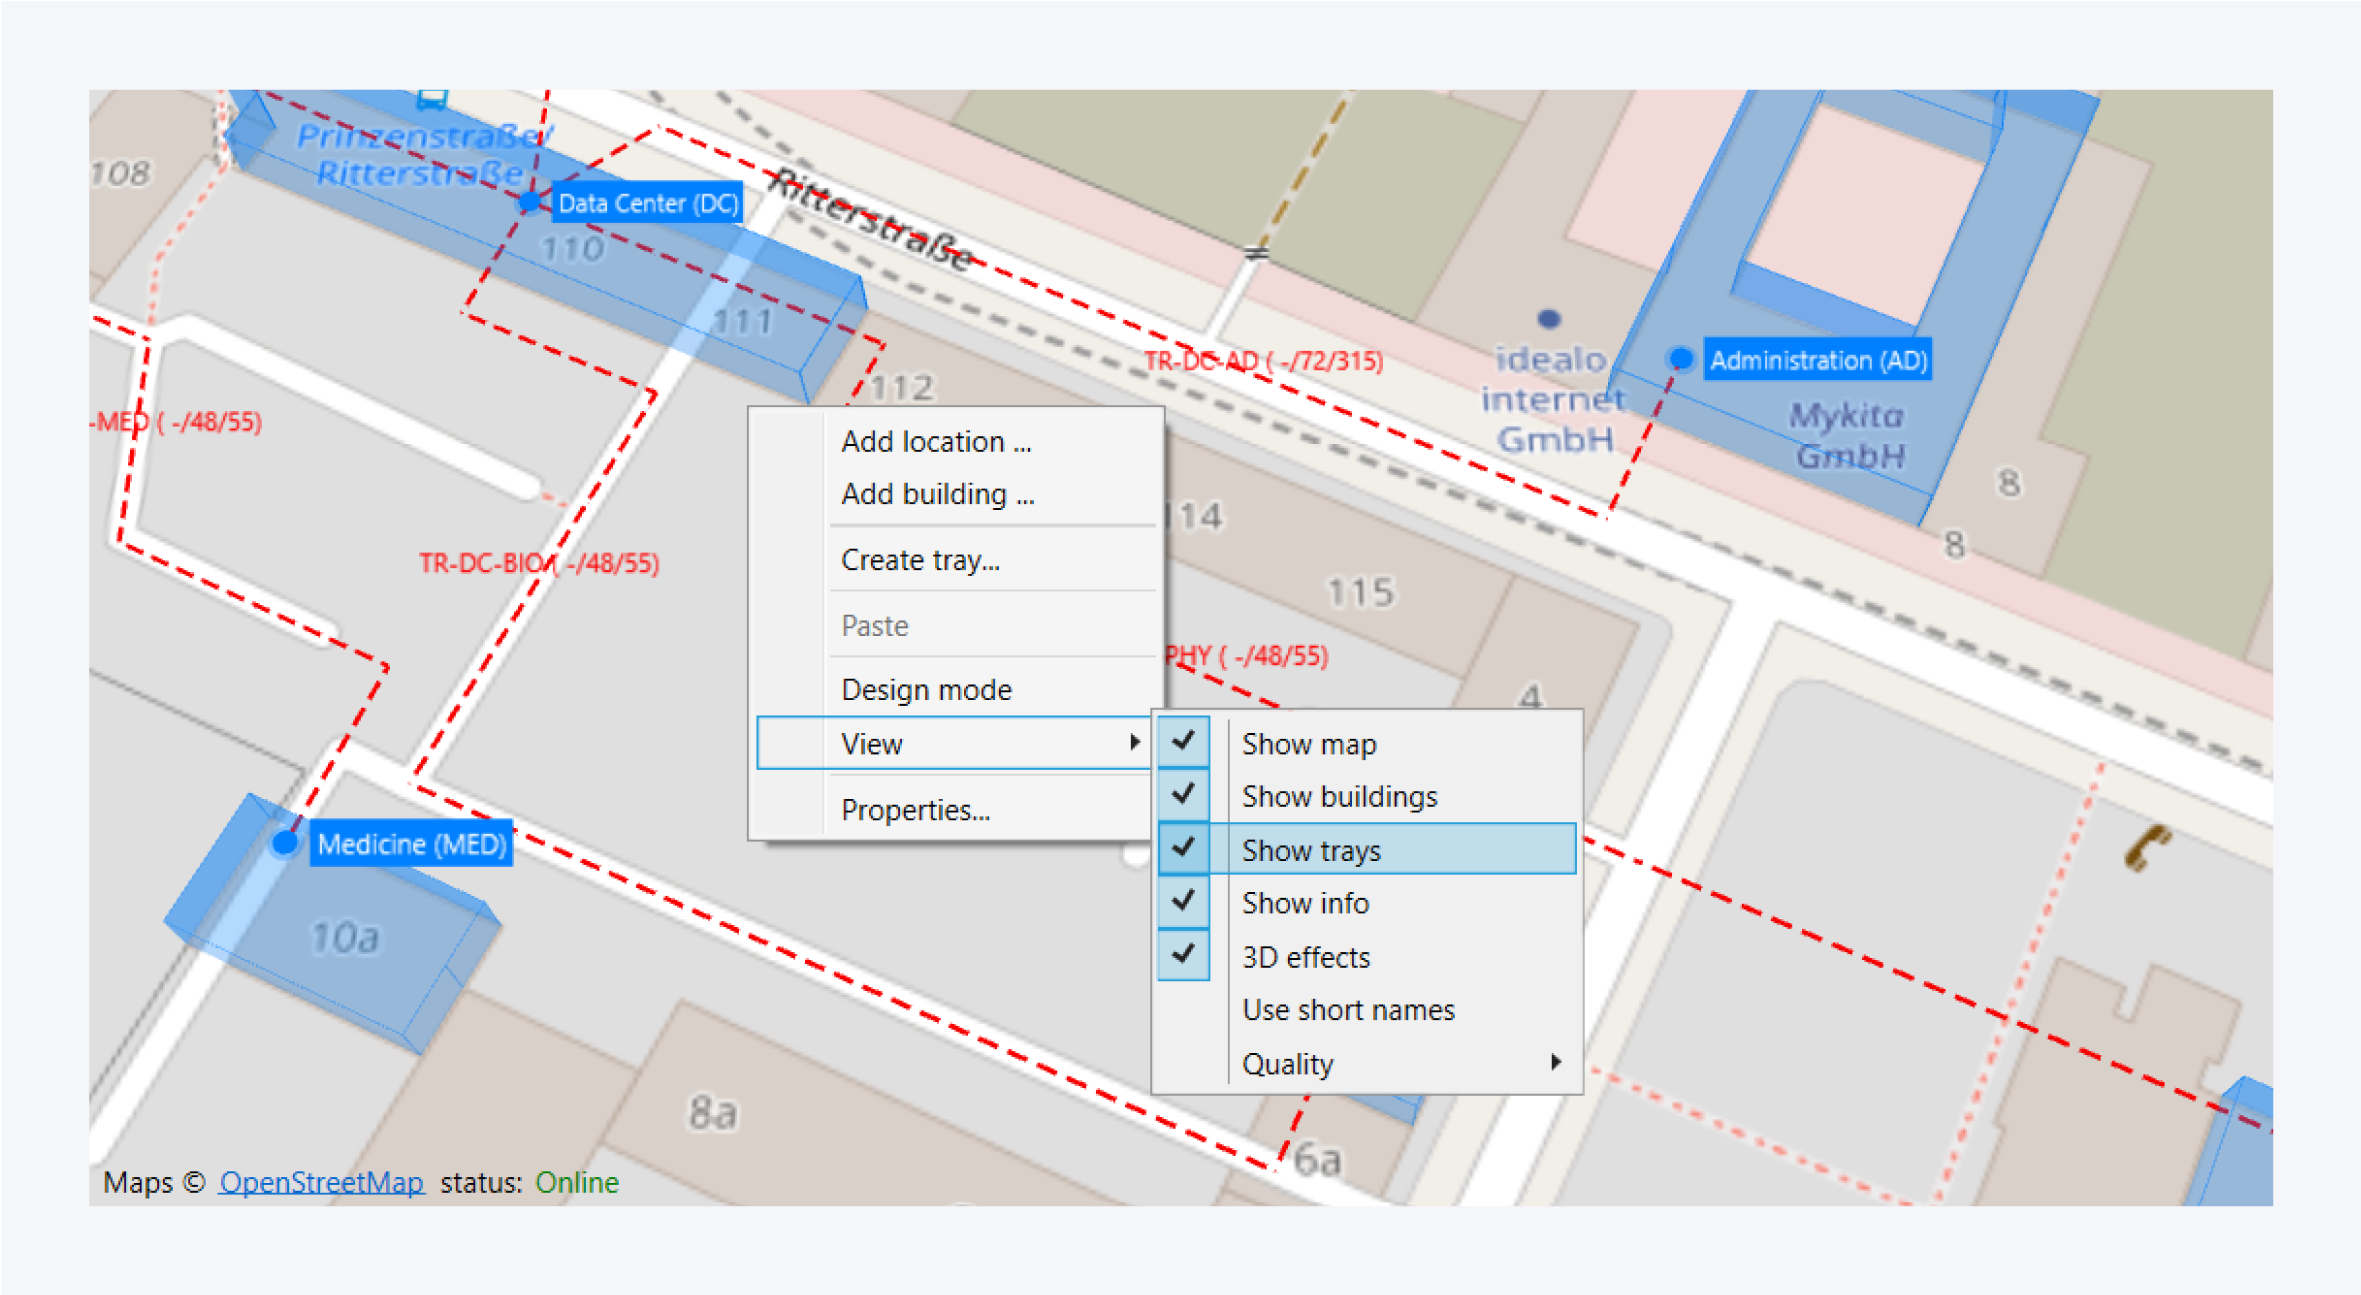
To create a tray from the main map on the dashboard, first you have to make sure that the trays are visible.
Open the context menu by right clicking on the map, go to view and check the show trays option.
Right click again to open the context menu. This time you will see a new option available, Create tray.
Tray Layout
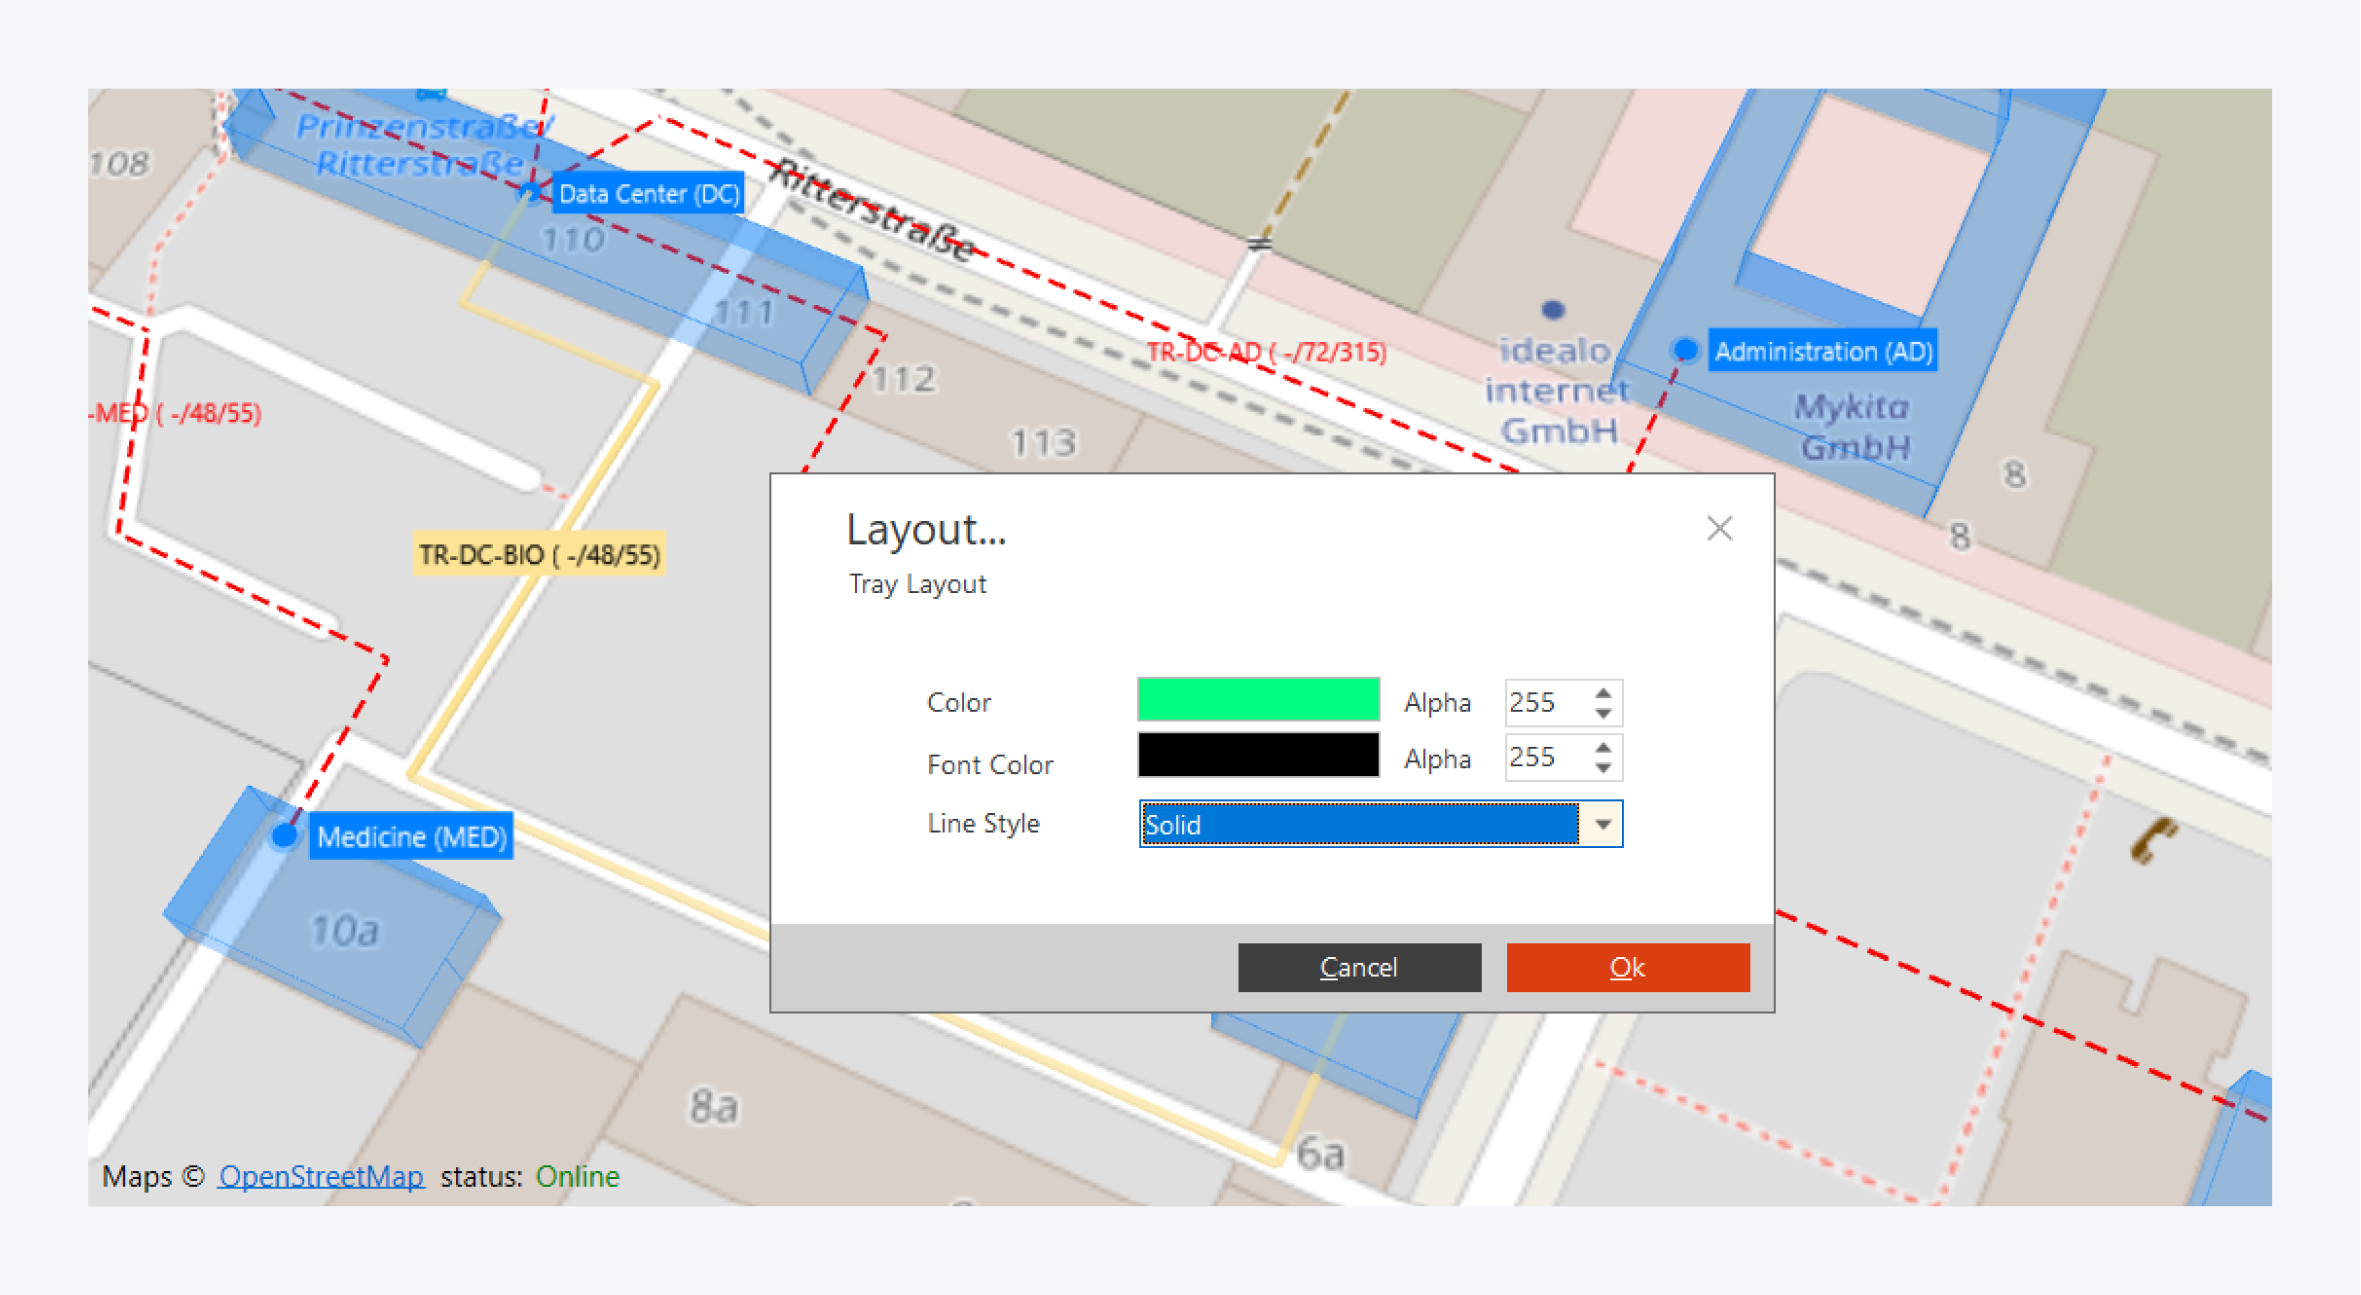
Right click on the tray and open the context menu. From there you can choose to change the tray layout.
You can change the tray color, name font color and the tray line style between solid, dashed and dotted.
Tray Nodes

To change the placement or path of the tray, first you have to turn the design mode on (1). Then, right click on the tray and select Add Node. Click and drag the node to create the new tray path.